This post is sponsored by Glad. We’re taking small steps to do our part and want to help you waste less too. Visit GLAD.com for more information.
Like I mentioned recently, it makes me feel really good to give old furniture a new life. It's rewarding to see furniture transformed, but it's also environmentally responsible. I'm so happy to be working with Glad on this series.
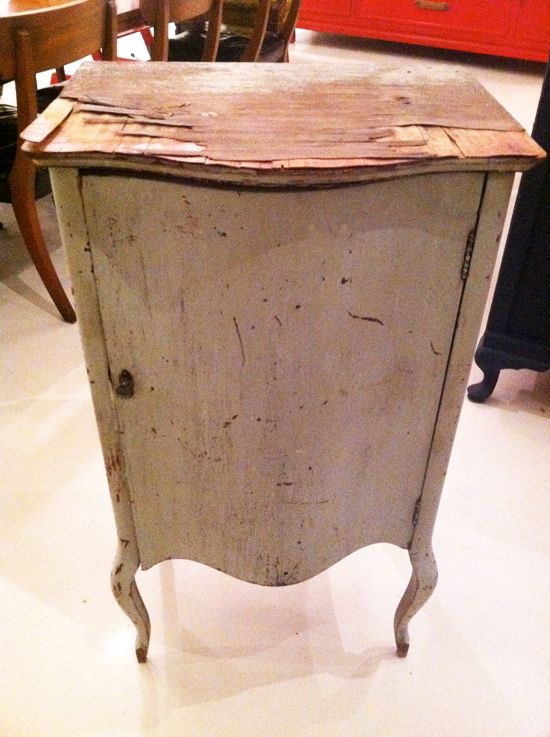
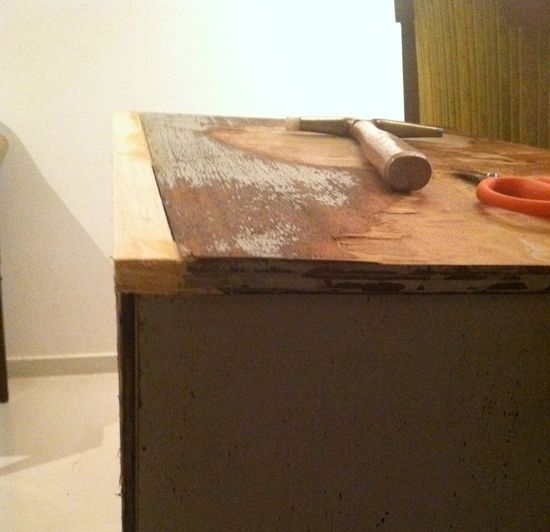
When I found this little French cabinet, it was in really (REALLY) bad shape. The actual cabinet itself mostly just needed a sanding and a new paint job, but the top was almost unsalvageable.
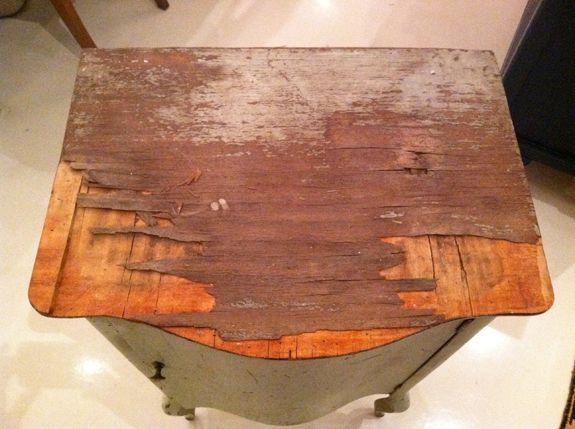
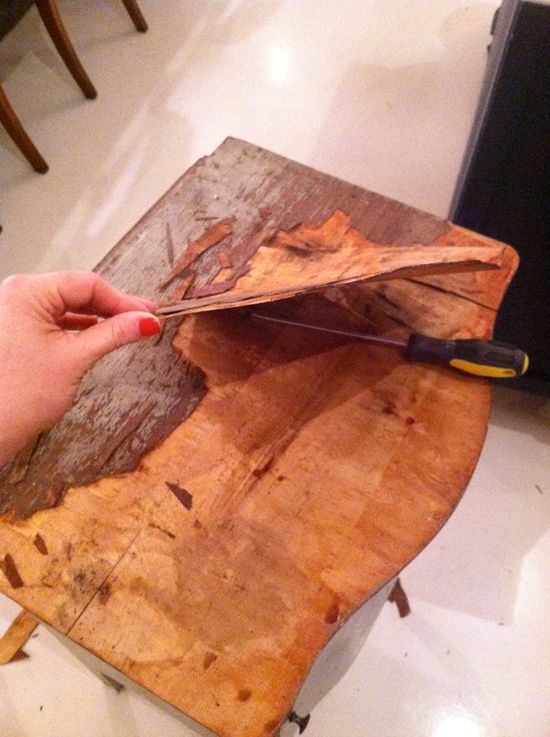
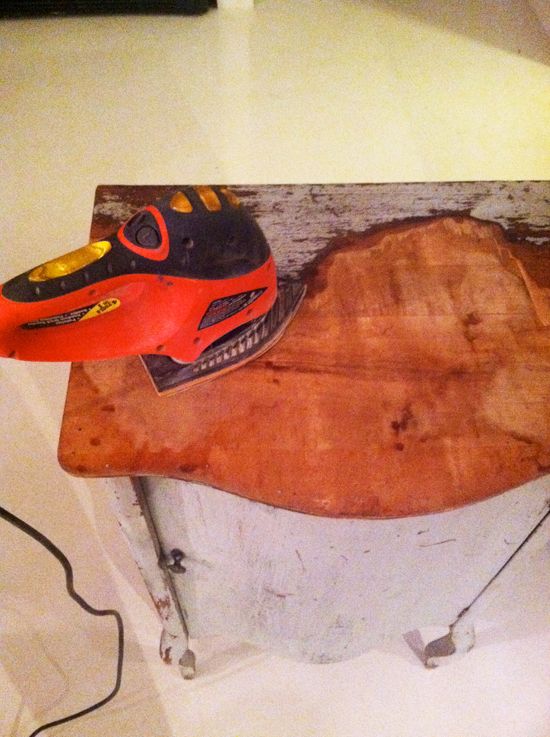
With resin, your surface doesn't have to be 100% level, so I just gave the top a little sanding and left it as is.
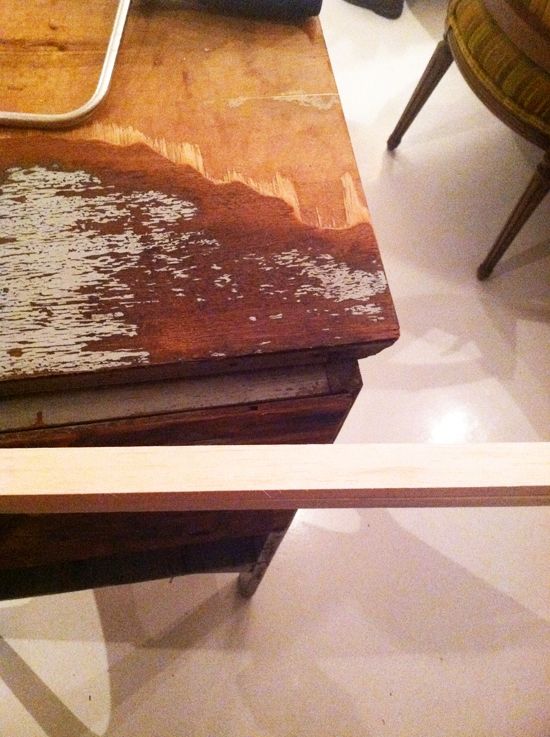
There used to be a back plate on this piece I guess, so there was a gap in the back. I just used a couple of strips of Balsa wood to fill the space.
Balsa wood is super soft, almost like styrofoam, so it was easy to zip through with a little coping saw. I was happy because I could easily mimic the shape of the existing moulding.
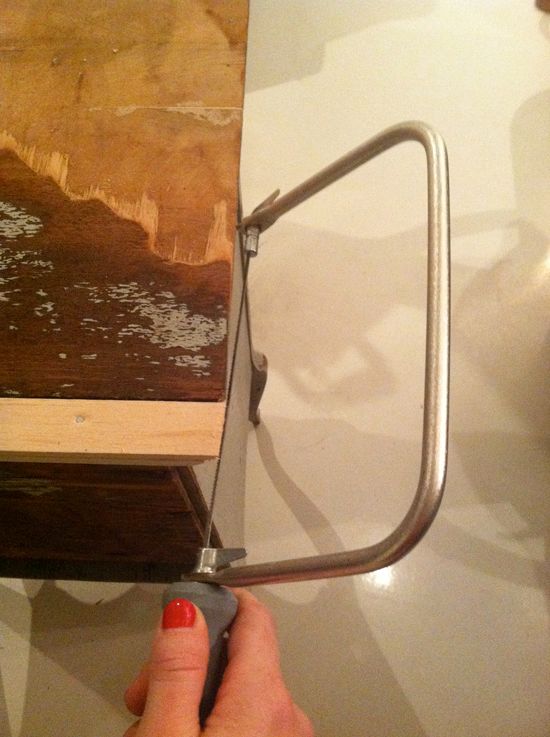
Pretty seamless! I wouldn't use balsa for a bigger surface than this. It is a very soft wood and not super sturdy, but this part is in the very back and everything is getting a coat of resin, so it was a good solution here.
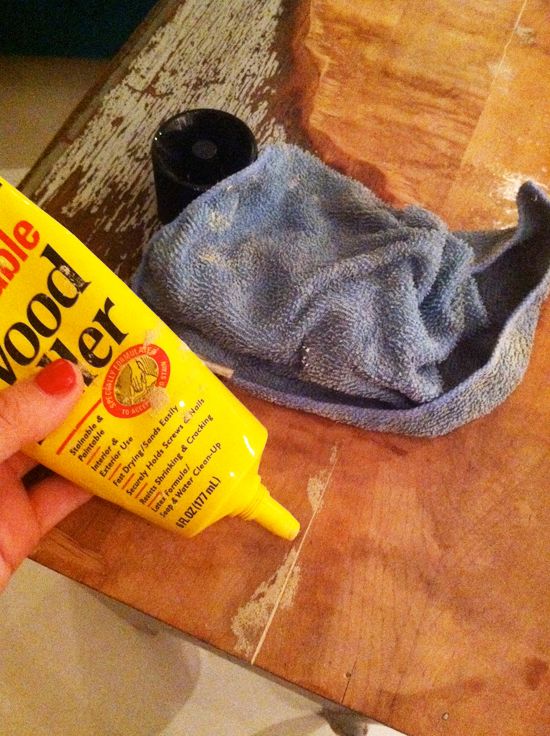
Before priming, I filled any cracks with my favorite wood filler. The best method is to fill with your finger and then wipe away the excess immediately with a wet rag.
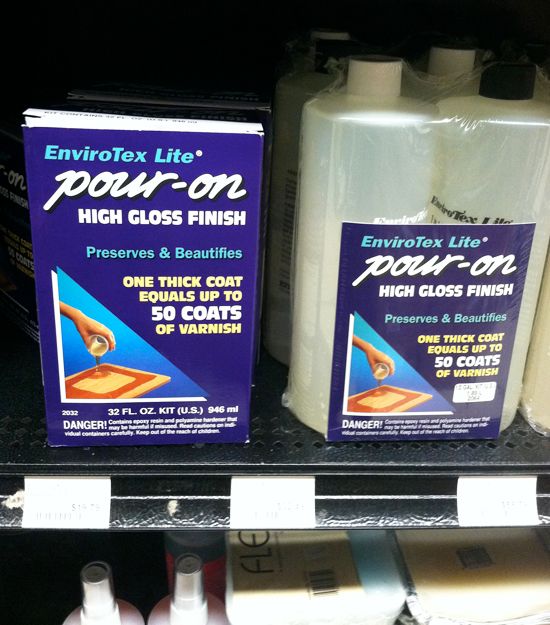
I found my resin at Blicks, but it's carried everywhere. I need about 32 oz for this project, which cost about $25.
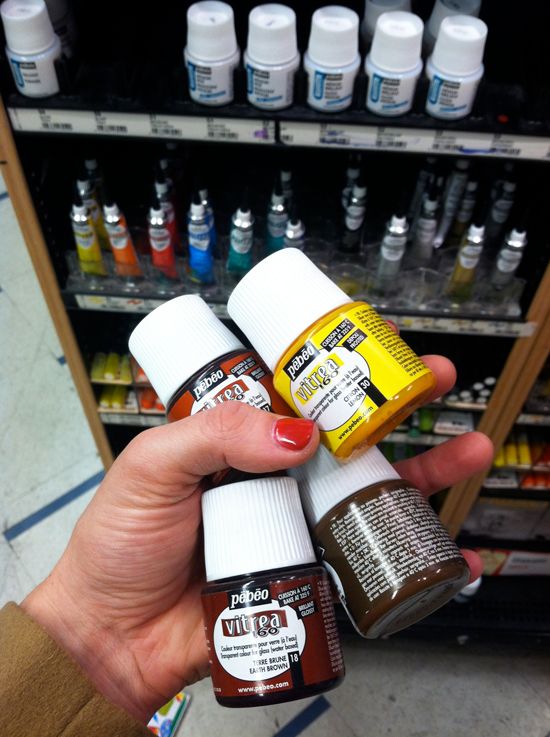
Also at Blick's, I visited the glass paint section.
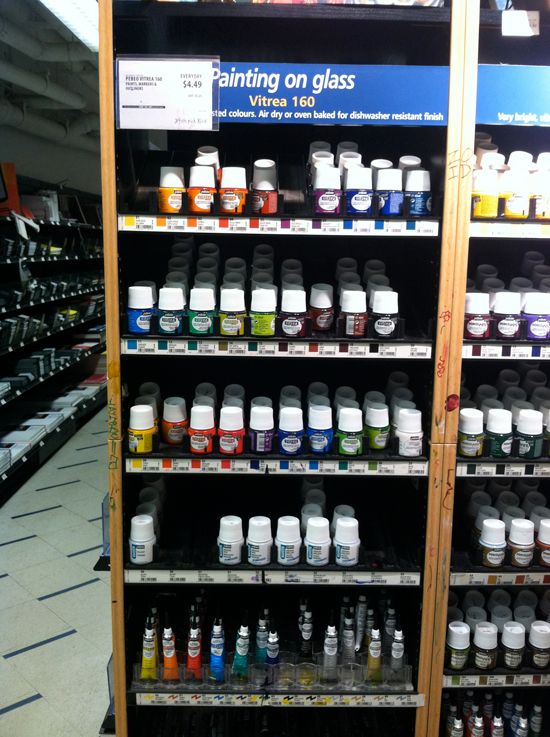
To make a tortoise shell pattern, you'll need a bright mustardy yellow and two shades of brown (medium and dark)
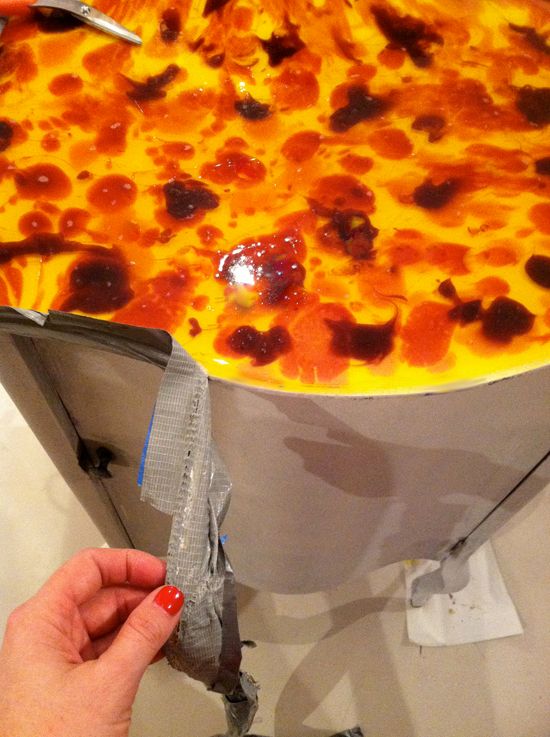
After priming the whole cabinet with Zinsser's, I built some walls around my table top with duck tape. You could also use painters tape, but get the extra sticky kind. You want there to be a really tight seal here.
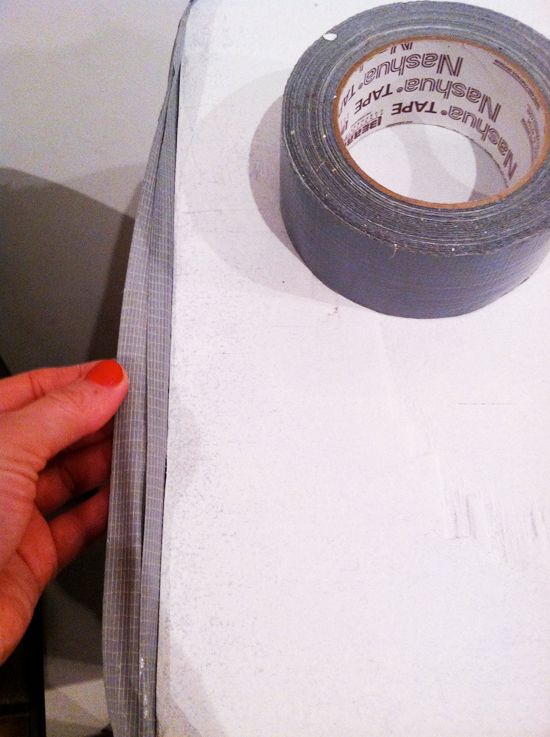
If you're going to attempt a resin project, I recommend doing some Youtubing first. I had to do this taping method because of the curve in the front of my cabinet, but if my cabinet had straight sides I probably would have tacked up a couple pieces of wood for an even tighter seal.

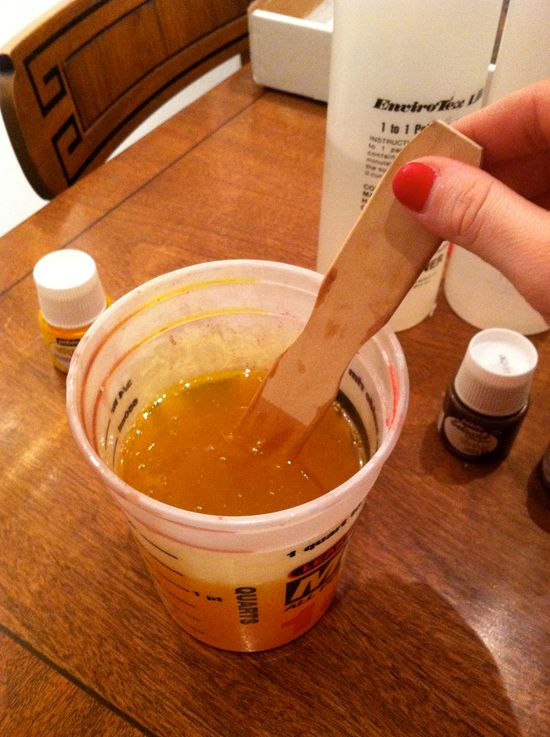
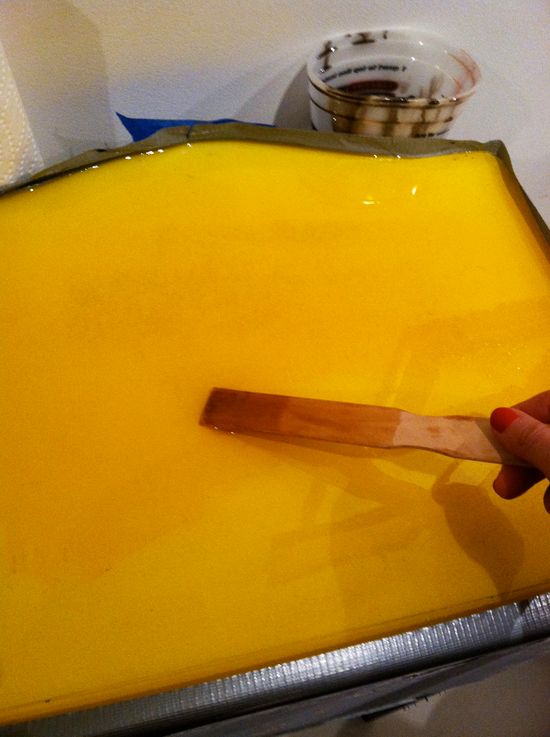
You should follow the instructions on your resin box, but the basic idea is you'll need to mix resin with hardener and then stir. I made about 24 ounces for the yellow base.
I used three drops of the yellow glass paint to make this color. I wanted it bright and semi-transparent. The white paint underneath makes the colors very clear.
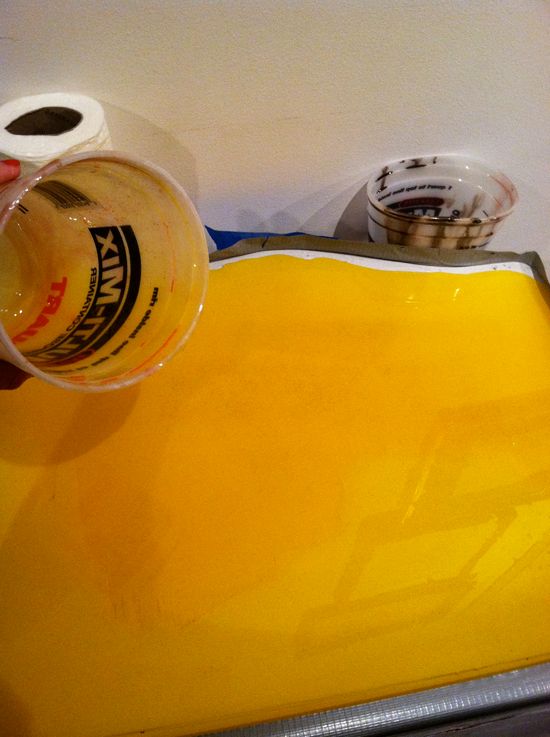
After pouring I quickly but carefully moved the resin around to get an even fill.
Then I mixed about 8 oz of medium brown paint. Just one drop of paint at first! You want the first layer of brown to be light. I used an old baby medicine dropper for this step.
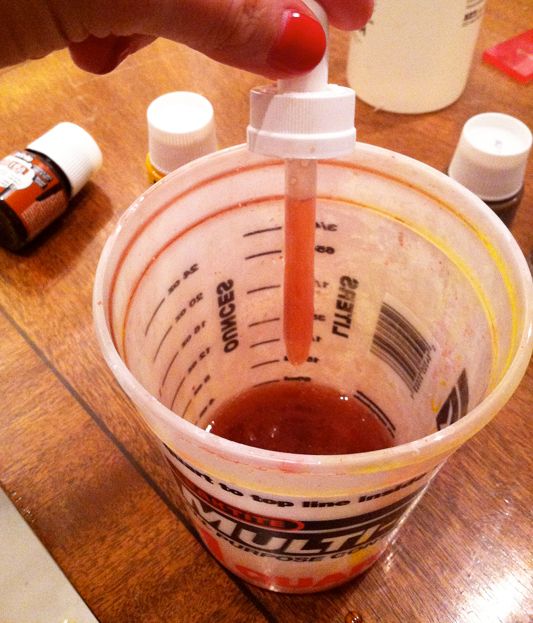
One small dropper full makes a quarter-sized spot. The brown will thin out and spread though, so try to have a light hand here. Just place the resin and sort of let it do it's thing. It's a pretty fun art project actually.
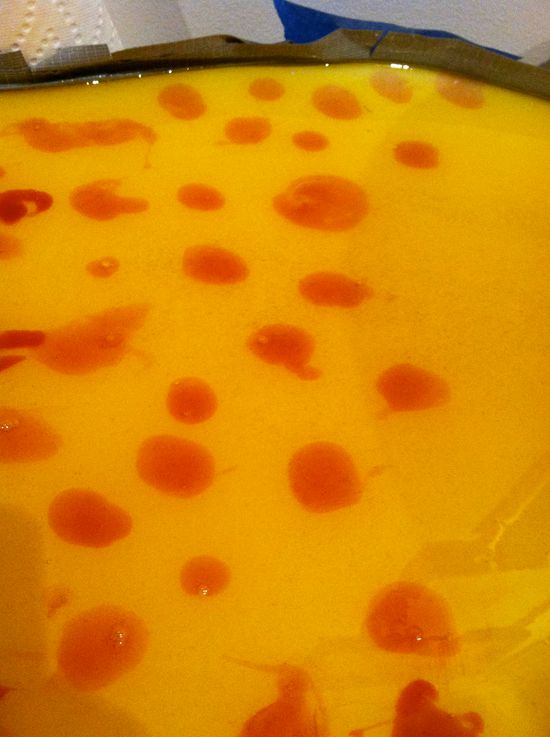
Add another drop or two of paint to darken the resin for the next layer.
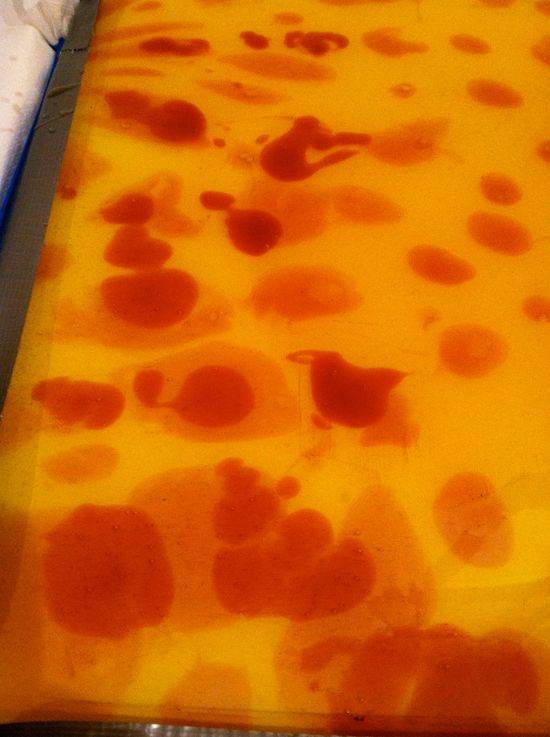
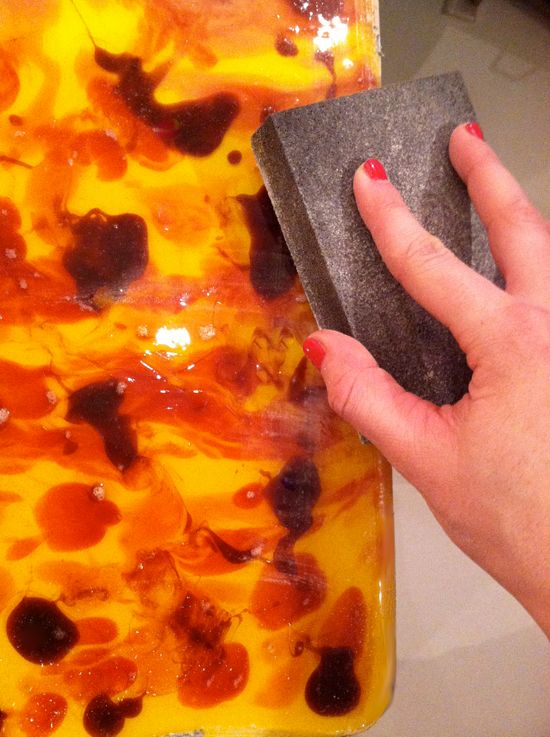
I had some dripping, but not a ton. I sort of just watched while the resin hardened and wiped up drips as they happened. It only took my resin about 30 minutes to get pretty firm. Then I let it sit overnight to fully cure. In the morning I pulled off the duct tape.
And did some light sanding to even out the edges.
Then I painted the rest of the cabinet (I had only primed the piece before doing the resin, which ended up being a good choice because of the drips).
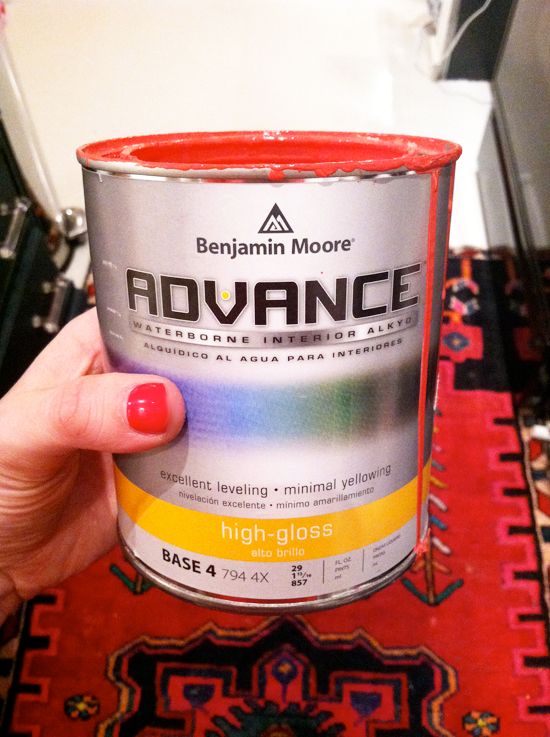
This is my recent favorite paint. I discovered it when I did the One Kings Lane sale. My painted recommended it. It's Benjamin Moore's Advance line. It's oil based, but it's low VOC (it has a slight odor, but it mostly smells like linseed oil, not crazy chemicals). The finish is AMAZING. It is super hard-wearing and it comes in multiple finishes. I love the high gloss best.
I used BM Tomato Red for the interior of the cabinet and BM White Dove for the exterior.
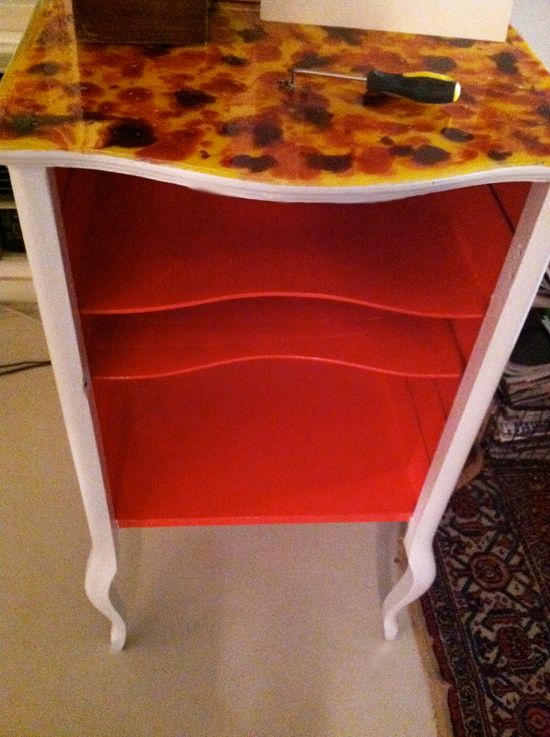
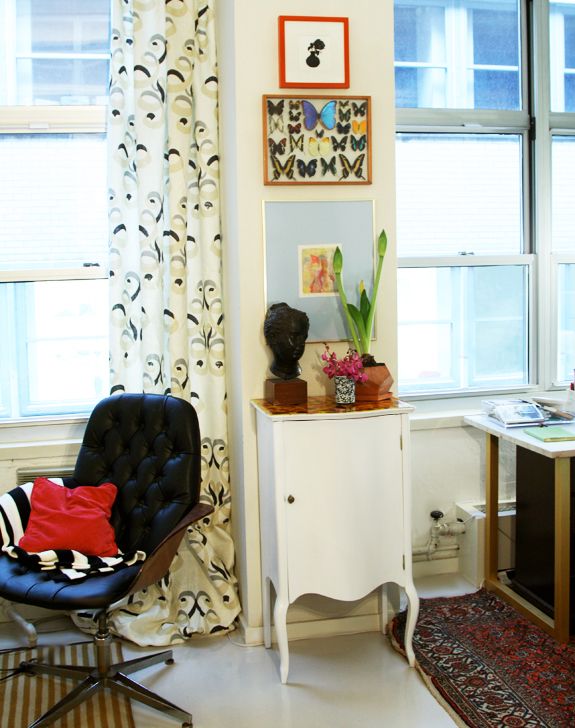
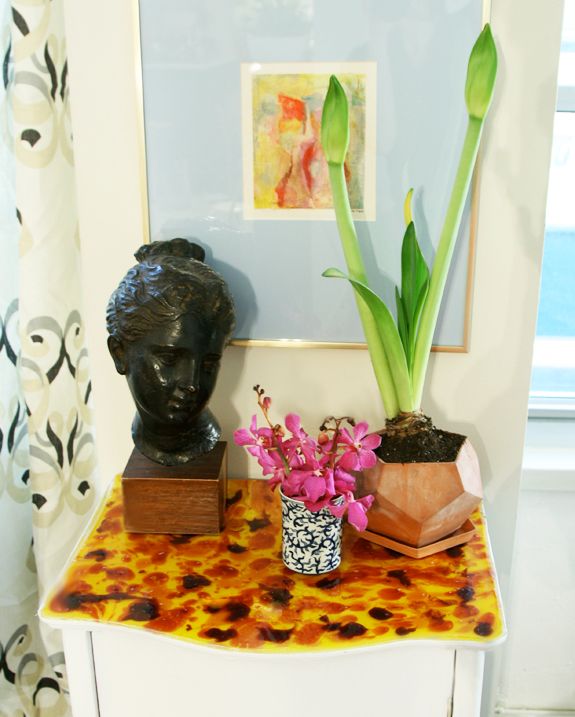
Here it is all done! I'm waiting until the paint fully cures before filling it up, but I'm thinking it's the perfect piece for all my decorator supplies that are always sprawled over my desk, like tape measures and paint decks.
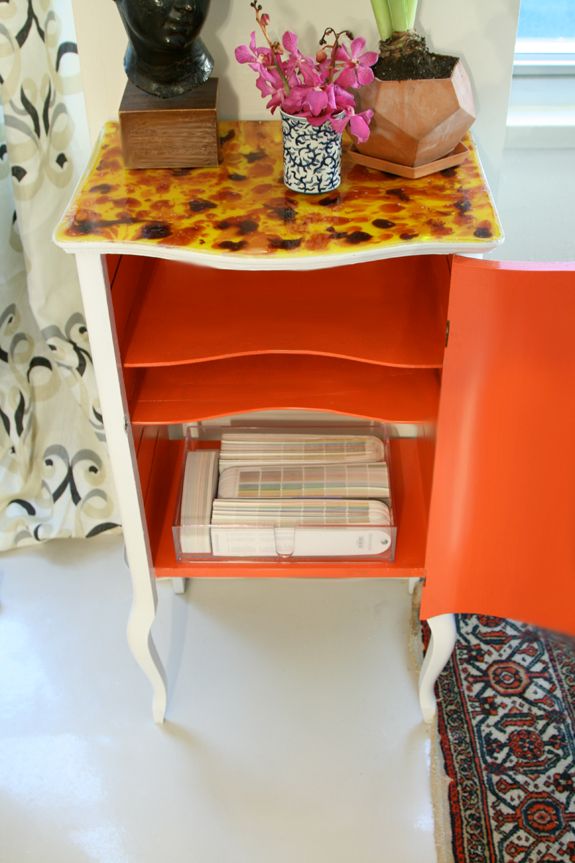
I love the surpise orange interiors. And I love the simplicity of the white. It just looks so pretty with the tortoise shell pattern on top! A color on the frame of the cabinet would have been too much here. (Also, there's a lot of color and painted furniture in my living room already!) :)
I love the surpise orange interiors. And I love the simplicity of the white. It just looks so pretty with the tortoise shell pattern on top! A color on the frame of the cabinet would have been too much here. (Also, there's a lot of color and painted furniture in my living room already!) :)