FREE DOWNLOAD PICTURE
MORE INFO ABOUT NOTEBOOK

Thursday, June 28, 2012

Canvas Sketchbooks

For gifts this year, the kids made personalized journals for their teachers.


I picked up a few of these canvas sketchbooks from Blicks. I LOVE them and can't wait to get a few more to play around with. The inside pages are not lined, which I love (though nothing beats graph paper for me!). And the canvas cover can be customized with basically any medium you can come up with - markers, crayons, paints, stamps,  etc. 


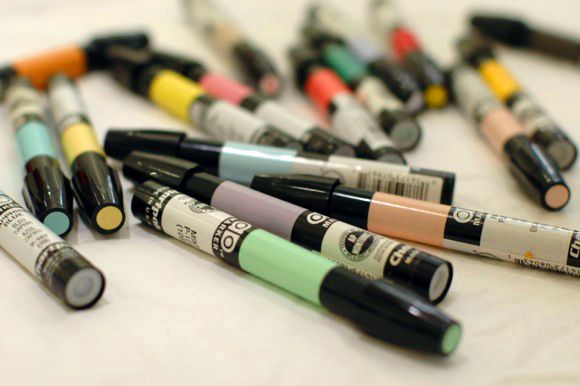
We thought about using paint, but Chartpak markers seemed like a fun choice.


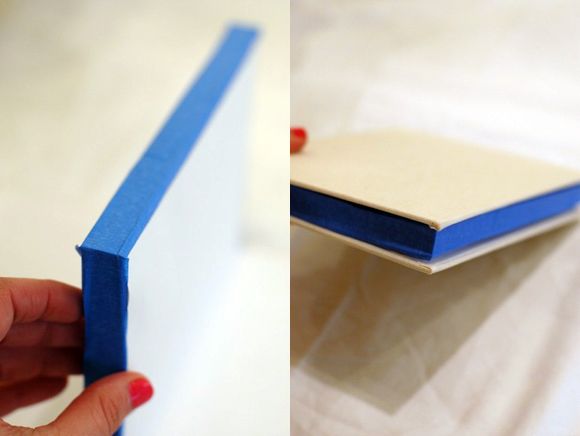
I taped off the paper edges to protect against stray marks.


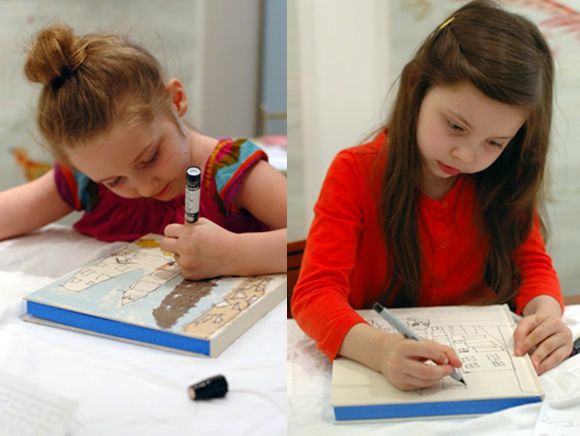
The girls and I talked a little about what they were going to draw, we did a little sketching first and then  I let them do their thing. They drew the outlines first with fine point sharpies.


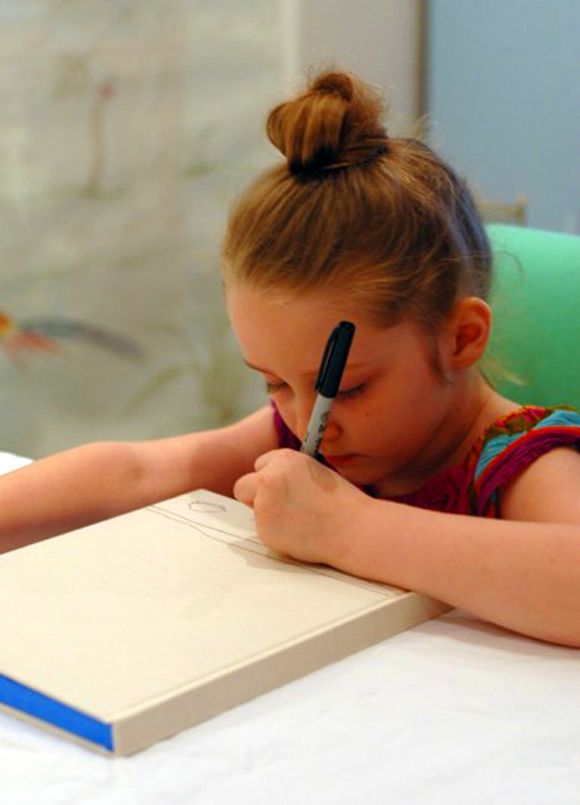
And then colored in with the Chartpak markers. The markers bled a lot outside the sharpie lines, but it was fine. Who wants a perfectly-in-the-lines coloring job anyway?


Evie made one too and it ended up being a very pretty, dreamy abstract. I think Heather is going to keep it.


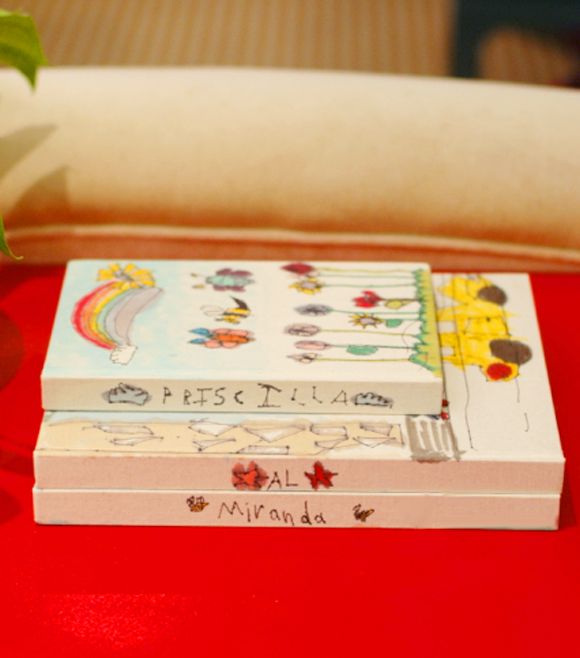
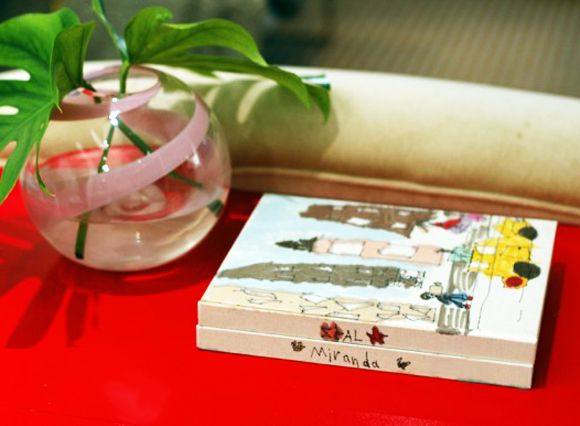
The notebooks were such a hit with the teachers. The kids drew stories and pictures of what each teacher will be doing during the summer.


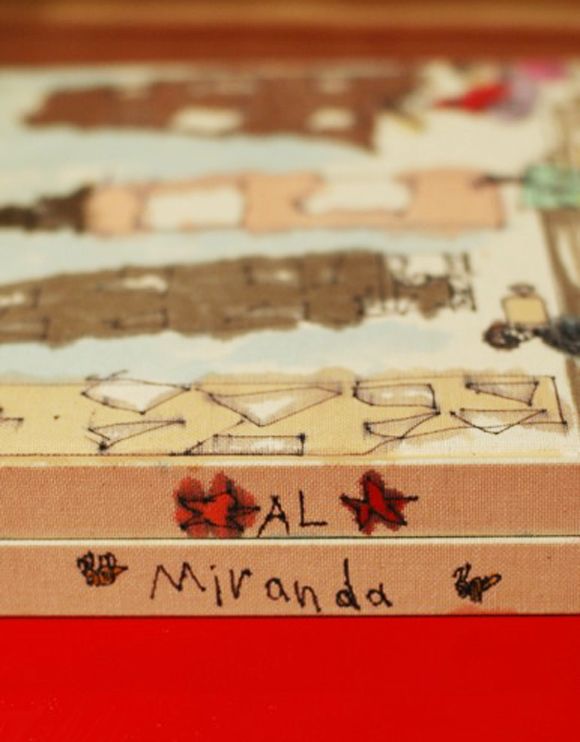
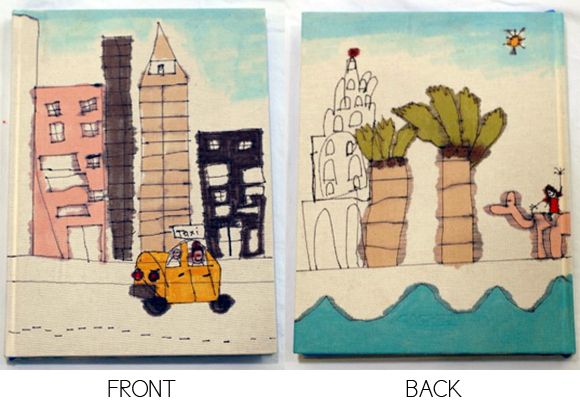
Claire's pre-k teacher, Al, is also a film maker (he is seriously the coolest, nicest teacher). He's making this super hip indie film this summer about a man that leaves his wallet and his phone in his office building late one night and gets locked out. He has to walk all the way home to Brooklyn with empty pockets and he has lots of adventures along the way. I can't wait to see it when Al's finished. Claire drew a picture of him filming on the streets of NYC, and she and Evie "just happen to be walking down the sidewalk" and they get filmed too (Claire's words - that kid!)


Gracie also had a really special teacher this year, Miranda, who we will love forever. It's crazy how involved these lovely people are with our kids and then, bam, one day it's over and they're done. That can be hard to digest for kids, teachers and parents alike.

Miranda is summering in Spain and Morocco, so Grace drew a picture of her teacher taking a cab to the airport (Grace is waving goodbye from our building). And on the back side, Miranda is riding a camel in Morocco by the beach.


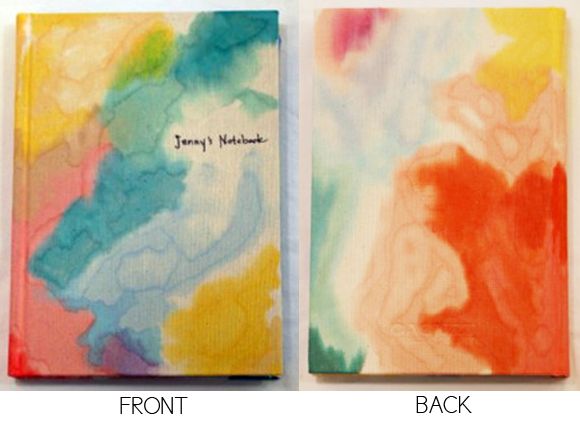
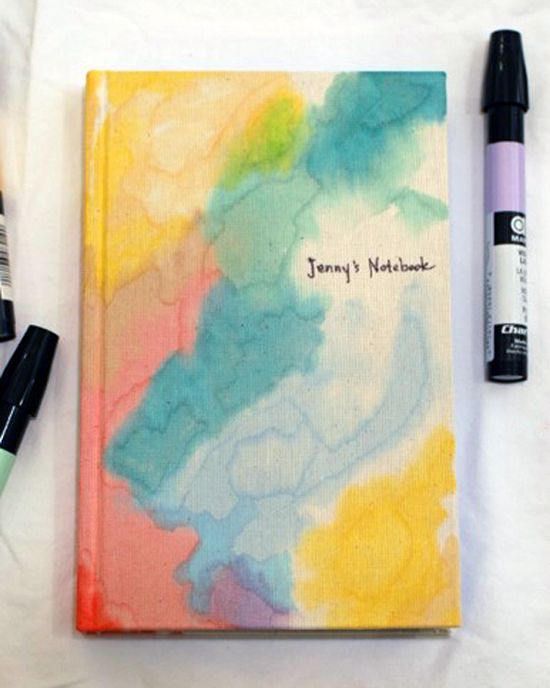
I made one for myself and used a blender marker to add in some water marks. Looks sort of like tie dye, right? I like it. The back side (with the bright orangey red, below), is my favorite.


Anyway, I feel like the possibilities are endless with these canvas-bound sketchbooks! I'm going to try some patterns next. Maybe like a Les Touches-esque stylized leopard print? Or a faux bois... or malachite... Tortoise shell...

Wednesday, June 27, 2012

MSL Radio!

Well, we finally made it to the last day of school for my girls. I'm taking full advantage of this last day and I've packed in all sorts of appointments before we launch into full-blown summer mode tomorrow. First up is a dash down to Brooklyn for a meeting with the contractor at the brownstone to talk about refinishing the floors. (whoop!)

We've been thinking a lot about it (thanks so much for your input by the way), and because of all the stairs in our place and especially because of the very short window of time when the house will be empty, we're probably just going to hire out this project. I'm hoping our guy will say they can do the floors for just some fabric advice and a big plate of fresh cookies, but something tells me it might cost us a smidgen more than that. I might be waiting on my DREAM fridge a bit longer than I hoped.  (but seriously, isn't that fridge perfect?)

Some of you mentioned you have used 50/50 Jacobean and Ebony stain mix on your floors, which is the formula used on these white oak floors (from here). We have red oak though and might need a little more ebony stain in the mix. I'll have to play around with it. I'm also considering going very very light, which might better suit our narrow space. Decisions!


In other news, I'll be joining the fabulously talented Kevin Sharkey on Martha Stewart Living Radio this evening from 5:00-6:00 pm. We'll be talking about all the good stuff. Blogging. Decorating. When to DIY and when to call in a professional (let's see what I'll say after getting the quote for my floors just minutes before the show! ha.).


Call in! Let's chat.  (PS  If you don't have a subscription to Sirius, the folks at Martha have generously offered up a free 30 day subscription here.)

Tuesday, June 26, 2012

Flokati Rugs

I love the idea of stepping out of bed in the morning onto the softest, furry pile of wool. So I've been thinking a flokati rug would be so cozy and swanky (I vow to never use that word again - it had to be done) in our soon-to-be-dark-walled bedroom.


I've been looking around for a nice flokati (aka one that doesn't shed like C-R-A-Z-Y). But I also want one that won't be a huge investment, since, let's be real, it's a white rug in a house full of kids and maybe a dog. If I didn't have about a million other places to spend our money right now I would be tempted by a real Beni Ourain Moroccan rug, like Jenna's.

Living Etc.

I've had my eye on this flokati for a couple weeks since it has pretty decent reviews and the price was good. As is typical for me though, I let it sit in an open browser tab for about three weeks - until I noticed it was 75% off (still is!). And since I'm a total sucker for marketing gimmicks like that, I just couldn't pass. A little over $100 for the 5x7 seemed like a very fair price for a well-reviewed flokati.


Elle Decor, March 2010

Anyone have this particular rug? Or a flokati in their bedroom? Spill!

PS If you're feeling adventurous, Danika at Gorgeous Shiny Things used a little bit of fabric dye to recreate the Beni look.

Monday, June 25, 2012

Contest Closed: Clorox Wipes $500 Give Away

This post is sponsored by the makers of Clorox® Disinfecting Wipes, the quick and easy way to clean and disinfect your home!

Congrats to Hallie the winner of the $500 give away to Target and the Container Store. Hallie, please email me your info as soon as possible to claim your prize.

Thanks to all that entered!

BHG and Pillows

I got back to New York late Saturday night and playing catch up has been a little crazy. But it was so fun to come home and see this little piece in the July Better Homes and Gardens. They let me share some of my favorite tips for zhushing up a home on a budget. I also had to bribe them with lavish gifts so they would call me the reigning Queen of DIY. ;)


follow me on instagram: @jennykomenda

I'm going to be posting on the BHG Style Spotter blog a couple times this summer. Each post will focus on a room and a very specific way to mix it up a little without breaking the bank. Pillows are one of my great weaknesses and I'm sharing some of my currently available favorites that will instantly update your living room (and a fool-proof method for mixing colors - it's simpler than you think). Go check it out!


Friday, June 22, 2012

Frisco and Floors

Hello from Hotel Vitale in San Francisco!


I'm here for the weekend with a few other bloggers, and many of them live here. It was fun over dinner last night, getting the inside scoop about all the great things this beautiful city has to offer. We've thought about moving to San Francisco a few times over the past couple years.  Maybe down the road in a few years (if Brooklyn doesn't work out for us)...

Speaking of Brooklyn, this weekend I'm trying to figure out if we should refinish the wood floors of the brownstone ourselves or if we should hire it out. If we're going to do it, I feel like we need to do it first thing, before we move anything in the house.

I have a meeting next week with my contractor, just to get a sense from him how much it would cost to get some of the bigger projects professionally done. In the meantime I need to get online and do some research on DIY floor refinishing. The current reddy stain bugs me, but honestly - it's not *that* bad. I do think a new stain would help the house feel more finished and updated. Less...70s. But we'll have rugs in most rooms, so maybe this is a place where we should save our money.


Have you refinished your own floors? Or maybe you went with a professional service and you were glad you did? I'd love to hear about it as we're weighing out our options.

Have a lovely weekend! See you Monday. xx


Thursday, June 21, 2012

Black and White Striped Throw

If you have $20 burning a hole in your pocket, I know how you can spend it. IKEA's Eivor throw is such a great little blanket. It feels like everyone has one, and for good reason.


It's soft like a knitted sweater and it washes well, but the biggest selling point is the great black and white stripe - a pattern that is surprisingly hard to find in throw-form. And it is SUCH a fun addition to any room. Buy one. Buy three!


You may have noticed an Eivor throw hanging out on our old headboard. I was so sick of the old fabric on our bedframe! We had plans to reupholster it ages ago, but our bedroom was definitely on the back burner. Finally I'm picking out a fabric to order this week and I've decided to go with the velvet route. I'm leaning toward the silk coral on the left. There will be brass nail trim and new bedding too. Yessssssss!


What's your vote? The peacock velvet on the end is lovely in person, but I think it might match too much with the painting.

Also, do you have the Eivor throw? Link party in the comments section if you want to share how/where you use yours!

Wednesday, June 20, 2012

DIY Gold Leaf Art Frame


I love big art hanging over a bed and have been on the look-out for something large and in charge for above our headboard. Recently (actually when I was shooting that IKEA commercial spot), I spied a HUGE frame in someone's cart at IKEA and was surprised to hear from them that the artwork/frame combo was on $50! Not bad at all for 55" of wall decor! I was planning to pick up one of these and replace the print with some of my own artwork.


Then last week at the flea I found the absolute perfect, perfect piece of art for above our bed. It's a vintage watercolor featuring all sorts of lovely blues and greens and some black for contrast.


The only part of the art I didn't love was the heavily grained oak frame (I prefer natural wood frames to be birdseye maple, burlwood or birch).


Since deciding on dark walls for our next bedroom, I thought a gold frame would look lovely here. I love using my trusty gold leaf pen for smaller frames, but this frame is huge - also around 55" wide. Plus, the gold leaf pen can end up looking a little flat (sort of like gold spray paint can) when it's used on large surfaces. Real gold leafing has almost a lightly distressed look (at least when I do it myself!) that actually I love.


It's easy to assume that taking on a gold leafing project will require a big investment for supplies. Not so! This little kit from Speedball has the glue (called 'size'), 25 sheets of leaf and even sealer, for only about $10. That's as much as a gold leaf pen costs! 

The step-by-step is a breeze. It took me about 30 minutes to gold leaf this huge frame, and that includes 15 minutes of size drying time. First, just lightly clean the frame. Remove any gunk or dust. Then run a line of painters tape along the inside edge of the frame to protect the glass. If it's easy for you to remove your artwork, leafing an empty frame is ideal. (my art was backed with kraft paper, so I needed to go the tape route).


Using a 1" foam brush, dip and fill the brush in the size adhesive bottle. It should fit perfectly in the bottle. One dip was plenty for one entire side of the frame. You don't need a lot of glue here. Less is definitely more. Also be careful to avoid any puddling with excess size. Everything needs to dry evenly.

Once the size has dried for about 10-15 minutes and is completely clear (not milky), it's time to start leafing. If you're working with a very small frame, you can cut the sheets down to size to help reduce wastage. I should have cut my sheets in half before using them to make my life a little easier.


There's really no going wrong with the leafing process. You just carefully lay the sheet down, trying to not let the leaf fold over on itself - thought it's not the end of the world at all if it does. Then burnish the leaf into the frame with your finger or a clean paint brush. You can just rub in bits and pieces of extra leaf and it will stick to any amount of the size. You can see here where even the tiniest bit of size got on the frame at the end of a brush stroke, and the leaf stuck to every bit of it.


I went around the frame one side at a time (I'd be leafing one side while I was waiting for another side to dry and get tacky). Once all the leafing is done, and you've filled in all the missing parts and the cracks, use a clean cloth to further burnish and rub in the leaf sheets. This is the best step for me! The gold starts to look finished, and so pretty!

If you would like the extra protection of using a sealer on top of the gold, here's when you would do that. I didn't bother since picture frames don't usually get a lot of wear and tear.


I like to pull out my vacuum with the upholstery attachement on to clean up all the gold leaf specs left over on the frame and on the drop cloth. It cleans up very well with the vacuum, even though you feel like you're making such a mess during the project!

I'm so glad I changed the frame to gold. Much better than that reddy, grainy oak! And see what I mean about the lightly distressed look? I love that.


I'm just itching to get into the new house and paint my bedroom black now.  :)


Tuesday, June 19, 2012

Black Walls in Our Bedroom

There are four bedrooms in the new house. Two on the garden level and then two more on the floor above the living room/dining room/kitchen. It made sense for us to be on the same floor as the girls (who will all be sharing a room for the next couple years at least). The bedrooms on the garden level are pretty large and equally sized, but we decided to use that floor as my office (since that floor has an outside entrance) and the other bedroom on that level will be my sister Heather's, who's living with us currently.


AB Chao


Domino


Chicago Home

The upstairs bedrooms share a bigger, nicer bathroom, which is good, but one of the bedrooms is majorly smaller than the other. There wasn't even really a choice for us - it makes way more sense for Michael and I to take the small bedroom and to let the girls have the huge 20x15 bedroom. That way there is plenty of room for them to spread out and play. Hopefully the toys will stay mostly upstairs in their room!

So our little 'master' bedroom (ha!) is proving to be a bit of a challenge layout-wise. There's no closet. Or rather, the head of the bed is in the original closet. So we're going to add a wall of Pax units. There's also a large hall closet that we can use for additional clothes storage.


I've been thinking a lot about painting the walls of the room black. There's just no getting around how tiny this room is (it's about 9 x 11 -- EDIT: I just double checked the measurements and I was off. It's about 8x13. Eesh, that's so narrow!), so I'm just going to work with it and play up the coziness aspect. I'm telling myself (and Michael) it could end up being really restful.

I'm planning to install a lot of new moulding everywhere in the house, including the bedroom. I'd paint the moulding black too though and I think the dimension will be really cool.  I'm hoping with a light rug and white bedding/curtains, and oversized artwork, the mix could be just right with the dark walls.


Lonny


I never jumped on the black walls bandwagon a couple years ago, but I'm sure a few of you did. So I have a question for you: Do you still like your black walls? And did you paint them flat or glossy? I'm thinking high gloss or even lacquering might be really nice in our tiny room...


Elle Decor


High Street Market