FREE DOWNLOAD PICTURE
MORE INFO ABOUT NOTEBOOK

Tuesday, February 28, 2012

Lamp Shade Switcharoo

Got a ho-hum lamp shade that could use a little spicing up? New lamp shades can be very pricey (pretty shades here are always at least $50. Usually closer to $100/$150+!). I had an old white silky shade on hand that I decided to paint red a couple weeks ago. I tested two different colors, but I knew I wanted the Oxblood color from the get-go. I think it's a really good idea to temper bright, garish colors with muddy, off-tone colors in a space.


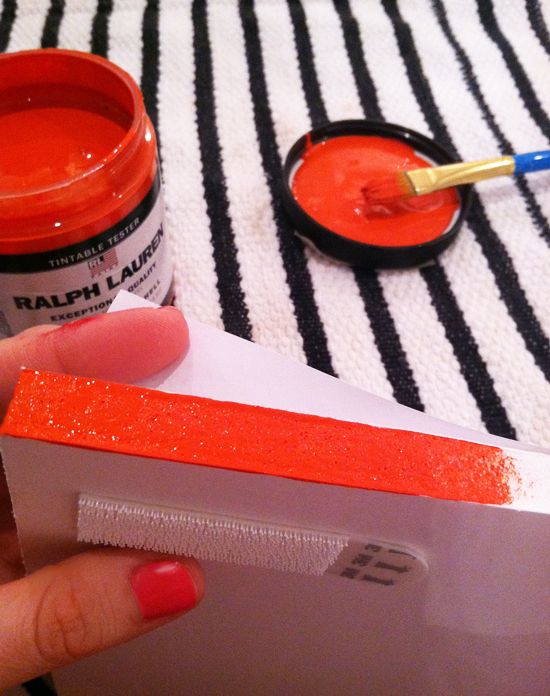
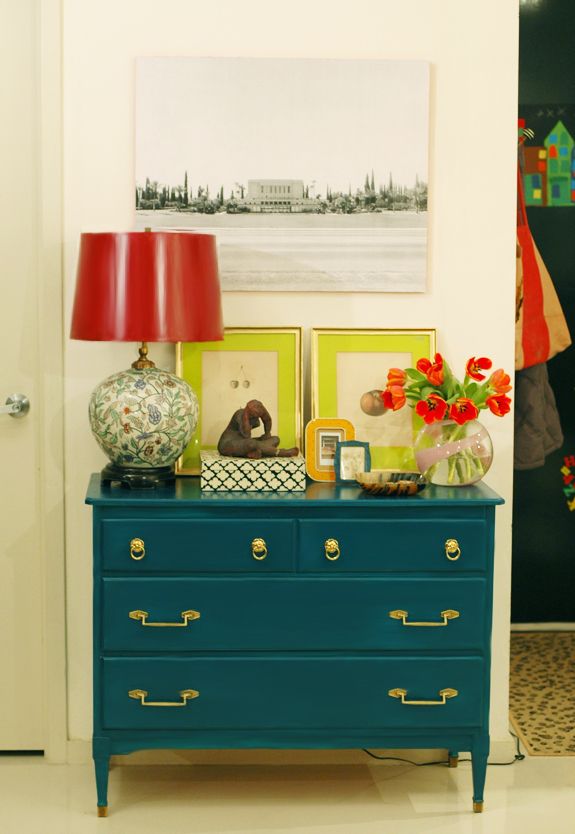
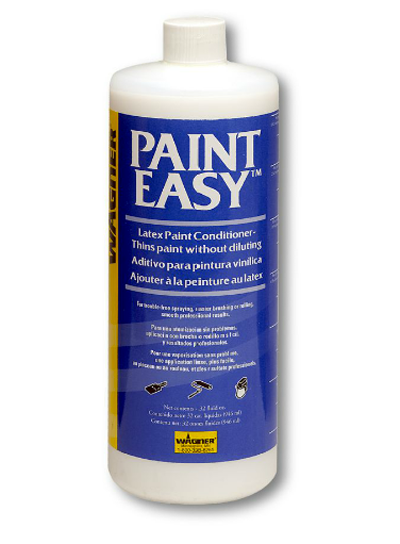
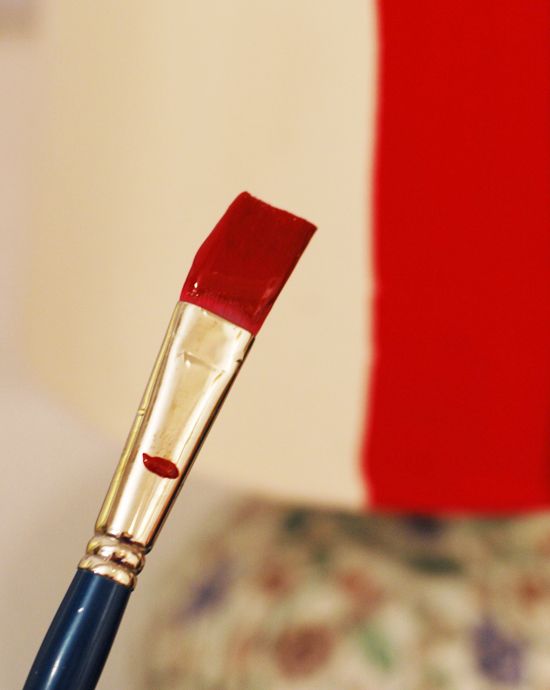
I had an old quart of glossy red paint on hand that was the perfect color (Man, I wish Home Depot still carried that Ralph Lauren paint line! Those colors were so pretty!). So, the trick to painting lampshades? Either water the paint down, or better yet, thin it down with paint conditioner. I've used this brand with great luck.


But the real trick to painting lampshades (or furniture, or really anything with a brush) is to load the brush with a consistant amount of paint every time, lay the paint down smoothly the first time and then resist every temptation to go back over what you have done! Just let it dry. Once it's fully cured in a couple hours, you can lightly sand the whole shade and give it a second coat to cover up any imperfections in the first layer.


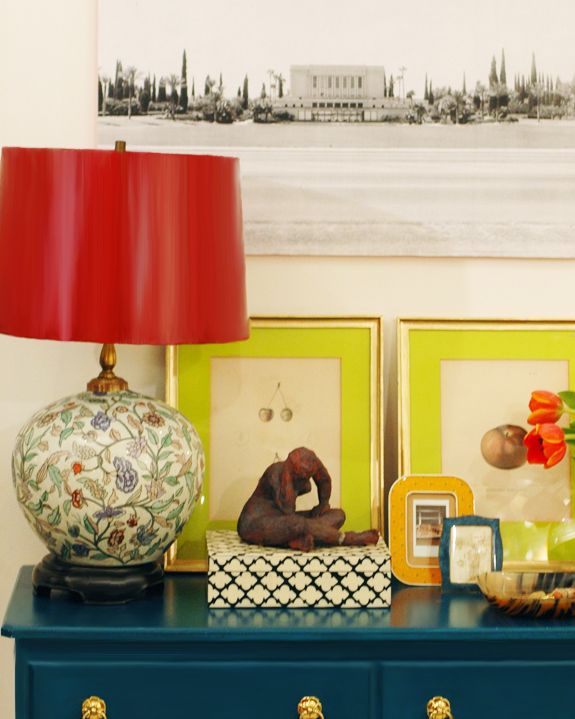
Don't forget to paint the inside rims, but I like to stop where the fabric hem rolls in. Leave the inside white or black (or line it!). You can paint paper shades too, but I wouldn't water your paint down in that case- use the conditioner or just straight paint. I've painted a couple different types of shades and most of the time it works great, but it should go without saying I wouldn't mess with a really lovely expensive shade. Reserve this project for those approaching-nasty yellowing shades that so often come with lovely vintage lamps!


PS The Homies are out again! (They always sneak up on me, so thanks to those of you who nominated and voted for me already in both the Best DIY blog and Best Home Design categories - I'm not holding my breath, but I am super flattered. xox) I love the Homies because they make it so easy to find really great, new-to-me blogs! It's risky business though, finding a new blog that fits you so well you just can't go to bed until you've read through to their very first post! :) Dare I click through the list before the weekend?!


Like LGN on Facebook
Follow Jenny on Twitter

Monday, February 27, 2012

Chinese Wallpaper in Acrylic Frames

A while back I was gifted a set of hand-painted chinese wallpaper panels from this eBay store. They let you customize the background color (I sent in a Martha Stewart paint swatch that I liked - the color is Heavy Goose), and they let you choose which scene you'd like. I asked for the panels to be painted on PAPER (not silk, which is standard).

The panels are not inexpensive, but when you consider the cost of Gracie or DeGournay, these are down right affordable. I was planning for the panels to go in my bedroom and I wanted them to be more chill in color and pattern. Well, it turns out it didn't work to hang the panels in our bedroom for a lot of (boring) reasons, so I've been storing them for about a year now. Recently though, we bought some new living room furniture and the whole apartment has been in a state of flux. It seemed like a good time to move the gallery wall to the living room and set up the chinois panels by the table.


I knew I wanted to do acrylic on the framing of the panels, but I also wanted this project to be as cheap as possible. I ended up buying four sheets of 1/8" plexiglass at Canal Street plastics for about $60 a sheet. I'm sure all you lucky suburbanites could find it for way cheaper though. I had them cut the sheets so there would be a 1" border all around the almost 8' long wall panels. The sheets come looking like this, wrapped in a paper film to protect the plexi.


I drilled three holes along the top and bottom of the plexiglass, and then one on each side in the middle, for a total of eight holes per panel. The trick to drilling through plexi without cracking it is to use a small bit (1/8" at most), drill slow and to put a piece of plywood underneath for added support. Also be sure to leave the paper film on during the drilling process.


Once the holes were drilled, I hung the wallpaper panels directly to my walls using poster (NOT picture!) hanging strips. These are super thin and help the panels lay pretty flat against the wall. Also they are completely removable and won't damage my walls or the paper panels.


I probably used 12 strips per panel (I bought the bulk pack of 48 strips) and made sure to stay close to the edges for the most part.


I went one panel at a time, first hanging the wallpaper (using a level!) and then mounting the acrylic directly on top of the wallpaper. I just used bright gold screws to mount the acrylic to the wall. I started out using wall anchors, but ditched those pretty quickly. The screws on their own were working really well. These screws I had on hand sort of had an unthreaded neck to them, so it would have been really tricky to drill them in all the way flush with the acrylic (and probably would have cracked the plexi), so I left them sticking out a bit, about a 1/4", and I really like it actually!


I had bought 24 of these big brassy buttons to epoxy to the tops of the screws to give it a more finished look, but I ended up not going that route. It looked a little overdone or something. I think the exposed screws somehow make the panels less stuffy maybe? Personal preference.


I just finished hanging these last night, so I'm still sort of letting the whole look settle in on me. I might end up changing some things, but for now I'm happy.


I'm working on another DIY for the dining room so I'll share some wider-angle after shots when that project is done.

PS! If you try this yourself, I totally recommend butting up the acrylic sheets right next to each other rather than spacing them out the way I did. I wish we didn't have to make space between the panels for electrical outlets. (oh, the sad realities of renting!)


How was your weekend? Michael is going to Brazil this week and I'm jealous. Also I'm not super excited about being a single mom all week. Hats off to those of you who do it solo all the time. You are much stronger than I!


Like LGN on Facebook
Follow Jenny on Twitter

Friday, February 24, 2012

Special Delivery

If all goes as planned, this rug from eBay and a new pair of arm chairs and will arrive at our apartment today! It feels like Christmas morning!


I know the rug is going to need a professional cleaning, but I'm hoping the colors are pretty in real life. But I have high hopes that my $220 were not spent in vain! I think it will clean up nicely.


It's a pretty big rug (10x13) and I'm thinking the plan is to put it in my office with the hope that it will lighten up the room a bit.

I'm thinking about doing a grasscloth-ish DIY on the walls in there that might end up being sort of dark, so it will be nice to strike some balance on the floors.


PS We sold those pretty blue chairs a few months ago. They just weren't comfortable after long stretches of time. I'm pretty jazzed about the replacement office chairs though. They're at the upholsterers now, but I'll be sure to share soon.

Happy weekend friends!!

xx

Thursday, February 23, 2012

The Magic of a Gold Leaf Pen

I found these botanical prints at the flea market and I fell in love with the bright chartreuse, almost neon green matting!


I wasn't the hugest fan of the forest green painted frames (or rather, I didn't like the color combo - I am a fan of forest green in general). So I bought them with the plan to change the frame color. I think black would have looked great, but I really wanted to bring some gold over to the entry console area.


Have you ever used these gold leaf pens? I might be a little obsessed with them. I've been adding gold detailing on furniture and mirrors like a mad woman. It's an addiction really.


I used the Krylon leafing pen to make the botanical frames gold. So much better than dark green! I didn't bother to take apart the frames (they were professionally framed and had kraft paper backings I didn't want to mess with). The good news is it is so crazy-easy to paint frames with glass or mirror. The glass sort of repels the paint most of the time, and 100% of the time you can get off the paint with a little windex and a razor blade.


Also, a couple of you asked about the console. You must be newbies! Here's the post on painting a cheapie dresser with Behr's Billiards Table in high gloss.


Like LGN on Facebook
Follow Jenny on Twitter

Wednesday, February 22, 2012

Dibs on the Rug at J. Crew

It's true. All design bloggers love J. Crew. I think it's all that combining of modern, fresh colors in traditional shapes. At least, that's why I love it.


There are two J. Crews closer to my apartment, but I always shop at the downtown 5th Ave location. I go so I can visit my rug in the upstairs women's shoe department. Talk about fresh colors in a traditional form:


I know, it could use a good cleaning, but guys. Those colors!

This picture makes me laugh. I was trying to take sneaky photos of the rug, but the sales lady thought I was taking outraged photos of her yelling at those boys who were horsing around on the Chesterfield and knocking over shoe displays. She was completely frustrated by them (and their absent mother), and was subsequently annoyed by me documenting her frustration (even though I wasn't really). She gave me a frown and a one-eyebrow-lift. In her defense, those boys were truly being naughty and seriously, where was their mom? A weird moment on all accounts, now forever memorialized here. :)

Back to the rug. The friendly people in J. Crew's PR department said it was purchased from ABC and is antique. Given the size, I'd say it was about $30k. Ouch. Still great eye candy though. Please someone, make a good rug that looks just like this.


It matches the belt I wanted to buy.


Anyway, if you're ever in the neighborhood, the 5th Ave store is worth checking out. The light fixtures above the cash registers aren't to be missed either:


Also, it's less real-life inspiration, but still cool: The antique gloves wall art installation.


PS I found a pretty turquoise and mint antique rug on eBay for my office that should be arriving today or tomorrow. It's not even half as lovely as the J Crew Moroccan number above with all the blue and orange and coral, but I'm still excited to see if it's pretty enough to live up to its eBay listing photos. (Always such a gamble. Am I right?)

Like LGN on Facebook
Follow Jenny on Twitter

Tuesday, February 21, 2012

Huge Prints for only $4!

Michael and I were married eight years ago in the Arizona LDS temple. It's such a beautiful place and is really special for our family. A while back I was looking for vintage maps of Mesa, AZ on eBay (we collect old maps of places we've lived) and I stumbled across this photo of the temple from the 60s. I loved how modern the shot is with all the white space!


Later I saw this tutorial on Pinterest and knew I wanted to blow up my vintage photo for our home. I scanned in the photo and brought my zip drive to Kinkos (Or I guess it's called Fedex Office now? Bor-ring!). For only $4 they printed my image on their large format blueprint printer. The largest size you can do is 48" wide, but mine is 36". It's so inexpensive because the paper is nothing special and you can only have black and white. But it's huge and graphic and so affordable!


I cut down the paper to size and then mounted the print with scrapbook tape on double thick foamboard I got at Blicks for $7 (which I also cut down to size using an X-acto knife).


After mounting the print I realized I could save a ton of money by not framing it and just painting the edges. I used an orange tester paint that I already had on hand and a square-edged artist's brush. It was easy to carefully paint just the edges of the foamboard.


I hung the mounted print on the wall with my favorite picture hanging strips.


I'm so happy with how this project turned out. I only wish my wall was bigger so I could have done the full 48" width!


From the side you get to see the pop of vermillion color. I love little surprises in design!


Like LGN on Facebook
Follow Jenny on Twitter

Monday, February 20, 2012

Another way to paint your interior doors

Hello friends! Happy President's Day! Michael and I are taking advantage of the three-day weekend to wrap up some half-finished projects together.

As I was working on a DIY yesterday, I had a flash of inspiration when I remembered this shot from Martha Stewart living. I love how they painted the inside rim of the door that punchy red color! Such a fun surprise in an otherwise pretty neutral room.

image via the lovely Abbey Nova

Hoping to finish up the project this afternoon to share with you tomorrow!

Thursday, February 16, 2012

Bedroom Planning

Thanks for your patience with my light posting this week. It's been a rough one, but we're on the mend and I think this weekend we'll be ready to get out and get some desperately needed fresh air!

I loved reading your feedback on the dresser handles. I think I'm going to try salvaging the zigzag handles and see how I like them when they are nice and shiny again. Lots of people commented that they're sick of seeing ring pulls everywhere, which surprised me! I think they are such a classic design element I doubt I could ever get sick of seeing them.

Another thing I won't get sick of? Tufted headboards! :) I've been working on my bedroom redo. We have this bed still, but really our bedroom is too small for a footboard. I'd rather trade that floor space in for a narrow bench this one (DIY on the way!).

House and Home

Since I'm trading in our bed frame for just a headboard I think I want to do a tufted version here. I'm debating between lots of small tufting...

domino

Or more spaced out tufting with a rounded shape.

domino

Either way I'm planning on doing velvet. Maybe leather on the bench?

I spied this green headboard on Pinterest yesterday (follow me here). I'm in love! Wouldn't this color be amazing?

this month's House Beautiful

Here's hoping today is our last sick day! Lots to get done!

I hope you have a great one! xoxo

Like LGN on Facebook
Follow Jenny on Twitter

Tuesday, February 14, 2012

New Dressers

We've needed a pair of new dressers for our bedroom for a while. I found a set (not a pair in the same height) on eBay that I loved. It had the prettiest tiger maple veneer. But we really needed a matching pair and something much bigger and taller with at least five drawers.


I lucked out when we went down to Jersey last week and I stumbled across this pair of MCM dresser with a cool wood grain. Not exactly the dressers I loved from eBay, but the dimensions were perfect and the price was great (only $200 for the pair).


At first I was on the fence about the hardware. The zigzag is kind of cool, but now I'm over them I think. The brass plate is getting corroded, so I'm thinking I just want to do simple brass ring pulls like the dresser had that I first fell in love with.


What's your vote? Clean and touch up the brass zigzag pulls, or replace with simple brass ring pulls?


PS I usually have a huge stash of these brass ring pulls since they look great on everything. They are about 2" in diameter. I might just try them again, though I wish I had something closer to the 2.5-3" diameter range. Gracious Home has an impressive hardware selection that I might check out this week. Do you have an sources for large brass ring pulls? Liz's Antique Hardware is great if you have about $30 a pull to spend.

Monday, February 13, 2012

Unplugging

Oh, boy. We are down for the count here at the Komenda household. My poor girls have the stomach flu (SO not fun). We're all sitting here in a daze after the night we just had. I'm unplugging for the rest of the day so I can snuggle my babies and sleep a little.

Thanks for the day off, friends! See you tomorrow. xoxo


PS This AMAZING room was designed by one of my design heros, Celerie Kemble. Did you know she is a curator on Dering Hall? Such amazing inspiration!

PPS The yellow Brunschwig chair fabric is on my all-stars list. Isn't it gorgeous? Also, I want to take a closer look at the legs on those chairs. Stain? Paint? Faux malachite like here below? (another favorite room from Kemble Interiors)