This content series is in partnership with smartwater. smartwater, simplicity is delicious. Click here to learn more.
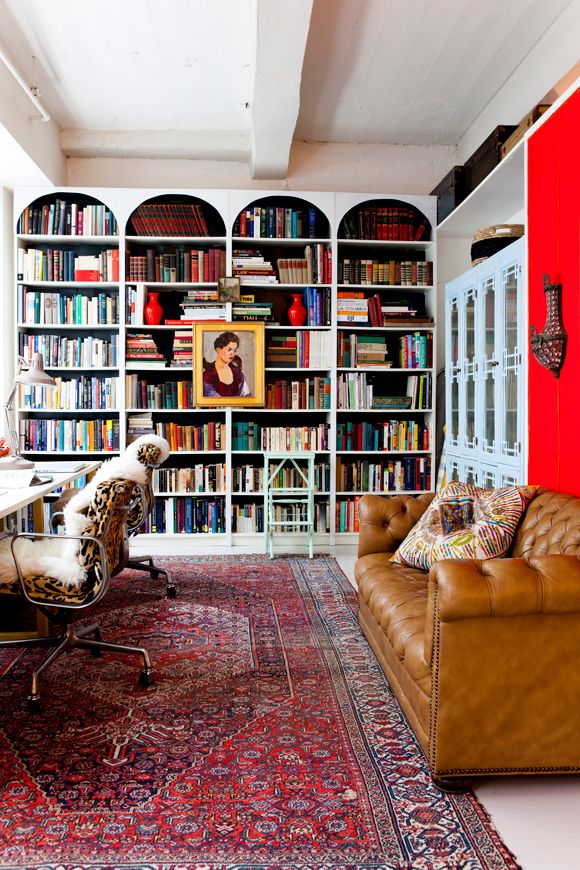
I think it's important to make offices feel comfortable and homey as possible - especially if they are in your home. They have to be functional first, of course, but the pretty requirement should be a close second in my book!!

The home office in our loft was pretty with the wall of books, but the walls to the right of the shelves were not good looking for a long time. I had huge stacks of fabrics on open (wire!) shelving and a blank wall with some less-than-awesome visible drywall seams. Not cute. And I realized it was making me not want to work in there.

So, we moved the fretwork cabinets into the fabric nooks and put the fabric in my storage room since I didn't need to get into it every day. (I'm actually thinking of selling a lot of it at the stoop sale I want to hold this month or next). We use the cabinets for storing accessories and magazines and some office supplies. They really fit well inside the wall space there too.

For the little accent wall though, I wanted to try something fun, but something that was easy and free. I had a couple yards of this tomato red linen from Graylines at the apartment already and I decided it would make the perfect accent wall.
The idea is really simple! You even follow my same general upholstery guidelines I diagrammed here (down about halfway through the post). The really important thing here is you need to staple as straight as possible. Using the moulding along the perimeter and a yard stick in the center is really helpful for getting straight lines. (Here's a post on my favorite cheap stapler)
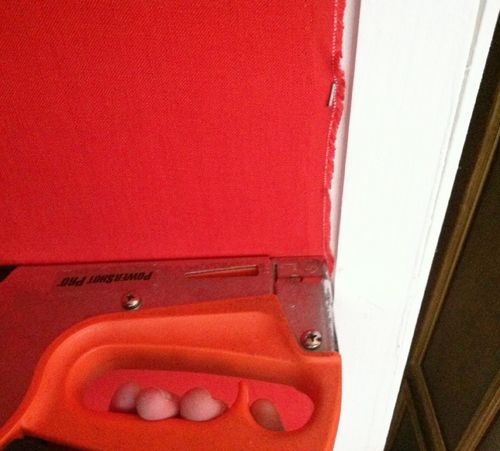
Because my wall was wider than a full width of fabric, I stapled a full width right in the middle of the wall and then went back to cover the sides with two smaller widths of fabric. For that smaller width, I started from the outside edge of the fabric and stapled up the full piece of fabric and then cut off the loose, remaining fabric. If you do it this way, you don't have to measure at all.

The staples of the smaller panel should go right over the top of the staples of the first panel. Once you have three panels of fabric stapled to the wall, trim the fabric close to the staples. How tight you need to trim it depends on how thick your trim is. Mine was only 3/8" wide, so my lines had to be perfect and I need the fabric trimmed really close.

Then you just fabric glue your trim on top of your staples to cover up the mess. I used orange velvet ribbon for trim and I loved the slight color and texture contrast against the fabric. It was really pretty.

Easy! It took me about 20 minutes to do that small wall in my office.
It was so fast, and it made the hugest difference in how I felt about that home office! I'm planning to upholster the walls in my bedroom (black linen!) instead of painting them. Won't that be cozy? I'm really excited about the idea!
It was so fast, and it made the hugest difference in how I felt about that home office! I'm planning to upholster the walls in my bedroom (black linen!) instead of painting them. Won't that be cozy? I'm really excited about the idea!