FREE DOWNLOAD PICTURE
MORE INFO ABOUT NOTEBOOK

Friday, September 28, 2012

Weekend Give Away: 5 Pairs of Shoemint Shoes

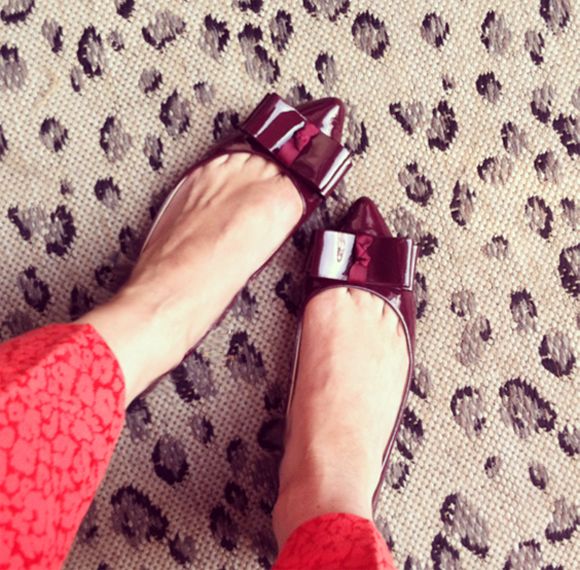
It's the weekend! After the past couple of crazy weeks, I am welcoming the chance to sneak out for a date night with Michael. Plus, I've been dying to wear these new flats from Shoemint (the shoe company that Rachel Bilson works with!). I love the bows, and burgundy is totally the hot color for fall.


Shoemint offers the most fabulous, high-quality leather or suede shoes, all for less than $80. I have a couple pairs and they are all incredibly comfortable. I could walk 40 blocks in the bow flats!

Shoemint is very kindly offering up three shoe closets (which is 5 pairs of shoes!)! To be eligible to win, please register here and then leave a comment on this post with your favorite shoe style. The winner will be chosen randomly and emailed. So have your choices ready. The hardest part will be nailing down your picks! :)


Check them all out here. And lucky you, click through and receive 35% off your first purchase! Those fringe booties are calling my name...

Contest ends Friday, October 5 at midnight. Good luck!

PS The neon yellow tote above is the bag in these photographs. It's really cute. :)

Comments are now closed. The winner will be emailed (so check your inboxes!) Thanks for playing!

Thursday, September 27, 2012

The Playhouse

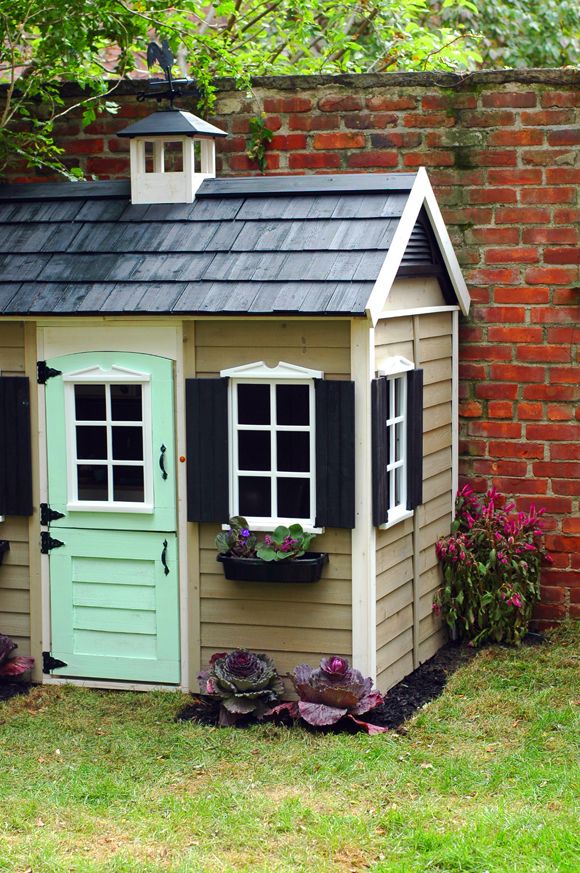
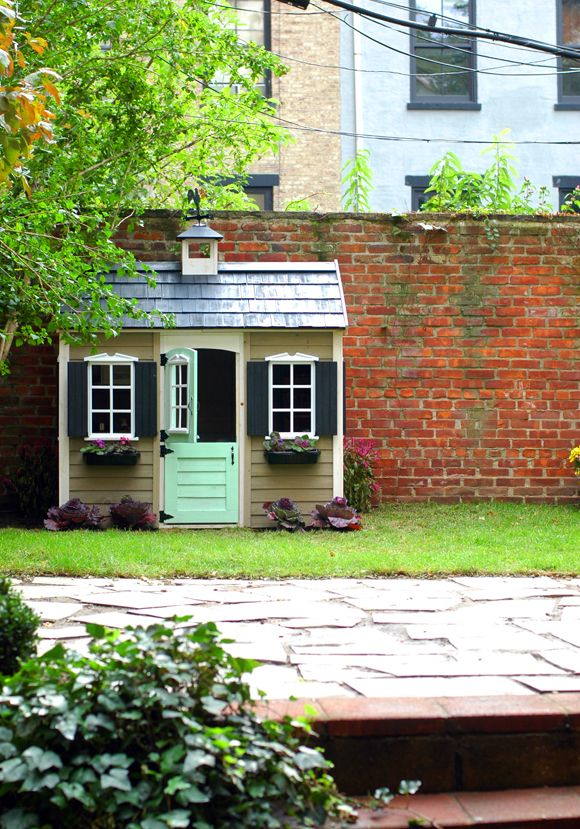
One of the homes we lived in when I was a kid had an awesome tree house in the yard. I played there with my brothers and sisters and friends for hours and hours every day. I have some seriously fond memories of that tree house and I've always dreamed of giving my girls a similar place to create memories. One of the reasons we moved to Brooklyn was because the girls could finally have some easily-accessible outdoor space (it's tough to get to the park every day!). And now that we're here, I want to enjoy this yard as much as possible. For us, it was so worth the investment to buy and built our new play house.


Remember what it looked like before? Cute, but meh. I thought it had potential though... 

 
We bought the playhouse on sale for $450 plus shipping. I know - not so cheap. I did so much looking around on this one though - I looked at all sorts of playhouses, even sheds suitable for using as a playhouse. And I priced out the materials for just building our own. For us, it was going to cost almost $500 in materials and transportation costs and I'm sure the end result would have been questionable! I don't really trust my carpentry skills.


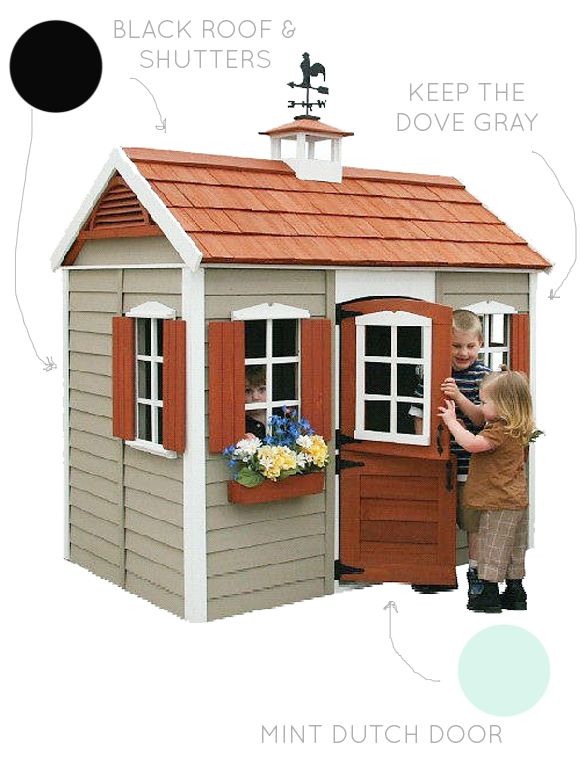
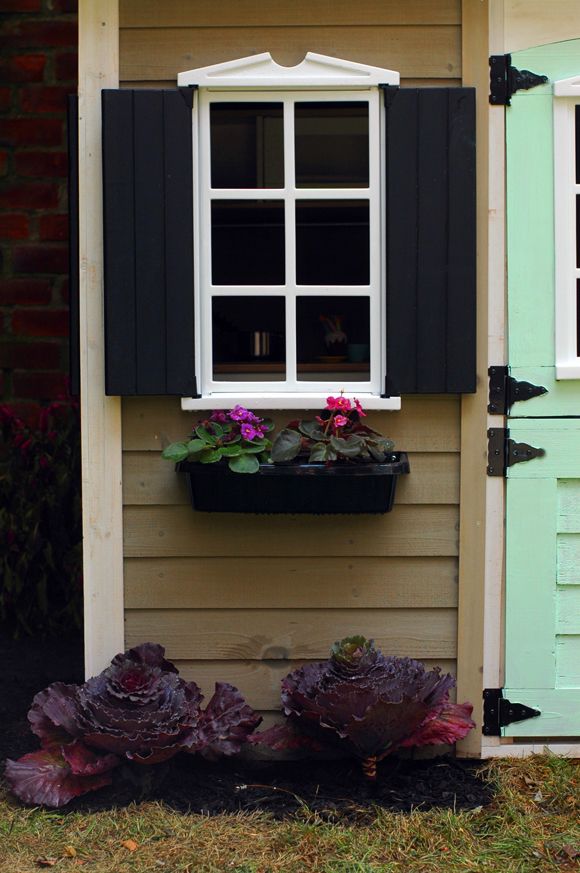
The house comes (very) disassembled and in a giant, heavy box. If putting together IKEA products makes your head spin, you might want to hire this out to a handyman! Luckily, Michael came to my rescue and put the house together on the lower deck with my very helpful brother in law, Matt. I forgot to paint the shingles and door before Michael and Matt put the house together, which was a bit of a pain, but not that big of a deal to paint with a roller after the fact. (I used Rustoleum's black enamel in flat finish for the roof and shutters.)


The girls helped me paint the door (it's not a perfect paint job, but I wouldn't have it any other way). We used the mint paint from this post. Isn't that dutch door the cutest?


One sort of tricky thing about this playhouse is it doesn't come with a floor, so we bought some plywood to finish off the bottom. To prevent sinking or water damage, I dug the ground out a little and laid out nine cinder blocks and sort of half-buried them. It was really important to get all the cinder blocks level.


Then I filled in the gaps with mulch which is supposed to help with bugs, weeds, and moisture issues.


I put down the plywood, cut to fit the bottom of the playhouse, and painted it with a gray primer. I'm planning to do something else on the floor later, but I wanted to get the primer down before putting the house up.


Once the paint had fully dried, we hefted the (VERY HEAVY) finished house on top of the platform. There is a lip on the inside of the house, so we just ran some screws down into the plywood base and everything feels super secure.


Some fun things I like about this playhouse: the funny little weathervane, the working shutters, the doorbell, the flower boxes under the windows, and the fact that I can just *barely* stand up inside the house. I feel like it's the perfect size.


We moved our trusty play kitchen inside and it fits perfectly. I was happy to free up the floor space in the girls bedroom, too, so win-win.


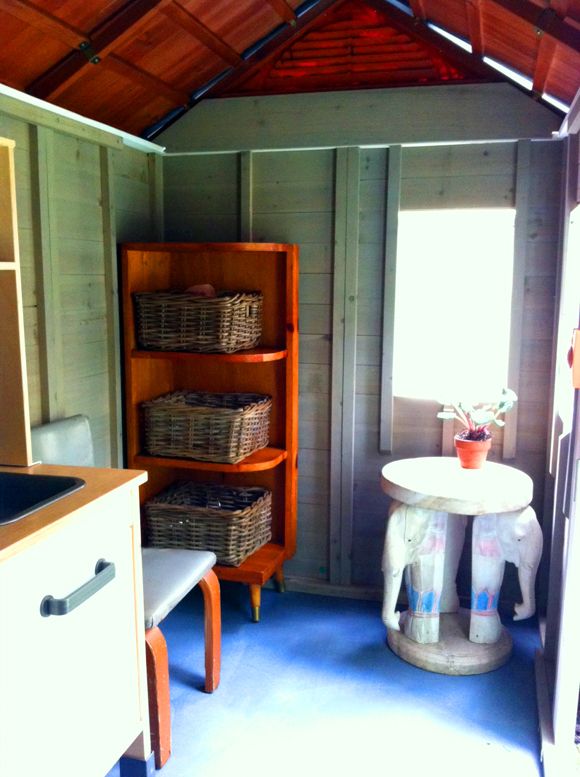
I got sick before I had much of a chance to really do anything with the inside of the playhouse, so it's pretty bare bones for now. I always want it to be on the unfussy side though, so the kids can really play without worrying.


So while not being my least expensive project that I've shared on LGN, I feel like we're going to get a lot of really great use here. Zero buyer's regret.


Some of you asked if my yard's all done now. Not even close! But it might just be good for this year. I feel like I can pick things up again next spring (though the upper deck will hopefully get done this fall). We've come a long way baby.

How to Choose the Perfect Eyeglass Frames

Eyeglasses are prescribed by the ophthalmologist (or commonly known as eye surgeon) to correct the visual deficiencies, and to improve the vision. However, this is just a general term as nowadays eyeglasses have turned out to be a fashion, and are used as an accessory. Ultimately, this has resulted into the strong need of stylish designed glasses and its availability in the commercial market. Nevertheless, eyeglasses have the potential and can actually help you to enhance your facial elements and make you look trendy, stylish and sleek. On the other hand while selecting the glasses it is equally important to search for the frames that suit your facial shape in the best possible way. It is always advisable to look for the characteristics such as the eyeglasses shapes, colours, designs etc. The best thing is to try out several pairs of glasses and check which one suits you the best, and makes you stand out. Overall, you should check out for the eyeglass frames that are suited to your face structure. The first step is to examine what is the exact shape of your face, which can be diamond, oval, round or square. Eyeglass frame manufacturer have come up with different types of frames, each to suit the particular type of face shape.

For instance, if you are selecting a round eyeglass frames and have a round or a full face than certainly you will not look good. The trick behind every glasses is to provide contrast hence, if you are having a round or full face than square frames should be the optimal choice for you. The defined edges of the square frame helps to provide a balance to the round facial structure, which makes them to suit perfectly. On the other hand, if you are having a square facial structure which generally means that your jaws and cheeks are quite defined on both side of the face, rounded or oval glasses will suit you the best. The eyeglass frame with a bit of rounded edges will be the best for you, however again it also depends on your taste in regards with colour, shapes and design. Besides, if you are having a square facial structure than you must never go for small rounded frames which end around the corners of your eyes as they will make your face a lot of fuller. Choose the ones with edges which extend its way to suit perfectly on the square facial structure of yours. Besides, whether it is round or square face, thick frames works best to make your face look slim. It is also advisable that never to go for extremely thin frame glass frame with rectangular shapes as they will only make your face appear larger.

Wednesday, September 26, 2012

Fig trees, Mums and Boxwoods

I thought it would be hard to find plants that I like this time of year, but I'm learning there are all sorts of pretty plants available right now. And so many great prices!

I've always appreciated big bouquets of carnations and huge orbs of mums. They are not particularly impressive flowers on their own, but they can make a big statement in large quantities. I bought two of these huge purple mums bushes from Home Depot a couple weeks ago and they are making my not-yet-touched back deck so much prettier. I love seeing the bursts of lilac while sitting in my living room. (the astroturf - not so much!) :)


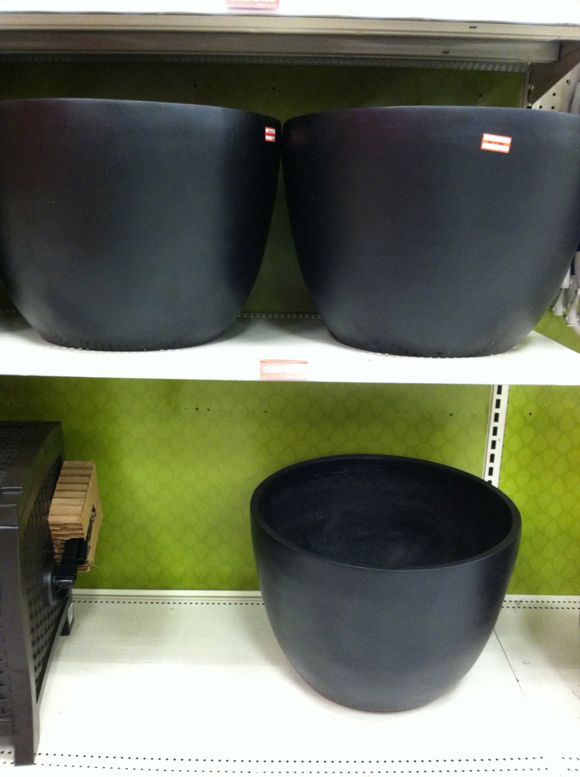
Target is having a huge sale on all their outdoor items. I bought a ton of stuff like hoses, a sprinkler, gardening gloves, and two of these giant black planters for 75% off. I love their modern shape and matte finish.


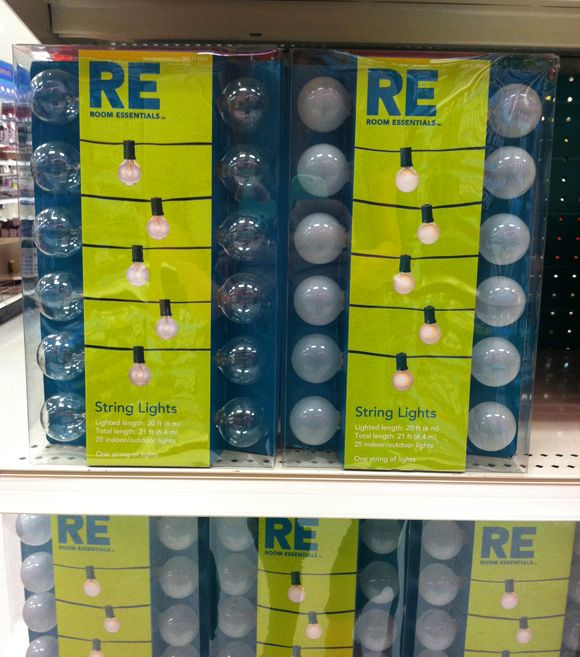
I also cleaned out their string lights section. These were only about $8 a box! Such a steal.


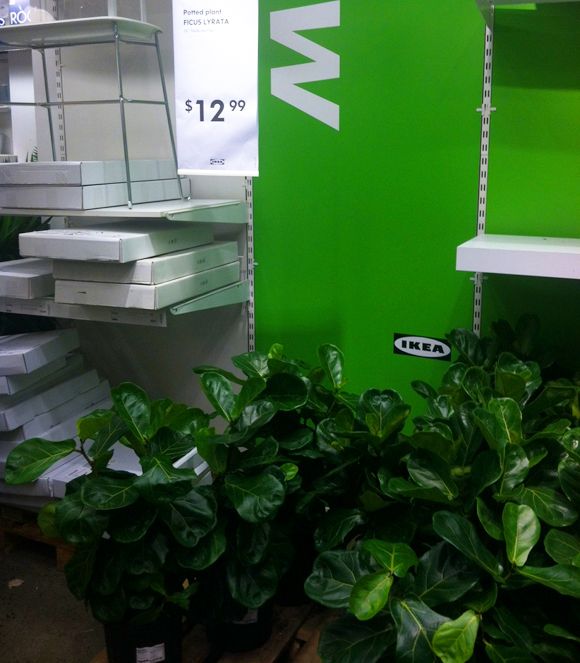
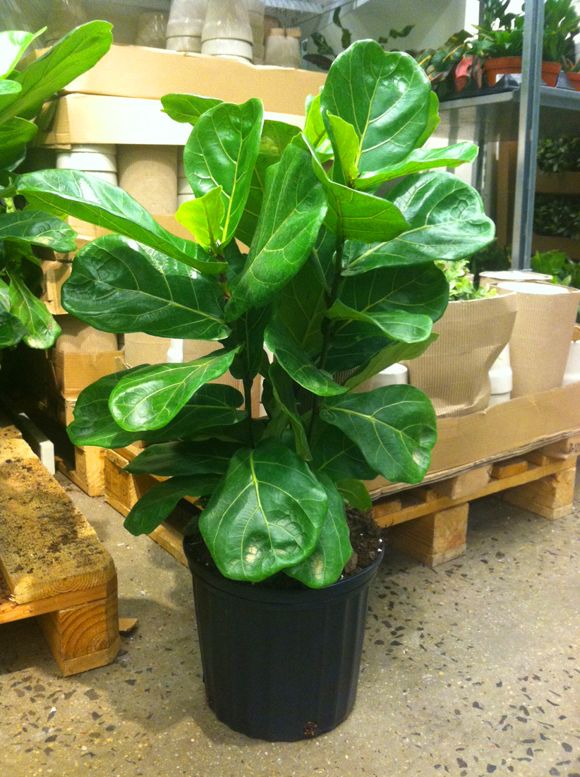
Also, if you've been trying to secure yourself a fiddle leaf fig tree and don't want to drop $250 on a mature tree (like the flower shop on 28th St is asking!), why not buy a small seedling from IKEA for only $13?


I bought two (along with a pair of their pretty, large terracotta pots) to also sit on my back deck. They'll stay out there for another couple weeks until it gets too cold and then I'll bring them in.


Tomorrow, if I'm feeling well enough, I'll be planting some some dwarf boxwoods I picked up at Home Depot for $12 each. They're so pretty and I get such a kick out of keeping them all trimmed up. :) I bought a pair of full size boxwoods for the front stoop as well. I'm thinking of trying to shape them into squares? You have no idea how much joy all these silly things bring me. :)


What are you up to in your yard these days? Is there anything I should be doing now to prep for the winter? Help this first-timer out!

Tuesday, September 25, 2012

Limiting Your Medium

I started the draft for this post a while ago and never got around to posting it. Before I got sick we pumped out a lot of yard projects (photos to come!), and I had this post in the back of my mind when I made some of the plant choices. Here's the old post...

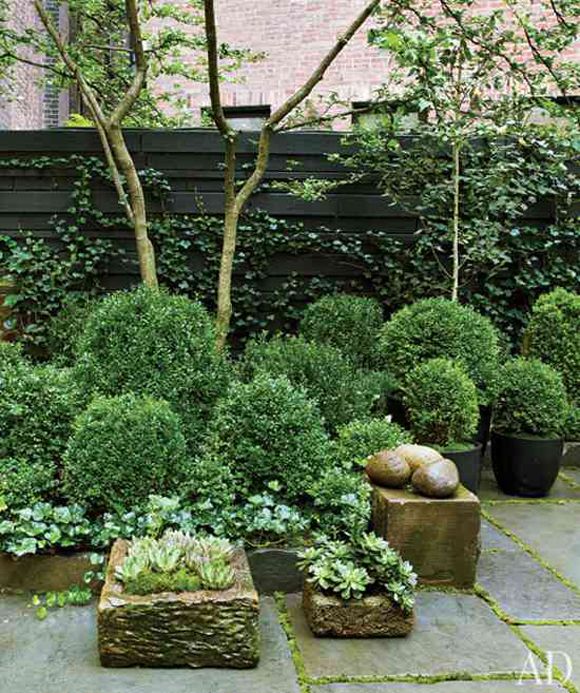
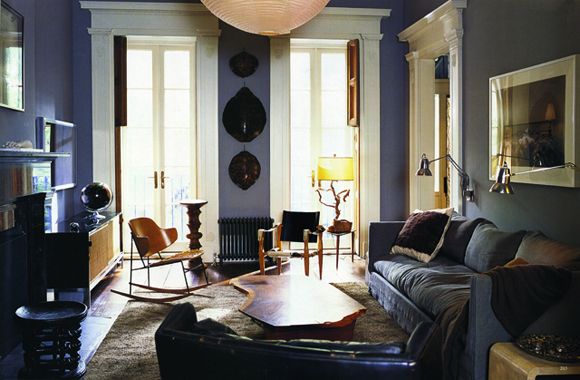
Someone commented here to remind me about Julianne Moore's lovely new landscaping of her West Village brownstone. And then I was chatting with the lovely Joslyn (who was on the SF trip last weekend) about how awesome her yard is. Simple. Artsy. Pretty easy-care. This might be the right approach for us busy ladies.


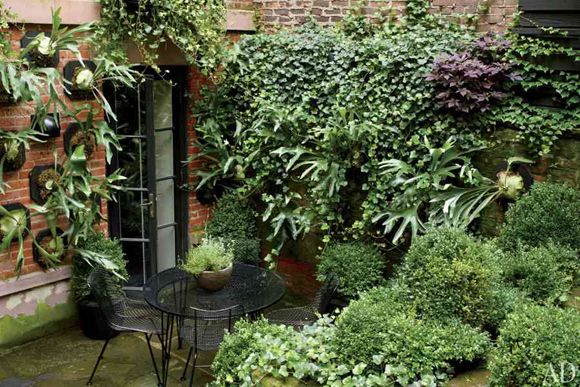
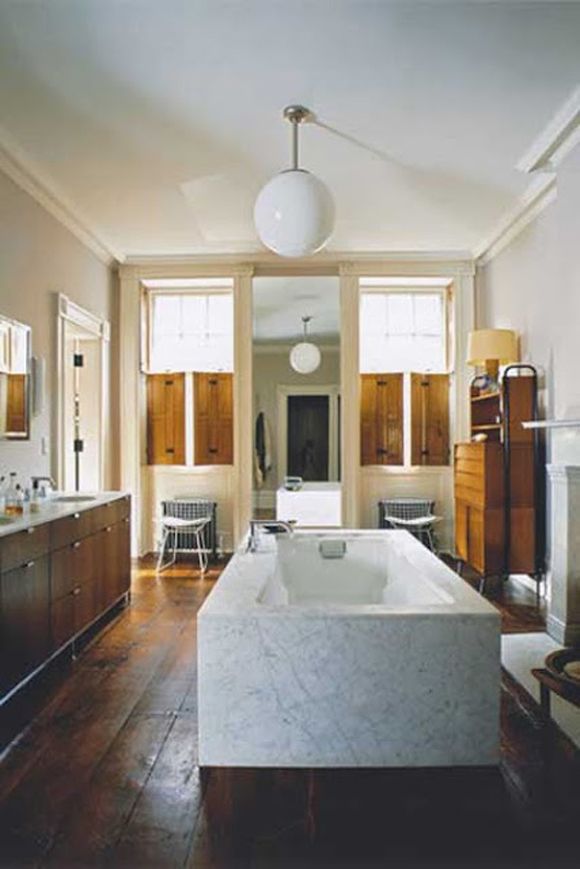
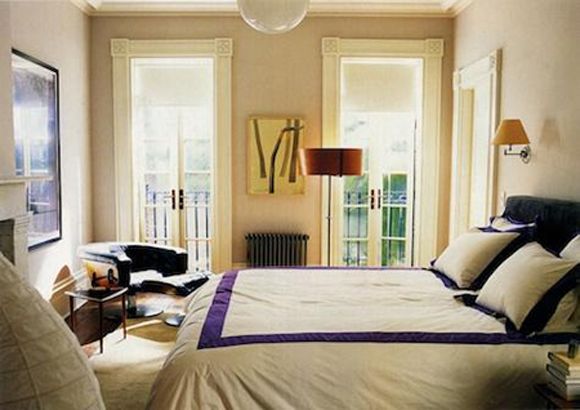
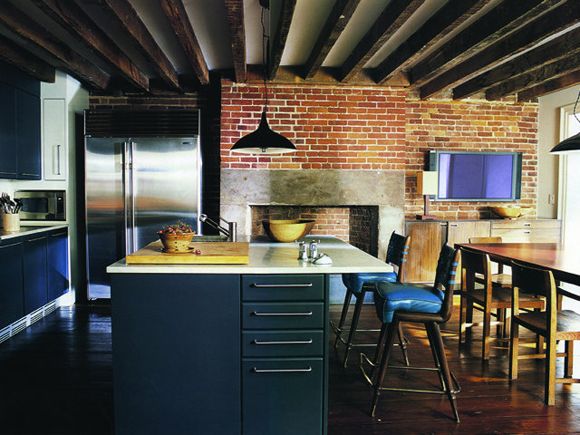
So I pulled up the article from Arch Digest on my flight home Saturday night. The photos really are cool (Her whole house has a great vibe - I've included photos from other shoots here, too).


I was super fascinated with this part of the article where Julianne mentions that she only wears and decorates with a handful of colors. She won't buy it or bring it into her home unless it's white, black, gray, green or purple. At first I was like...huh. But the idea has stayed with me all weekend.


Wasn't it was Matisse who talked about how the beauty of art comes from the struggle of an artist and his limited medium? I think the idea works in designing a home.


As a decorator who usually uses a lot of color, I think I'm making my life harder by not limited my color palette a little. When there are infinite choices, it's easier to make a misstep.


Although, let the record show, I am not usually in favor of matchy-matchy rooms and I think what we're talking about is a very different approach. The key here is to vary the shades and tones of similar colors.  Use peach and tangerine colors rather than the same bright orange on every accessory. Try mixing sky blue with cobalt. I doubt Julianne's house is filled with the exact same shade of plum over and over again. It looks like she mixes plum with dusky gray lavender and deep burgundy, which feels lovely and warm.

What are your thoughts about limiting the color palette in your home? Do you love for things to match in your home?

A Brief on Contact Lenses

Contact lenses or also known as simply as the "Contact" are lens that are placed on the eyes. The moral idea of designing the contact lenses is to replace the numbered glasses that people used to wear for better vision.

History
If we go into history of contact lenses, the idea for lens was first presented by Leonardo Da Vinci where he described a method of directly altering the corneal power by submerging the eye in a bowl of water. However, he never suggested his idea further. Later many researchers did their research in creating the perfect lenses. However, amongst many the Adolf Gaston Eugen Fick was successful in constructing and fitting the first successful contact lens in 1887.

How Do Contact Lenses Work?
Contact lens is placed on the top of your cornea where there is constant supply of tears (water from eyes). They are also rested in a place where they are firmly hold from the pressure exerted from the eyelids. They contacts are driven away slightly and moved smoothly over the cornea when a person wearing the contact lenses blinks his / her yes. This reaction is caused due to the pressure from the eyelids in which the contacts are placed. The whole process allows the water between the eyes and lens to gently flush out the dust particles, which may have been accumulated itself in the eye.

This is how the contact lenses stay on the eye, and allows us to get a correct vision. However, the way that how the contacts are able to provide the correct vision, or perhaps what involves that allows them to provide the correct vision is a different story.

Contact lenses are prescribed by ophthalmologist (commonly known as eye specialists) to a wide range of individuals who have problems with their vision associated with near-sightedness, farsightedness, astigmatism and presbyopia. The individuals suffering from these conditions have problems with their retinas as a result they are not able to properly focus on the light. When the retinas are unable to focus properly on light then it results into improper or blurry vision.

Every pair of contact lenses is made differently and uniquely depending upon the condition of eye that they are trying to correct. For instance if a person is suffering from farsightedness than the ophthalmologist will measure the cornea and will design a specific lens that are made precisely to fit in his / her eye. In the end, a pair of this lenses is made that fits perfectly into one's eyes that direct light rays to the one place on the cornea, which ultimately corrects your vision.

Sunday, September 23, 2012

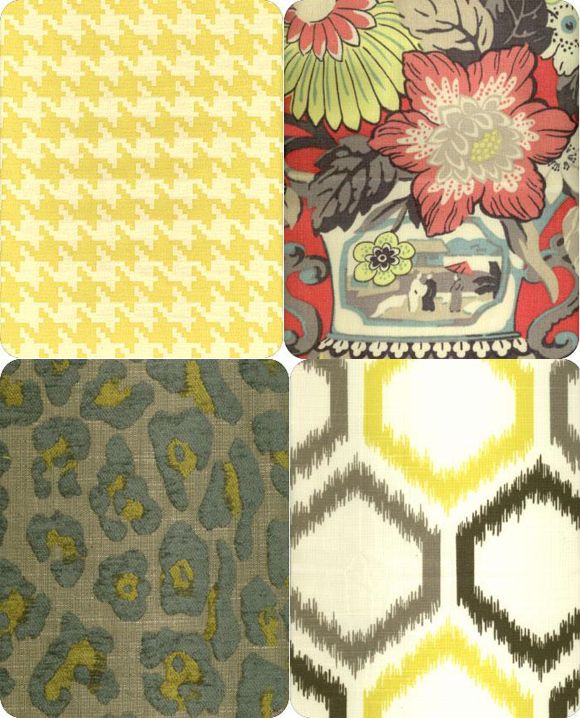
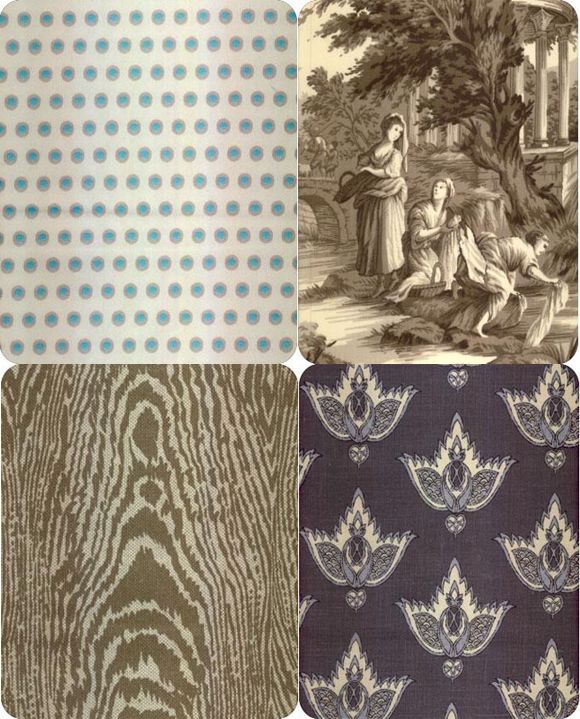
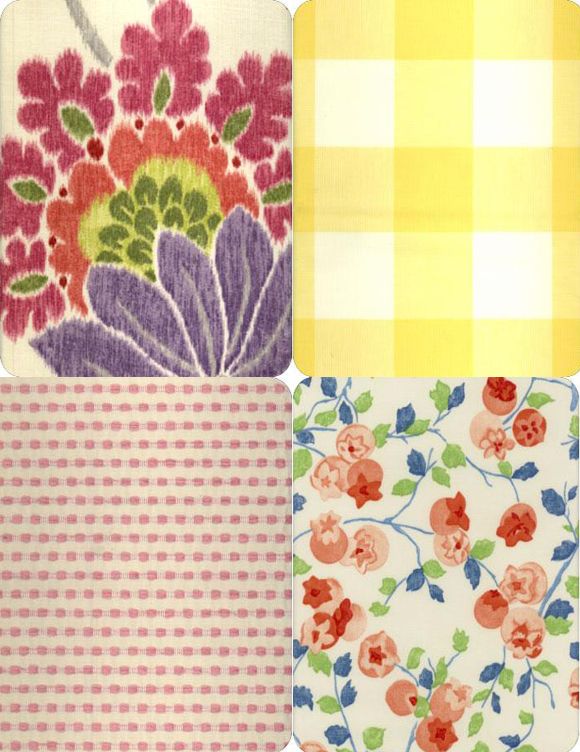
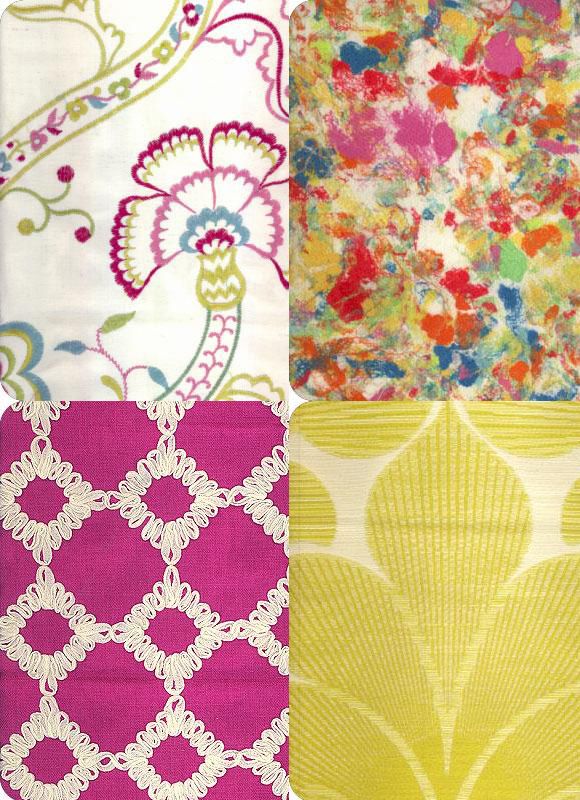
More Pattern Play (and $100 L&S Give Away!)

L&S Fabrics is giving away another $100 gift certificate! (Also - did you hear they are running a sale through the end of the month? 20% off with the coupon code LSFABRICS FIRST) They have some really awesome new fabric patterns, most ranging from $10-$35 per yard. It was easy to pull together fabrics for a whole imaginary house (I used my pattern-mixing formula).

I like more neutral fabrics for this imaginary living room. Maybe a colorful rug, or some fun accent pillows? With neutral base fabrics, anything goes. PS I will always love a buffalo check!


I thought these colors would be fun for a dining room. They seem so cheerful. And if you haven't seen the full repeat of the coral floral in the upper right, check it out here. Gorgeous.


The family room in this house would also be pretty neutral. I love toile for curtains, because the pattern is less intense and obvious. I like the gray variations in this one - it looks like an expensive Schumacher pattern. And wouldn't that faux bois pattern be great on a pair of arm chairs? It's a like a modern take on the traditional lodge/man den look.


For a sweet, feminine nursery, I would mix some large and small-scale stylized florals with some fun check and dots patterns.


For a little boy's room, how awesome are the anchors? The hits of dark charcoal keep things from going too sweet.


Oh man. I just ordered some of this abstract-like fabric for pillows, and I'm hoping it's just as amazing in person. I love it.


All fabrics, and so, so many more, here on L&S.

For a chance to win $100 gift certificate (new drapes? pillows? an upholstery project!?), please leave a comment on this post and share what you would purchase with the $100. The contest closes this Friday at midnight and the winner will be chosen at random and emailed. Good luck!

And don't forget the 20% off coupon code, good through the 30th! LSFABRICS FIRST

Contest is closed and the winner will be emailed (so check your inbox!) Thanks for playing!

Friday, September 21, 2012

Thank You

Hi friends,

Thank you all, from the bottom of my heart, for all the well-wishes, comments, tweets, texts, emails and phone calls. I feel surrounded by your love and support.

I am home now, kissing and holding my little ones, feeling so thankful things didn't turn out worse then they did. I'm hoping once I'm recovered I can just forget about this whole experience! Not fun. I will say this though - Please, please, please check and see that you are up to date on your Tdap vaccination. I thought I was close to current, so didn't worry about it when I was scraped by a rusty fence recently. Take my word for it that you never want to experience Tetanus, and of course we want to protect little ones from Pertussis, which is also covered by the vaccination.

I've got a back log of projects I haven't posted about yet that I'll be sharing next week while I'm recovering, so please come back Monday for regularly scheduled posting.

Thank you again. Big hugs to you all.
xoxo

Tuesday, September 18, 2012

Update on Jenny

Hi, guys. On Saturday Jenny was admitted to the ICU for tetanus poisoning. She is hanging in there and getting a little better each day but could use your good thoughts and prayers right now. She thinks she'll be back and at it in no time, but we appreciate your patience and support while the realities of the situation play out. I'm sure she'll want to post an update as soon as she can in the next couple of days. I assume it will include a PSA on keeping your tetanus boosters up to date!

Thank you all so much for all the love and continued support you've shown Jenny throughout the years. You all mean a lot to our family.

Michael

(At least her room has a great view...)

Friday, September 14, 2012

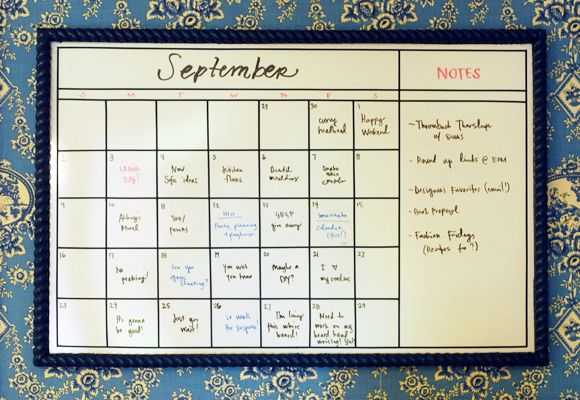
DIY Whiteboard Calendar


This content series is in partnership with smartwater. smartwater, simplicity is delicious. Click here to learn more.
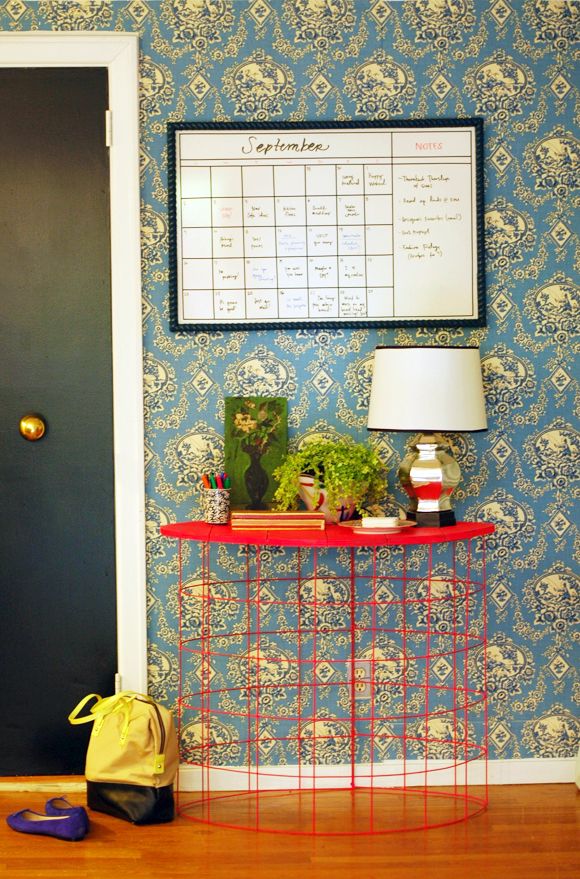

I always think it's a good idea to go out of your way to do or buy things that help you stay more organized and on top of your life. We've been chugging right along with these home projects, but for the past couple of weeks, the office has been a bit neglected. It's frustrating that we finally have a dedicated, more private space to use as a home office, and we weren't really enjoying it! Earlier this week I took a stand and started decorating without any forethought. It was actually really fun to just work with what I had on hand.

One thing that I decided I really needed and wanted this go-round was a calendar whiteboard, but just for my blog posting scheduling. It's so helpful for me to plan out posts this way - it helps keep me on top of projects.


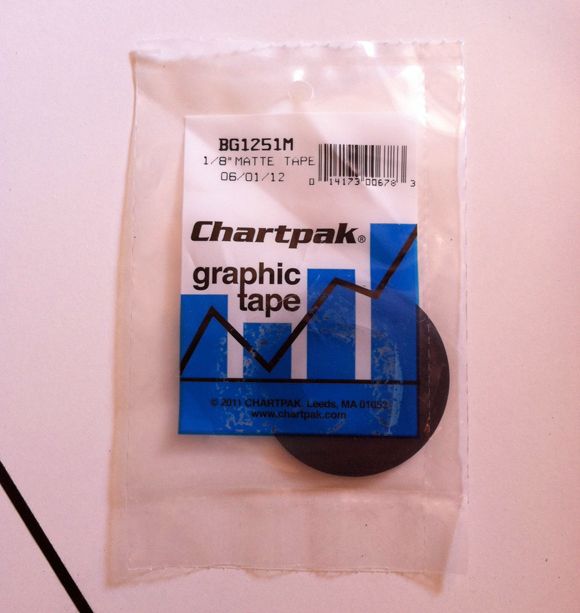
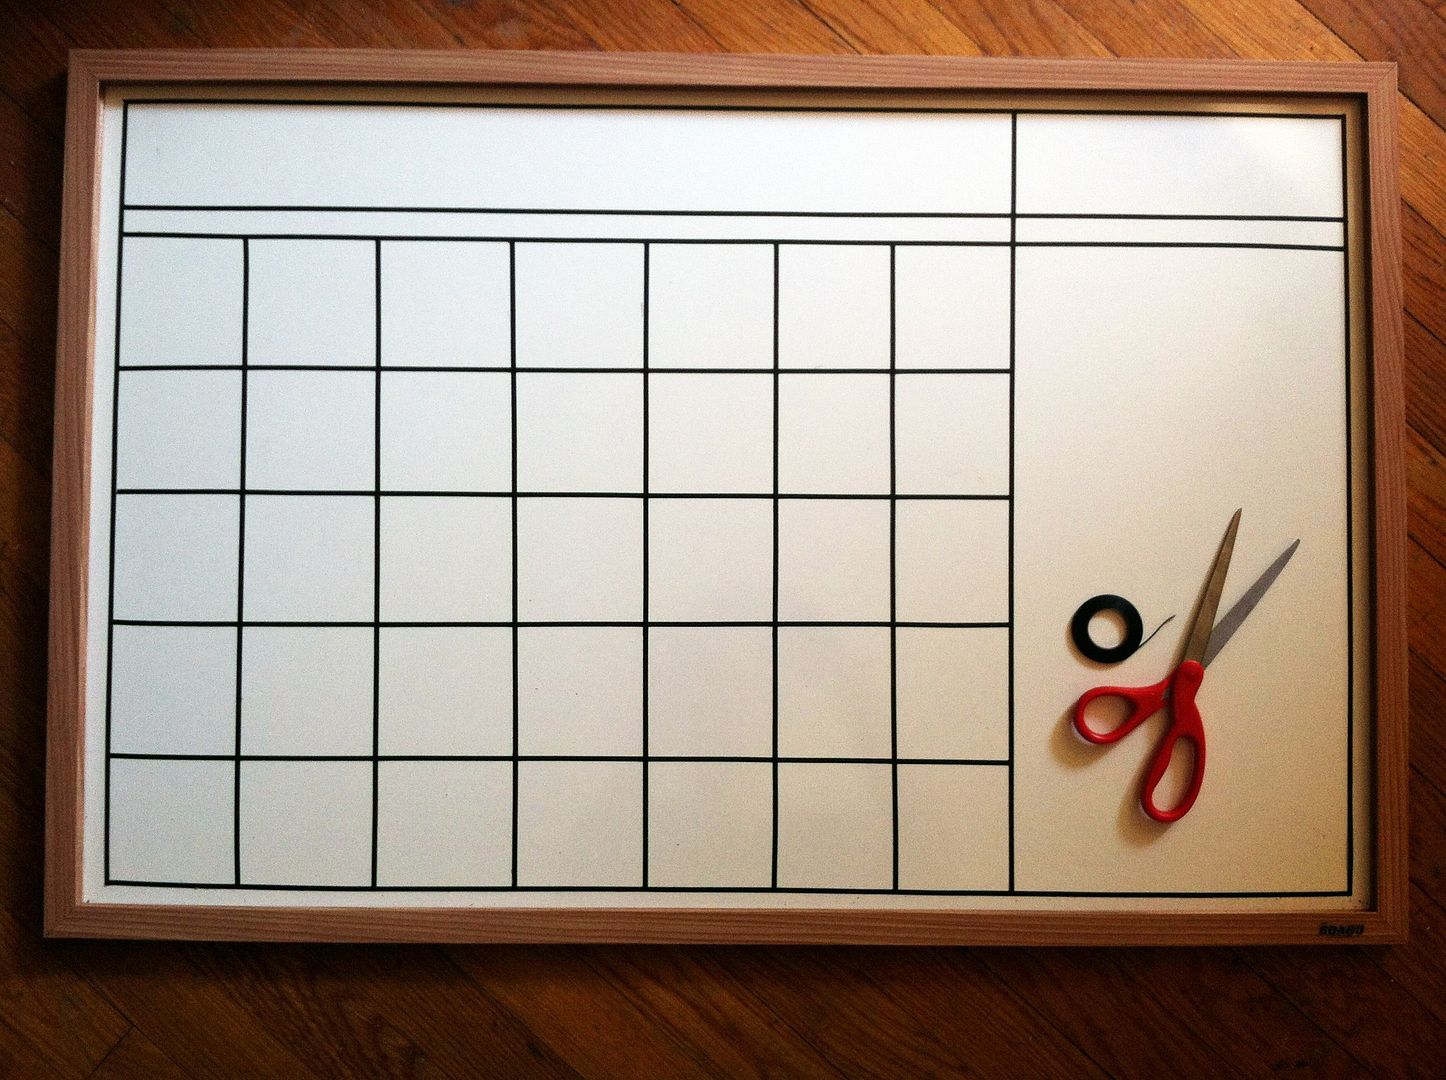
I looked around for some simple pre-printed calendar whiteboards and there's not much of anything I liked, so I decided to make my own. I used this whiteboard and it is really good and incredibly cheap. I also used two rolls of this tiny chart tape.


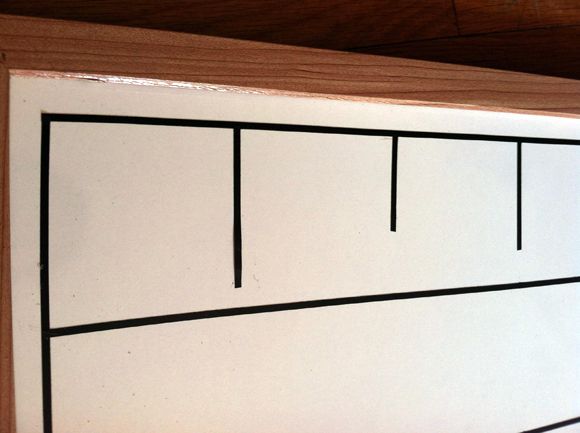
It's 1/8" wide and it's super easy and really fun, actually, to work with. I had grand plans to mark everything out and use leveling tools, etc. But the tape sort of took over before I had a chance to be responsible about the thing! It's just so easy to use, I ended up eyeballing it all! Cutting small strips of tape to help mark out the spacing first helped a lot.


It's not perfect but I don't mind. The tape is totally repositionable, so I can fix it later if I want to.


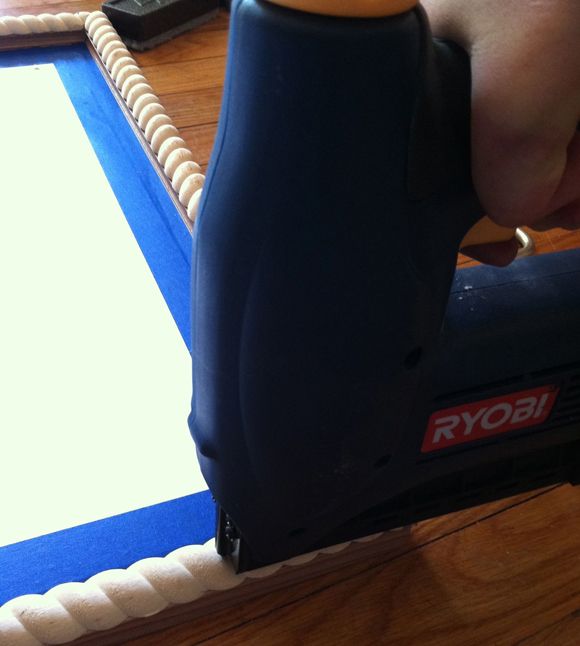
I like the way the tape turned out (I wanted the design there to be very simple), but the frame was sooo boring. I had my miter saw and my brad gun handy from all the moulding we've been adding in other parts of the house, so it was easy to add trim to the existing whiteboard frame. If you don't have either of these tools, a hand saw and some finishing nails work just fine! I used the pretty rope moulding I've always loved.


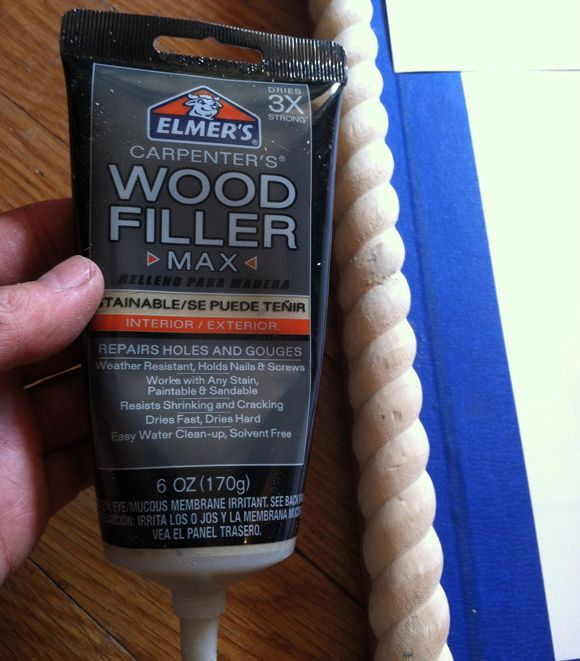
Once the moulding was cut and nailed, I filled the nail holes and corner gaps with this amazing, new-to-me wood filler. It is thicker, and just plain awesome. Recommend!


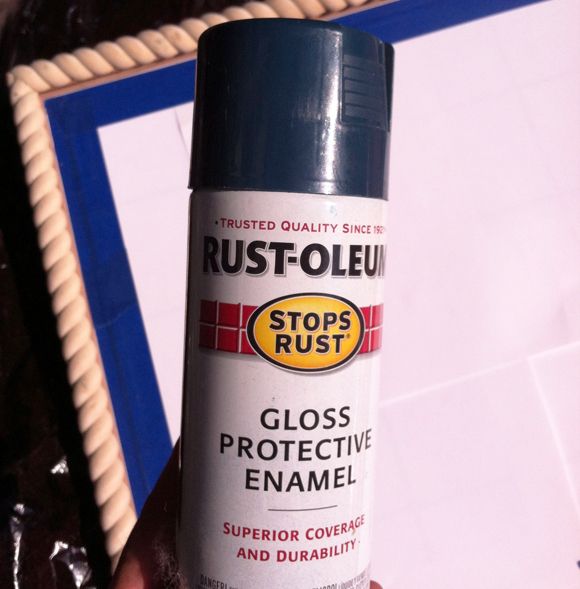
I sanded down all the trim once the filler dried, papered and taped the whiteboard, and then sprayed the frame with one of my favorite spray paint colors - Night Tide from Rustoleum. I'm sad it keeps looking black in all these photos. In real life, the color is a moody, deep forest/peacock blue color. I love it.


I let it dry and off-gas for about a day and then hung it up in my newly spruced office. I'm feeling 100% more organized already.

Going forward, all I have to do each month is fill in the date numbers, and then brainstorm what posts will go live when. It's so helpful to have the reminder up on the wall where I will see it every day. I'm such a visual person that writing to-dos and seeing lists in front of me is pretty much a necessity. I'm thinking of making one for the girls room, too. I know they'd get a kick out of keeping track of soccer games and ballet practices.


What do you do to keep your family or your business organized?