FREE DOWNLOAD PICTURE
MORE INFO ABOUT NOTEBOOK
Showing posts with label House Tour. Show all posts

Wednesday, January 4, 2012

Room Tours: Kristin Lutz's Living Room

Kristin Lutz is a decorator based out of Traverse City, MI. I love these photos of her living room she shared with me. Enjoy!


This is my favorite Oly Studio couch that I got at half price 5 years ago. Now it's on their site for 3x as much. Still love it and have recovered the cushion once in Osbourne and Little fabric. The fun pillows were purchased on etsy.


This was a flea market chair recovered in a david hicks for Lee Jofa fabric. The lucite table was $125 at a local resale store.


Here is my other sofa with its Etsy pillows. I always keep all the big pieces neutral and change out the accessories to keep the look current.


Scalloped lucite side table is from The Paris apartment website, which is chock full of inspiration. And I was just at the Viceroy in Santa Monica, so I am obsessed with greyhound statues. Kelly Wearstler is my design idol and this year, I'll see and stay in 3 of her hotels. They are amazing.


I love this Greek key side table!


This is the view from our kitchen...


I love my sconces!!


I bought the hide rug online. And the coffee table is from HSN by Nate Berkus.


I filled this little niche with a flea market cabinet I painted white and wallpapered the doors with a Thibaut pattern.


Thanks for having me, Jenny!


Monday, January 2, 2012

An All-Time Favorite

I've always loved seeing images of Ivanka Trump's old apartment floating around the web. Her home was featured in both In Style and House and Garden in 2007. I hunted down the old In Style magazine on eBay that had some of my favorite shots from her place. It's so fun to see the details!


I wish there were more photos of this stripey Empire sofa on the left here. And I'm loving the small gold detail on the lamp shade! Gorgeous.


Ivanka says in the article that she decorated the apartment by herself, but I remembered reading in the House and Garden issue that (one of my very favorite decorators) Emma Jane Pilkington did it? Either way, the apartment is beautiful. Classic, but young.


If Ivanka didn't use a decorator, she sure has an amazing eye for details. Look at the design on her brushed silk curtain panels.


I love this room with its library ladder. The blue is so pretty. I've seen other photos of the space and the color is actually much deeper and brighter in reality.


I love the punches of red in each room. Red is such a great, energizing color when used in tempered doses.


The bedroom looks pretty chill from this shot...


But then, BAM! Check out the dresser/mirror/lamp combo down at the foot of the bed. SO GOOD!!

(House and Garden)

Her dining room in In Style was pretty enough. I liked the turquoise chandelier, though it seemed small in this shot...


But this version of her dining room is A-mazing. The chandelier fits right from this angle and the scale of the art is much better here. She framed a vintage Hermes scarf.

House and Garden

(via Flickr, not sure of the original source)

Here's a close up of that super crazy-good lamp with the red lacquered shade. Maybe she has a pair of these lamps and one still lives in the bedroom? And check out the ribbon on the bottom of that armless sofa. Home girl loves her trims. Almost every upholstered piece in the house is trimmed out which makes me think Emma Jane definitely helped decorate.


Ivanka's home pulls off my favorite look so very well - traditional furniture, modern art, quirky accessories, great lamps. It's a fool-proof recipe, really. I mean, look at this Napoleon - great colors and what a conversation starter! And how beautiful are those crystal candle sticks? Such a lovely little collection.


Don't you agree this apartment will still look fresh 20 years from now? It's a favorite for sure.

Monday, November 14, 2011

Living Room Tour: A Little Glass Box

I'm so excited to start sharing some of these beautiful living room tours with you! It makes me so happy to see real homes, filled with affordable AND beautiful furnishings along with lots of great DIY projects. I hope your as inspired as I am by these lovely bloggers!


First up is Courtney from A Little Glass Box. Here she is, sharing her lovely rowhouse living room with us...


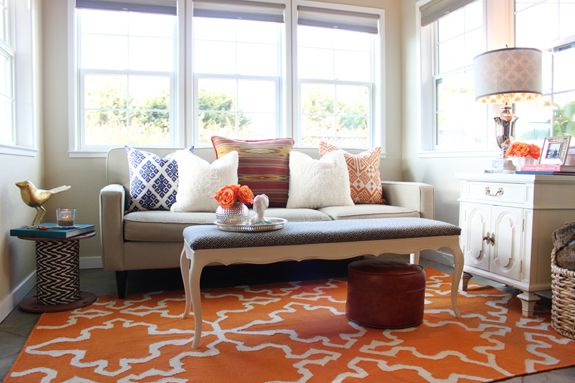
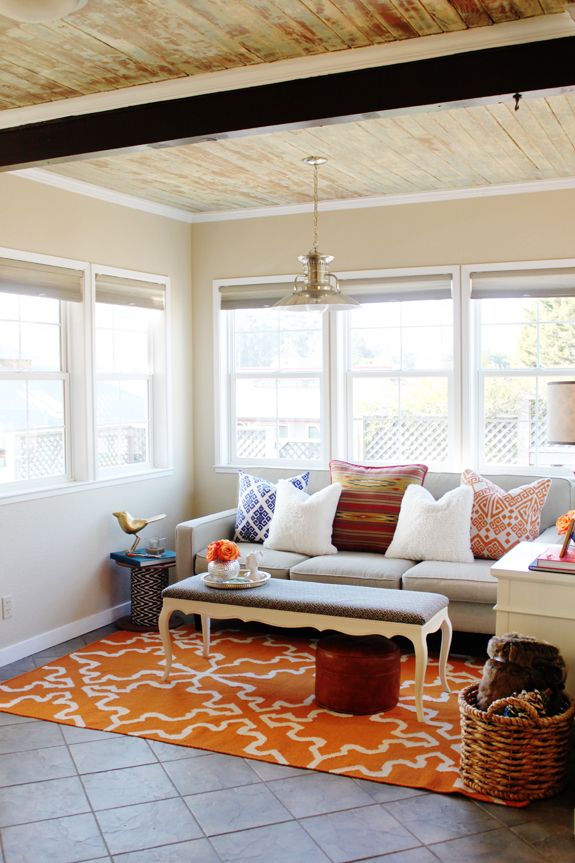
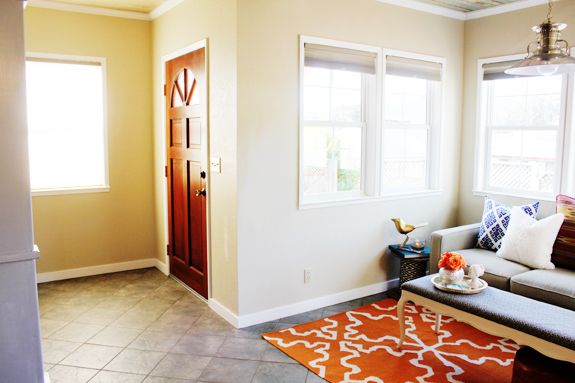
This past summer we moved from the East coast to the West coast. Coming from a 105 year old row house in Baltimore I was used to decorating small narrow spaces, but this rental house presented me with quite a design challenge. The living room is only 9.5x8 with three walls of windows. I immediately knew it would be difficult to incorporate color and texture without the help of wall art and the space for multiple upholstered pieces of furniture. However, I didn’t let this challenge deter us because this little house may be smaller than we were used to but it packed a lot of visual punch. The rustic wood ceilings were the original floors of the house before it had been rebuilt and the gorgeous light poured in from the windows making it impossible to do anything but embrace this space. Decorating it has been a labor of love but worth every minute because it has taught me a lot about using every inch of space.


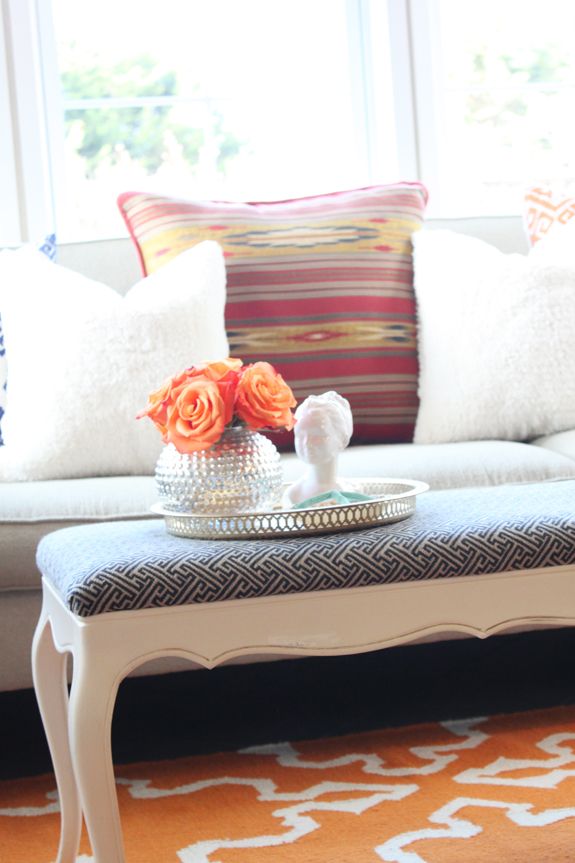
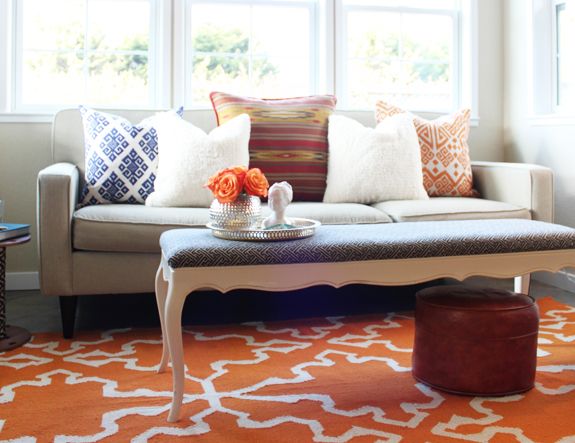
I purchased our couch from Macy’s in 2010 which is the perfect neutral jumping off point. We were worried that it would look too green against the grey stone flooring but it fits in perfectly with the help of the Dhurrie rug from West elm in Sorrel. The bench I am using as a coffee table is actually a craigslist find that was in some rough shape. With a coat of Rustoleum spray paint in Navajo white and some new fabric purchased from Calico Fabrics, I was able to give it new life.


The room gets its rich layer of color by mixing different patterns of pillows and I am able to still enjoy some of my art work by hanging it lower than normal and in an unexpected location.


The ‘spool ‘side table was actually made from an electrical wire spool that we nabbed for free from home depot after all of the electrical wire had been sold. We stained the discs with Behr’s semi transparent stain in Sable. It is wrapped with a bathroom rug purchased from West Elm to look like thread on the spool. It is one of my favorite pieces in the space. It is the perfect side table as well as some extra seating or book holder. In such a small space it is necessary for items to serve more than one purpose.


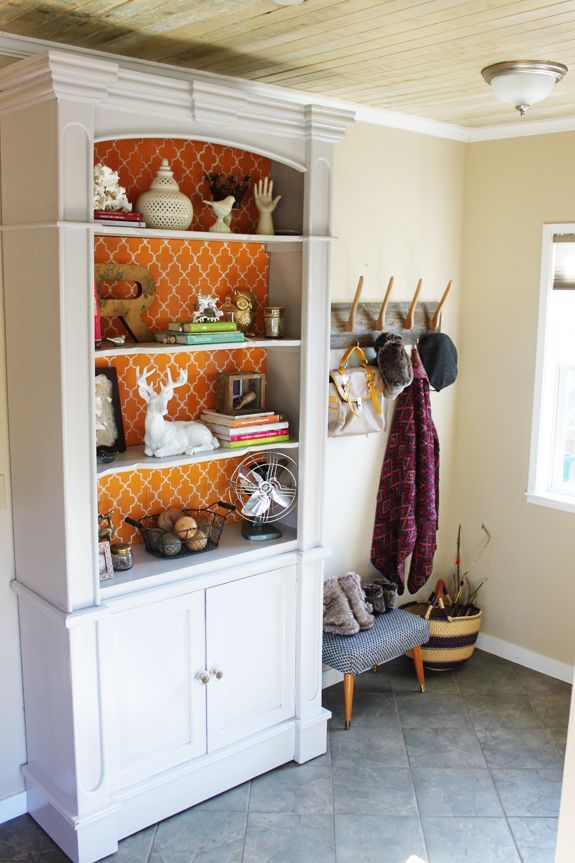
This room also opens up to our entry way which meant that I needed to use this space to not only set the tone for the house once you walked in, but to act as our own little mudroom while looking pleasing when sitting in the living room.


I repurposed a hutch that was in our dining room in Baltimore and transformed it into decorative shelves by painting it Martha Stewart’s chinchilla grey and creating cardboard backing inserts with a pattern to mimic the look of wallpaper. It’s a great piece to hold my collections and also stores practical everyday items in the cabinet below.


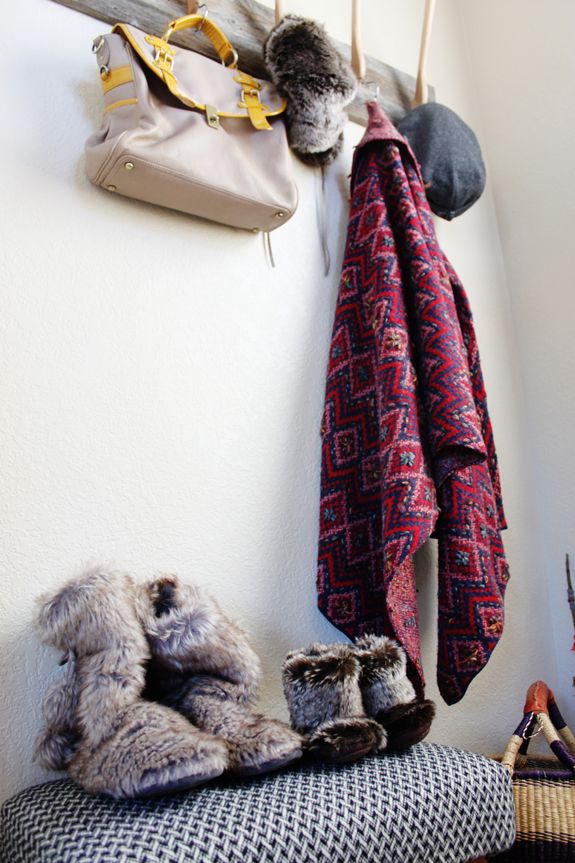
Because we don’t have an entry closet I simply added some hooks; baskets and a bench to increase our usable space. This is a trick I like to use as a previous professional organizer. My handy hubs helped me to create a coat rack out of spare wooden hangers we had laying around and some reclaimed wood. We love it. It now houses jackets, hats, and shoes for all of us, including our little man Oliver Tate. The stool was a retro flea market find that we simply recovered and it creates the perfect place to put down my purse. The basket, which is locally crafted, houses sticks and pinecones from our daily family walks.


We really have grown to love this space and it functions very well for us. It has been incredible in teaching me that the size of a room does not dictate or determine the design impact it will have or the ability it will have to make you happy.


Our design aesthetic is versatile, comfortable, eclectic and adaptable because I am always changing things around and our needs are always evolving. I hope this space can inspire others to think outside the box and explore alternative possibilities from the norm.


Sources:

Wall color is Whispering Wheat by Glidden

Corona Couch in Stone from Macy’s

Blue print pillow from John Robshaw called Ghana

Orange print pillow from Z Gallerie

Cream faux sheep pillows from last year’s winter collection at Pottery Barn

Navajo pillow from Cost Plus World Market

Dhurrie rug in sorrel from West Elm

Small Leather poof from Goodwill

Upholstered bench from Craigslist

Fur throw from Restoration Hardware

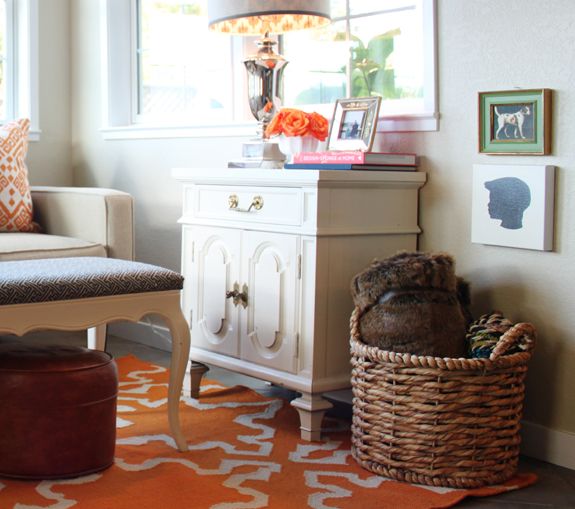
Side table from Goodwill with Anthropologie rhino head knobs

Hutch shelving in entry from Trohv in Baltimore

Lamp base purchased at Marshalls

Lamp shade purchased from Trohv in Baltimore

Mercury bubble glass vase from Marshalls

Gold tray from Goodwill

Picture frame from Homegoods

Paper Mache bird from In Watermelon Sugar in Baltimore (sprayed in Rustoleum’s gold metallic paint)

Entry way stool from San Francisco flea market

Entry hutch painted Martha Stewart’s Chinchilla grey

Stencil for cardboard inserts in the back of the hutch from Hobby Lobby


Thank you for sharing Courtney!! Your living room and entry spaces are amazing!

If you'd like to share your living room on LGN, email your submission to jenny at jennykomenda .com.

Monday, October 24, 2011

Wanted: House Tours!

I loved getting to share the nitty gritty details in Emily and Todd's house tour recently. It's so fun to hear about the thought process behind design decisions! I've been thinking that it would be really exciting to add detailed house tour posts into my regular posting schedule here on LGN.


But rather than showing a whole house in one post, I want these tours to be room-specific, sort of like the format we used with Emily's house tour. I like focusing on one room at a time so that we can get all the angles and details.


This month I'd love to feature living rooms. If you're proud of your living space and think it'd be a good fit to share here on LGN, feel free to email me a couple of your images and I'll get back to you with a questionnaire.

jenny @ jennykomenda .com

I'm also looking for project-specific submissions to share here and on my Babble blog. Look who I featured today.

I'm so, SO excited to see what all you amazing, talented, creative readers have been up to!

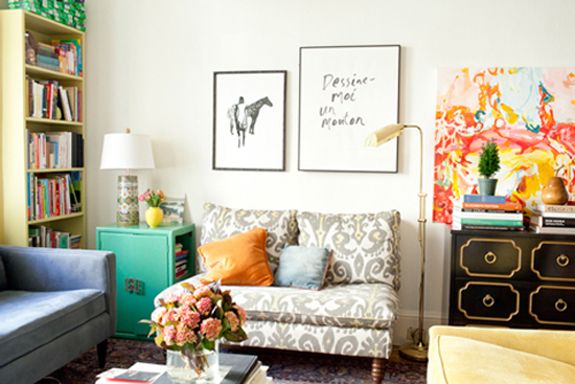
Images by Aubrey Trinnaman shared in this D*S post. Check it out for more images of Jordan's beautiful apartment, which was so fun to collaborate with her on! Everyone always wants to know where we got the ikat settee (Nate Berkus for HSN) and the drapes in her bedroom (the fabric is by Thomas Paul for Duralee) :)

Tuesday, October 11, 2011

House Tour: Play Room Under the Stairs!

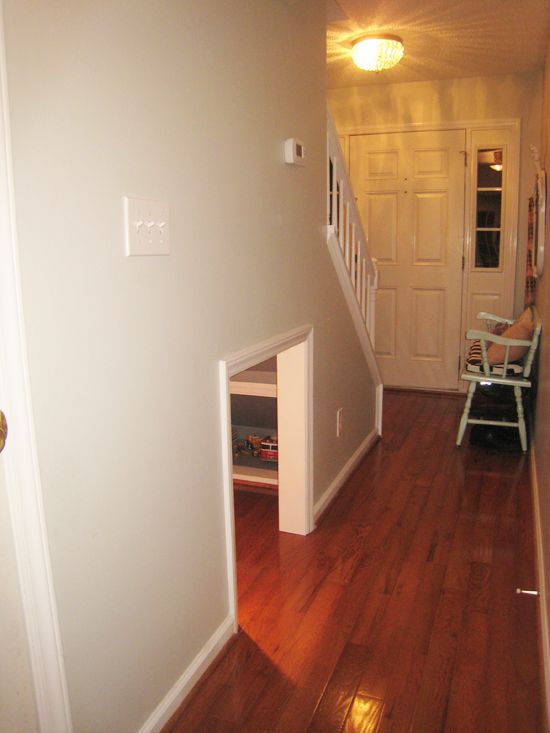
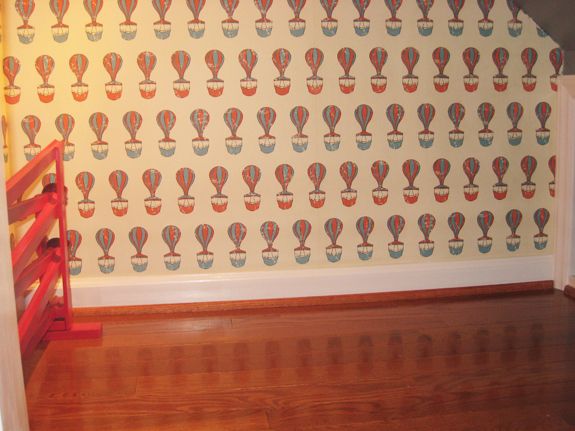
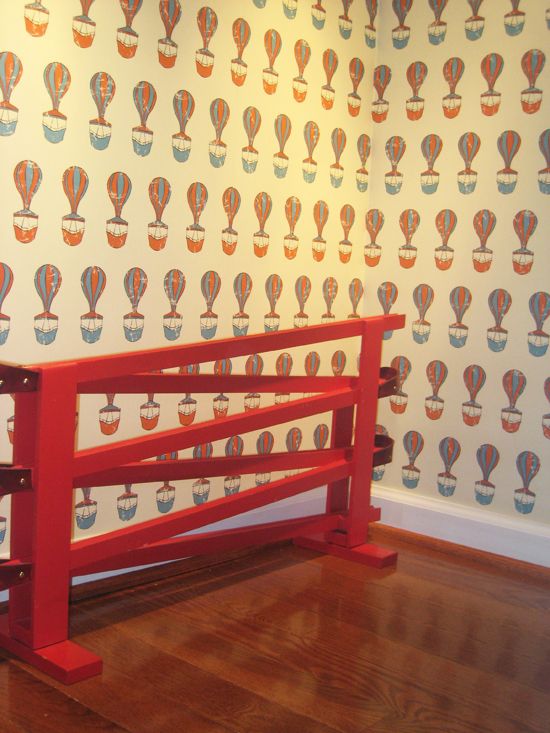
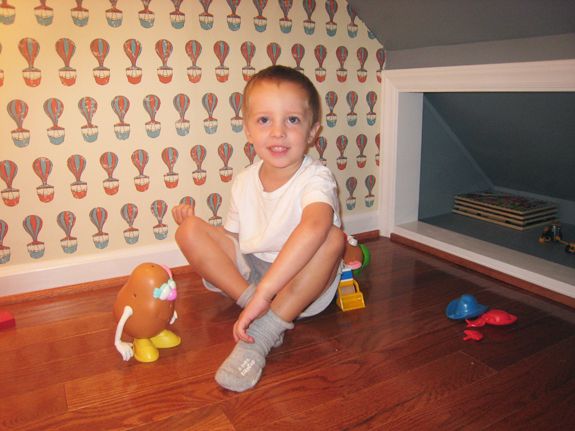
I'm sad this is the last post from Todd and Emily's house! It's been so fun to get the inside scoop on their decorating adventures! And thank you to Jessica from JJ Horton Photography for all the photos, except for the ones below that Todd and Emily just sent me here. This adorable play room is a recent addition to their home and I think the idea is genius! I would have LOVED a little play room under the stairs when I was a kid. It's wasted space anyway, why not make it useful and fun? I'm definitely storing this idea away for the future!

Here's Emily:

"When my father in law first visited us in our new home he suggested that we see what was under the stairs and build a play room. After two years of taking on other projects we never thought we could do ourselves, Todd felt ready to tackle a playroom under the stairs.


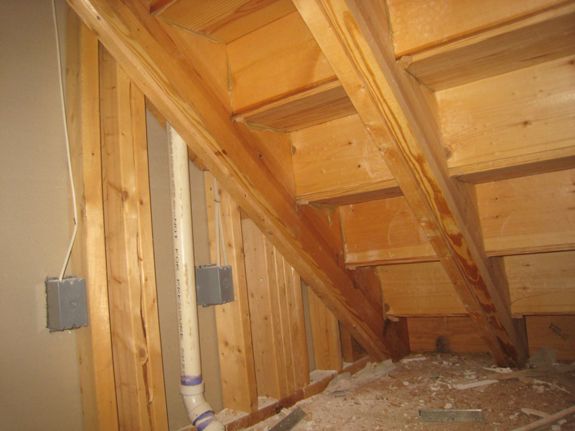
"He removed the outlet and stuck our camera through the opening to get an idea of what was under there. From what we could tell there was nothing, other than contractor debris and garbage from over 10 years ago. So we cut a hole in the wall and set in on removing a stud, installing the proper support for a load-bearing wall and began to plan the details.


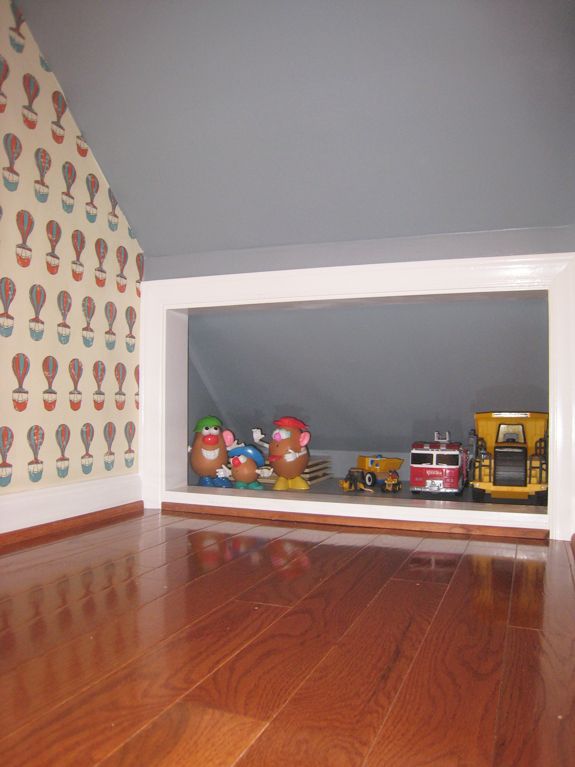
"Knowing that a small door would be too tempting for little boys and their friends to play with (i.e. slam over and over again), we opted not to put a door on this little playroom. That decision also meant that we needed to extend the hardwoods instead of using carpet. This wasn’t too hard to do since we recently put hardwoods in our kitchen to match the rest of the house and already knew what kind and color we needed. It only took one box to cover this room.


"We decided to build a cubby at the foot of the room as it slopes down into such a narrow space and we wanted to have a place to store toys and keep it organized since it is open to the hallway. We installed two small recessed lights, got all of the electrical work in place and hung the drywall.


"Imagine my excitement when Todd was the first to mention that we should wall paper the room (he’s usually against wallpaper in any capacity, but liked the idea of hiding drywall imperfections). While Todd got busy building the room, I was busy looking at wallpapers. We considered a few and since it is such a small room and would only take one roll we looked at some pricier options. We ultimately decided on this wallpaper from Ferm Living. We painted the ceiling Benjamin Moore Sweatshirt Gray to break up the wallpaper and used this same gray inside the cubby.

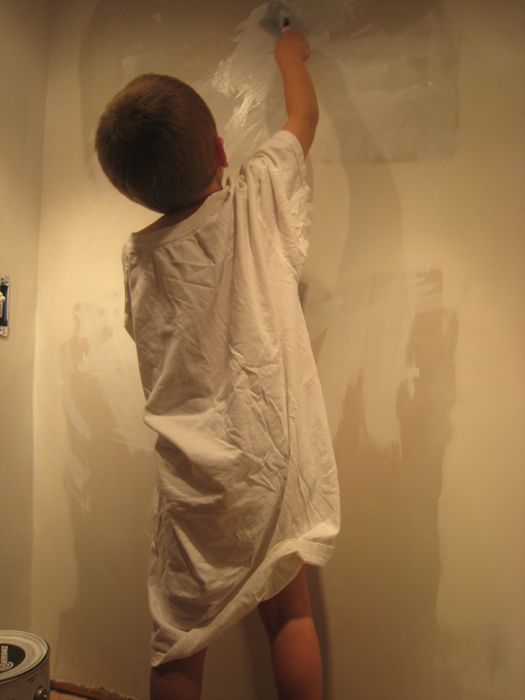
"Before installing the wallpaper we primed the walls with a water based primer which is recommended. Since Home Depot got rid of their wallpaper section they didn’t have the exact primer that we saw online so we went with a gallon of this one. Parker was able to help with this part which he was more than happy to do. I went to Sherwin-Williams after we primed the walls to buy the supplies we would need to hang wall paper. While there I found out that Sherwin-Williams makes their own water-based primer for wall paper and it comes in a quart size for about $15. I wish we had gone there first, oh well.


"Installing the wallpaper was an interesting experience. The first 10 minutes were frustrating as we tried to figure out the straight line of the wall. Walls and ceilings are never perfectly straight so you have to use a plumb (basically a weight you hang from a string attached to the ceiling) to find the perfect vertical line. You use this to make sure the first sheet is straight and then line each other piece up based on the first one. Corners are tricky (you can’t just wrap a sheet around or inside the corner) and there is a pretty detailed process involved. Thanks to some youtube videos we figured out one technique that made sense for the pattern in our paper and it worked pretty well. Of course, we picked a very hard room to wallpaper especially for our first try.


"We were surprised at how resilient the paper is. We chose a high quality paper so I’m assuming that helps but we would make creases in the smoothing out process that looked like they would never come out, but with a little reworking they always did. Overall, it turned out wonderful and I smile every time I walk by this little room which is probably 20 times a day. Parker loves showing it off to his friends and I like that it’s so close to the kitchen that I can hear the things they say when I'm in there.


"We originally planned on hanging a chalkboard that Todd built but when we put it against the wall I was surprised at how much I loved the wallpaper and didn’t want to cover it up with a big chalk board. Now, we’re thinking of making one of these so it won’t cover up the wall paper as much and doesn’t stick out in an already very small room."


Adorable right? I love that wallpaper so much. A HUGE thanks to Todd and Emily for letting us tour their house and for sharing the process of renovating and decorating a home! I think these two are a great example of how you can get a gorgeous home by spending money where it counts and saving on the other stuff.


Monday, October 10, 2011

House Tour: Emily and Todd's Entry and Laundry Room

Hi friends! I hope you had a great weekend! We're wrapping up Todd and Emily's house tour today, starting with their entry (I'm still cracking up over their chalk board message) and laundry room (so bright and FUN!). Come back a little later today for their new play room. Enjoy!

The Entry

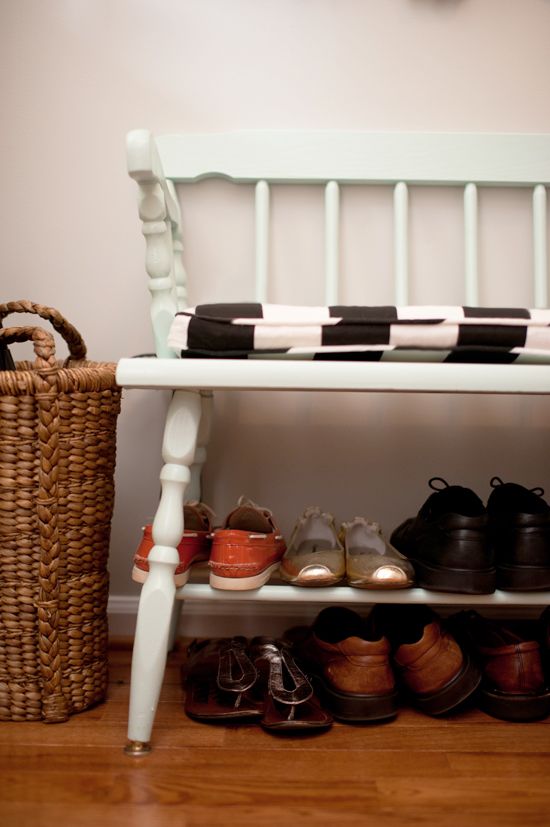
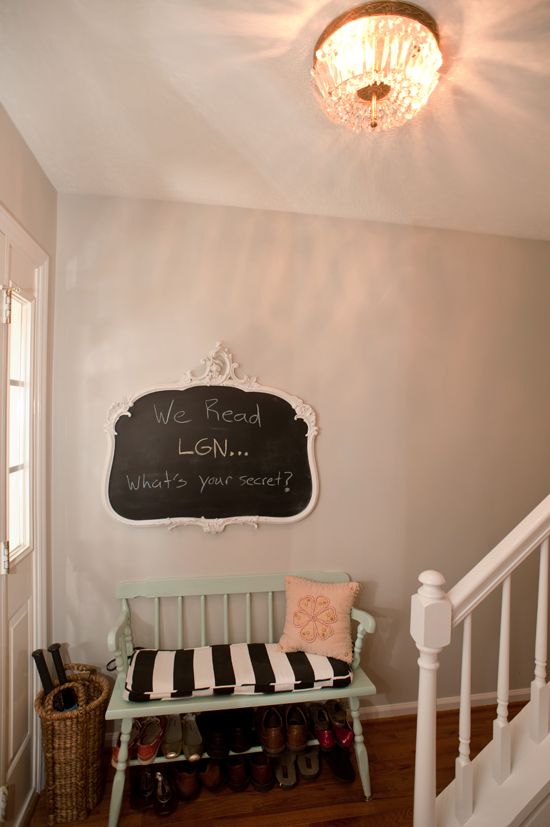
"We have a very small entry. As soon as you enter the front door, you can either go straight up the stairs, to the left and down the hallway to the kitchen, or to the right into the living room. All that would fit in our little entry was something small like a bench. I found a little antique spindle bench on CL for $80. It was originally painted black which we promptly changed to Martha Stewart Vintage Map (this color is from her old line of paint at Lowes, but ACE Hardware still had the codes in the computer).
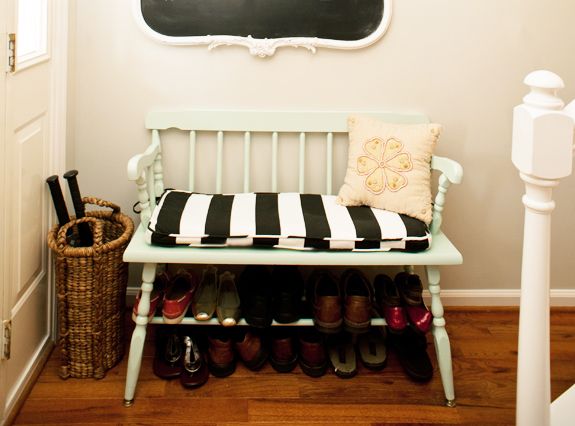

"The peach pillow is Anthropologie from about 10 years ago. I found the beachcomber basket at Home Goods for $20! A similar one is at Pottery Barn for more than a $100. We use it for umbrellas and Parker’s baseball bats. We’ve gone back and forth on whether to add baskets under the bench but ultimately we decided that we like the shoes lined up, makes it look like a real home. Todd is probably just agreeing with me on this one because he’s sick of me bringing home baskets and storage containers. I have a slight obsession with both.


"Other than the hooks in our kitchen, we didn’t have any black and white in the house so I made this bench pad using a 3 inch black and white stripe material from Premier Prints. I recently bought some laminated fabric though to make a new pad cover because every time we use the chalk board, chalk dust falls all over the pad. I’ve washed it a couple of times and every time I do the cover gets looser and sloops. But seeing this laminated fabric makes me think that I may need to re-paint the bench all together.


"After seeing and loving Christina’s frame turned chalkboard, I set out to do the same. We found the antique mirror on CL and spray painted it white. Before painting the mirror with chalkboard paint we put on a coat of BIN primer.


"I LOVE our ceiling light! I'm all about vintage crystal lights, plus we needed something that didn’t hang down very far so it wouldn’t hit the door when it opened. This one was perfect.

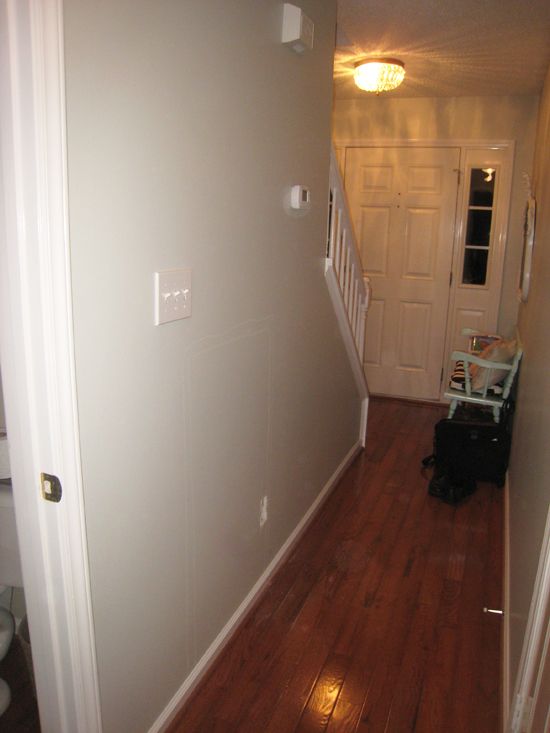
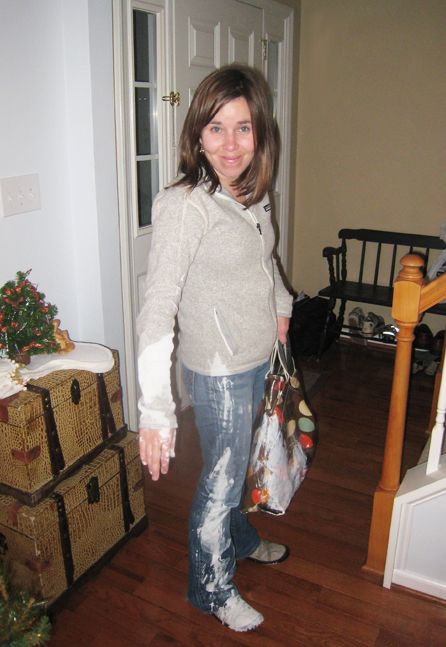
"The banister and hand rail going up the stairs used to be that awful gold oak from the 90’s, but my sweet dad painted them with white oil paint so they match the rest of the trim. (Jenny here. I'm going to sneak in this photo Emily sent me right after a gallon of paint exploded all over her at the check out at Home Depot. The paint guy forgot to hammer down the lid after mixing! Eeps! :) You can also see the before in the background here)
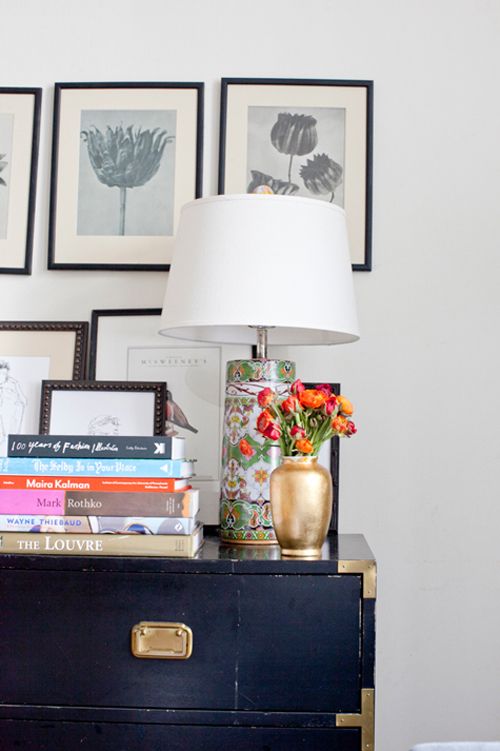


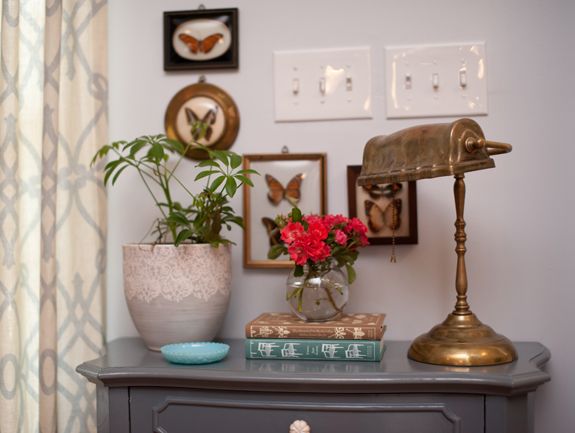
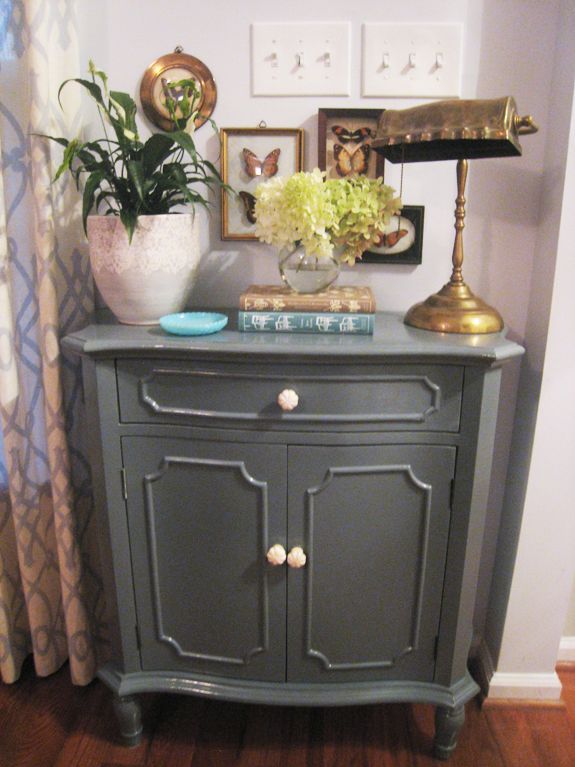
"To the right of the front door, as you walk into the living room, is a little piece I bought at Home Goods.


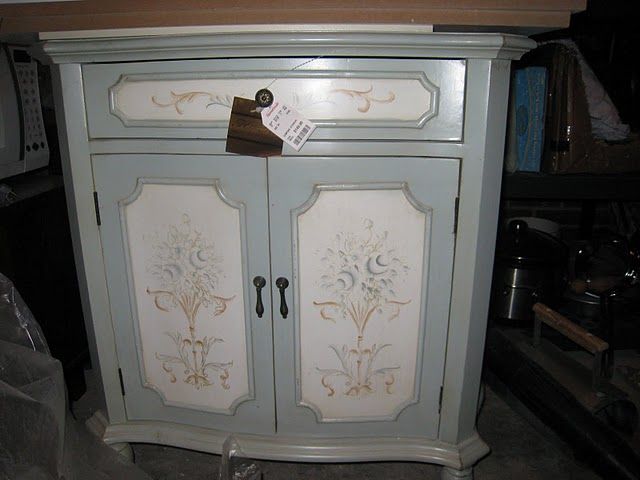
"We were looking everywhere on CL and at the flea market to find a narrow piece with storage that could go in this spot. When I saw this at Home Goods it was perfect only it had painted flowers all over it.


"We painted it Benjamin Moore Wolf Gray and added bone white knobs from Anthropologie.


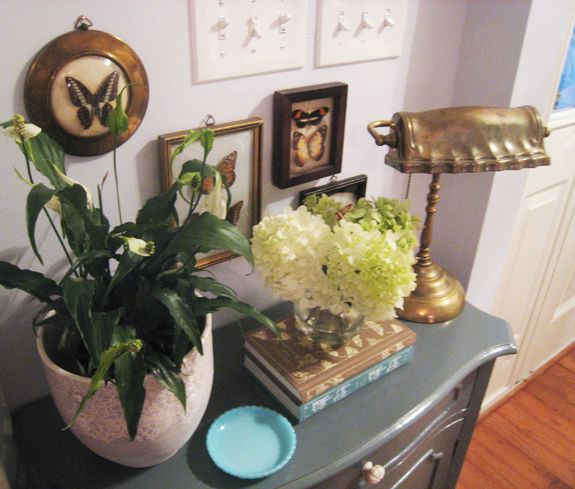
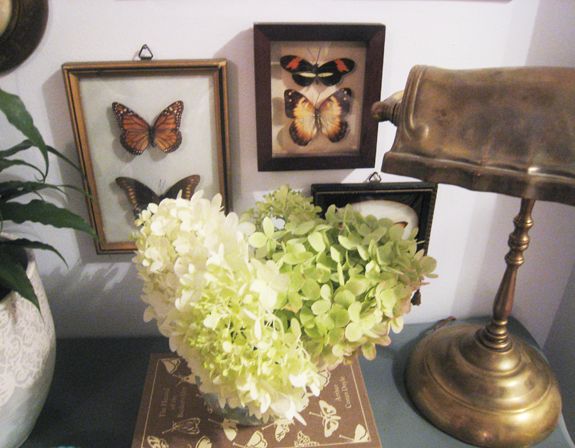
"I’ve had the hardest time decorating the top. Those darn light switches get in the way of everything. Thank you Jen for posting about framed butterflies. I got on ebay and found this set of small framed butterflies. The antique brass lamp is from my parents and the flower pot is from Home Goods.


Sources
Chalkboard: Frame found on CL, turned into chalkboard
Bench: CL
Bench cover: Fabric from Premier Prints
Pillow: Anthropologie
Basket: Home Goods
Vintage crystal light: ebay
Entry console: Home Goods, painted Benjamin Moore Wolf Gray
Knobs on entry console: Anthropologie
Books: Amazon
Framed butterflies: ebay
Flower pot: Home Goods
Blue milk glass dish: flea market
Antique brass lamp: gifted
Hydrangea’s: garden (all of the flowers in these posts have been from our garden)


On to the laundry room!!

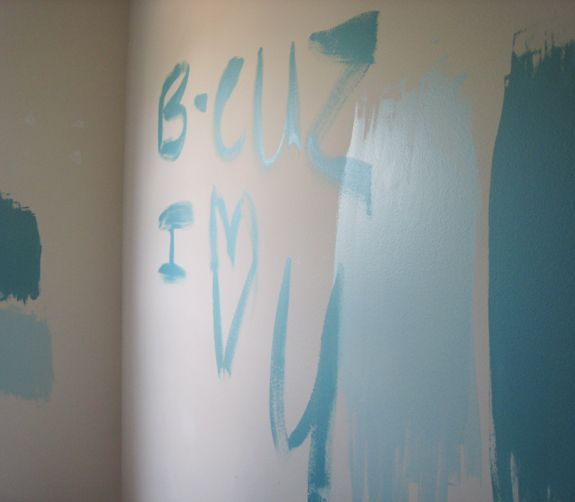
"Funny story about this room. It’s probably TMI, but the night before I was going to paint this room Todd and I had a little tiff (I have no idea what it was about). Anyway, when I woke up in the morning he had painted the ceiling, taped everything off, and cut in all the lines. Basically, all I had to do was roll it. And he left me a sweet note on the wall.


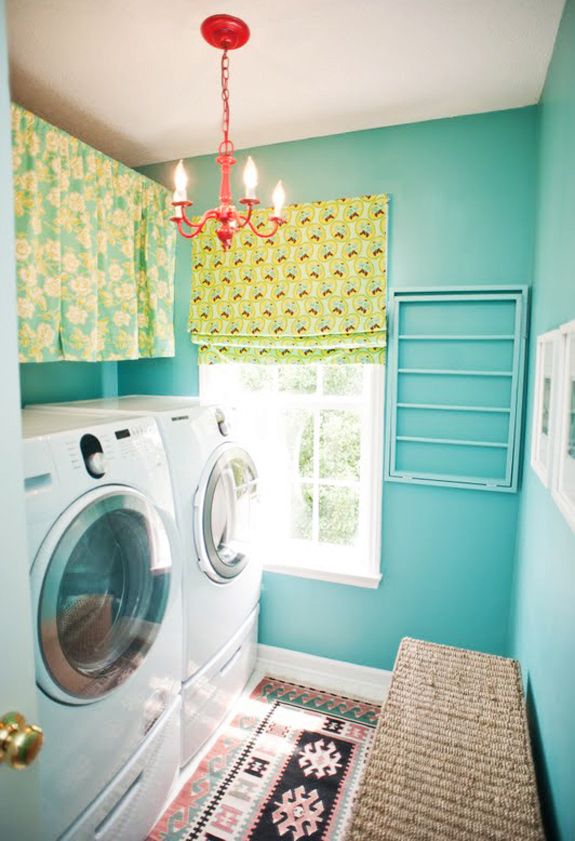
"When it came to planning the laundry room we decided to go bold. I always want to use these kinds of colors but I usually chicken out. The laundry room seemed like the best place to have fun. The fabric on the roman shade is by Anna Maria Horner. To hide all of the storage above the washer and dryer I made two lined curtain panels, this fabric is Heather Bailey.

"We needed a place to hang clothes that couldn’t go in the dryer and to dry wet rags and dish towels before throwing them into the laundry basket. I love the drying racks at Ballards but we didn’t want to spend that much money. So Todd built this simple drying rack for about $5 and we painted it a shade lighter than the walls, though you can’t really tell. We opted to get the stands for the washer and dryer for extra storage which meant there isn’t really a surface area for setting clothes down while you switch out the loads. The hamper from Target fills that role. I originally wanted something like this but it was too big. I use the hamper for rags, dish towels, and bath towels, basically things that I don’t wash until we are out. It’s nice to hide them away in a covered hamper and since we dry them on the drying rack before putting in the hamper they don’t get stinky.


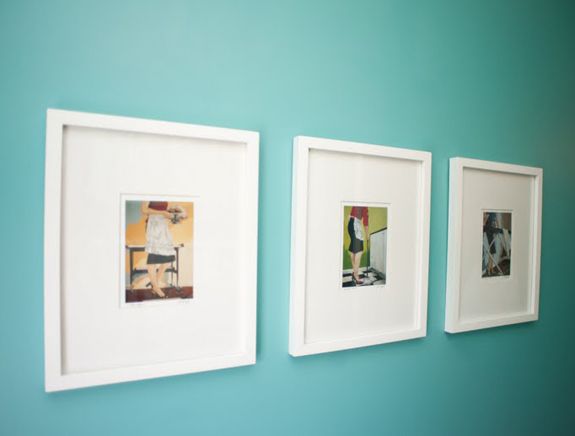
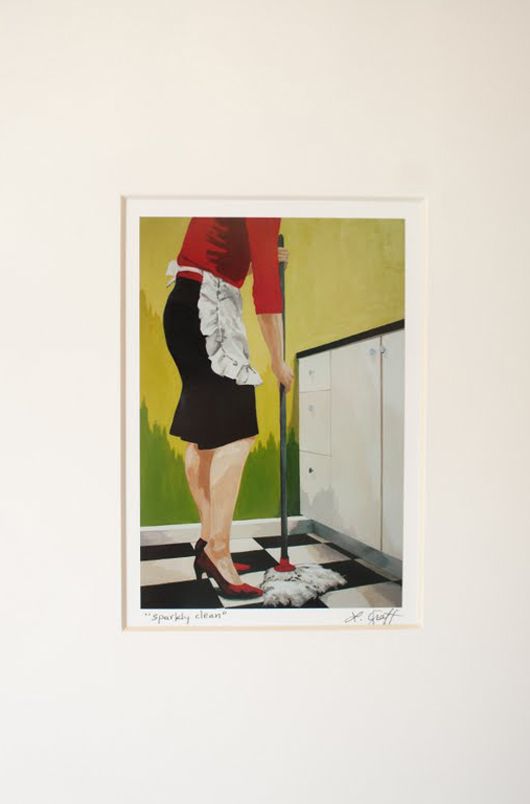
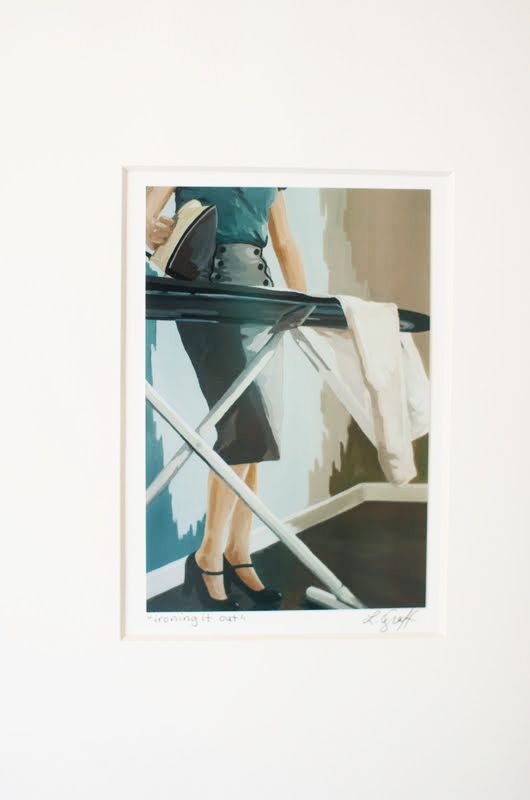
"My favorite part about this laundry room other than the color is the art. I first heard about Leslie Graff when Caitlin Creer blogged about her. I ordered a set of 5 post cards and framed my favorites in Target frames. I think she’s come out with a few more prints since we ordered these. These would be so fun in my future office/sewing room too.


"For the red light we bought a $10 brass light fixture from Habitat and spray painted it. The ironing board is mounted on the back of the door and a big linen closet is on the left just as you walk in. Someday I would love to tile this room.


Sources
Wall Color: Peacock Blue, Benjamin Moore
Hamper: Target
Art: Leslie Graff, frames from Target
Rug: Eatman’s Carpets, Raleigh, NC
Light fixture: Brass light from Habitat, spray painted red
Drying rack: homemade
Roman Shade fabric: Anna Maria Horner
Curtain fabric: Heather Bailey