FREE DOWNLOAD PICTURE
MORE INFO ABOUT NOTEBOOK
Showing posts with label Window Treatments. Show all posts

Tuesday, February 12, 2013

DIY: Roman Shades from Mini-Blinds (Revised!)

Thank you again for your votes with the Homies! It's the home stretch (voting ends tomorrow! yikes!), and the race is so, SO close! If you have a minute, I would love your vote HERE and/or HERE. Winning would mean a lot of great traffic for me for years to come. Thanks a million! xo


One of my most popular posts ever is a no-sew project where I made roman shades by glueing fabric onto mini blinds. I think it was one of the first tutorials I ever put up. So crazy to think about how long ago that was! I've done the no-sew project a bunch of times now and I've figured out a few tweaks that (if you're willing to pull out your sewing machine) make the shades look a little more professional and will help them last much longer than the all-glueing method.


You'll still use the mini-blinds mechanism for the base (which helps keep the cost of this project way down), but the vinyl slats get ditched. The result is a slightly more relaxed shade, which I often prefer over perfectly stacked flat folds of fabric that look a little too-uptight or something. Also, I usually suggest a linen for DIY-ing roman shades because the loose weave is super forgiving for those of us that struggle to cut an exactly straight line. :)


Okay, let's jump in!


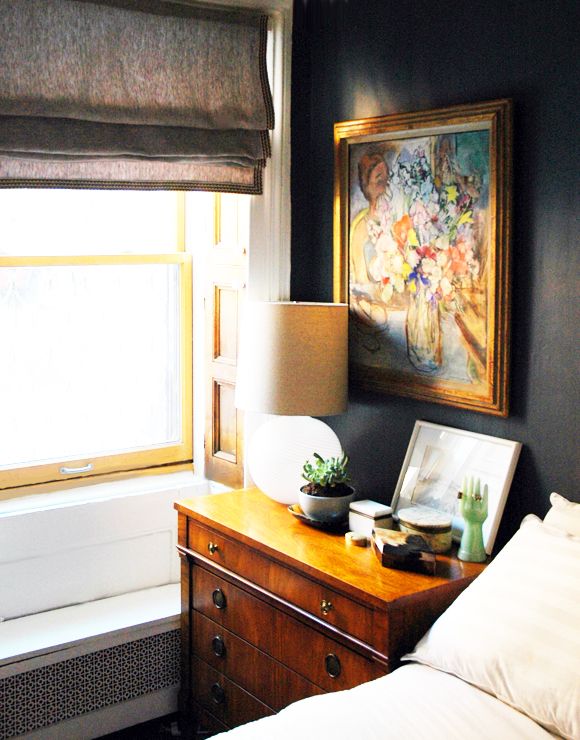
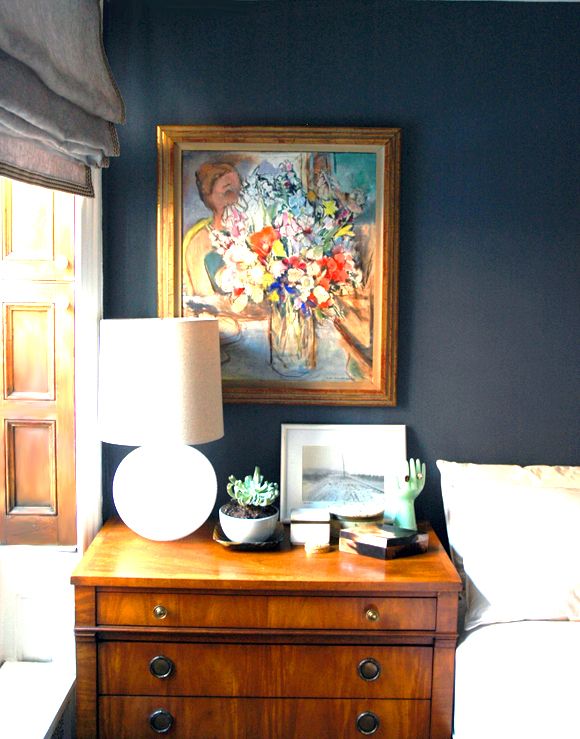
As you can tell from the photos, I ended up going dark on the walls in our master bedroom. The color is Benjamin Moore's Anchor Gray. I'm in love - it's really pretty and moody. I wanted to find some fabric for shades that complimented the wall color, but that was still in on the lighter side. I popped into Mood and they had this really pretty linen from a Marc Jacobs line that called to me from across the room. (one of my favorite things about Mood is they often tell you what fashion house made and used the fabric first - the printed silk section is OUT OF THIS WORLD)


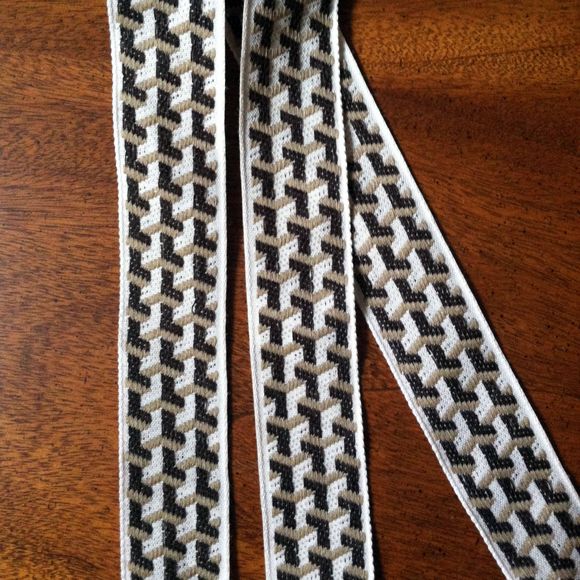
The linen had just the right amount of black and brown and blue to work right with the new wall color. 


Then Mood came to the rescue again. As I was waiting for the elevator after checking out, I was admiring the tumbling block pattern on the floors (remember here?) and I suddenly thought of a vintage trim I bought years ago and had been hoarding for the perfect project.


I checked and there was barely enough to trim out two roman shades (so it must have been fate), and I was ready to roll. :)


So, I know tutorials (especially ones involving sewing) can be a little confusing, but trust me that picking out the fabric is the hardest part of this easy project. :) If you're tackling this make sure you read through all the steps first so you have a general picture of how everything works together. The individual steps will be a cinch once you get the full picture.

1) Buy a cheapie vinyl mini-blind to fit your window (you can choose to mount it inside or outside of the sash). Cut your fabric to be three inches wider and four inches longer than the dimensions you want the finished shade to be. 

2) Press your seams with a hot iron. For the seams along the sides of the shade, I folded a little more than half an inch, twice:


And then along the top and bottom of the shade, I folded about an inch of fabric, twice, so that the raw edge is hidden:


3) If you don't want to line your shade, go ahead and skip this step. I chose a lighter liner (just some mid-weight white cotton, really) that wouldn't really block the light, but just sort of give it a nice filter. It also helps the shade look better from the outside of the house. You can do a black-out liner here if you want. Be sure to use a heavy-duty gauge sewing needle on your machine, though, if you do.

You can cut the liner out to be pretty close to the dimensions of your finished shade. You just tuck the liner under the seams of your shade fabric so no raw edges show. Pin everything in place.


4) Sew along the perimeter of the shade - just one big rectangle. And that's it for the machine sewing!


5) Pull out your mini blinds (remember to keep the mounting hardware!) and completely cut off the heavy slat at the bottom. Snip all the strings.


Then snip off all the ladder-shaped strings, being careful not to cut the cord. Pull off all the slats and the ladder strings so that you're left with only the top mechanism and the thicker cording.


6) Lay your shade fabric face down with your mini blinds mechanism and cords laying on top in place. Using the cords as your guide, mark out where you want your fold lines to be (I just drew little X's with a pencil). 

I think a 10" gap makes for a nice fold size. Here's an important part though: I wanted there to be a bit of a drop on the bottom of my shade so that the trim wouldn't be hidden by the folds. So I made a mark at 8" above the bottom of my fabric. (this will make more sense in a second)


7) Sew one of these little drapery rings at each of your markings, or basically where the cord meets the fold lines.


I used invisible thread and stitched all the way through to the front of the shade. My shade is pretty wide, so there are three cords in the mini-blinds mechanism, so I ended up sewing 18 plastic rings on by hand. This is by far the most tedious part of the project, but it should only take about an hour. If your shade is shorter, you'll probably only have two cords and much less ring-sewing to do.


8) I used a small slat of flat, 1" wide wood and three very small eyelet screws to make the bottom part of the shade.


9) Glue the bottom slat 8" above the true bottom of the shade, so that the folds would not cover the trim. Be generous with the fabric glue, but make sure there's no seepage happening through the front of the fabric.

(also, you can sort of see the line of three plastic rings sewn in place here, 10" above the bottom wooden slat)


Also glue the top mechanism to the top of the shade. You'll want to leave a little bit of fabric on the top and sides (I should have left more room on the sides). Also, make sure your cord is coming out of the back of the mechanism and isn't glued down to the fabric.


10) Thread your cords through all the tacked down plastic rings and then tie the cord to the eyelet screws in your bottom slat.


Then just hang your shades like you would a mini-blind, using the mounting hardware that came with the blinds, and you're DONE! Unless you want to add trim like I did, but that's just a matter of a quick line of fabric glue. I usually do shade trim in a U-shape so the top of the shade has no trim.
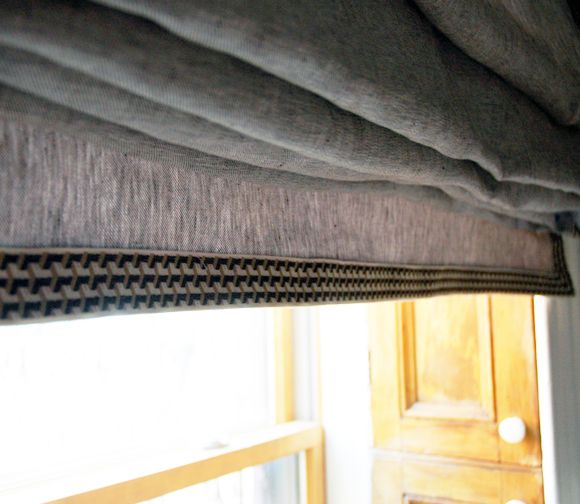

The biggest benefit of this approach over the no-sew version is there are no ugly mini-blind slats peeking through the fabric. And the finished product is probably more durable.
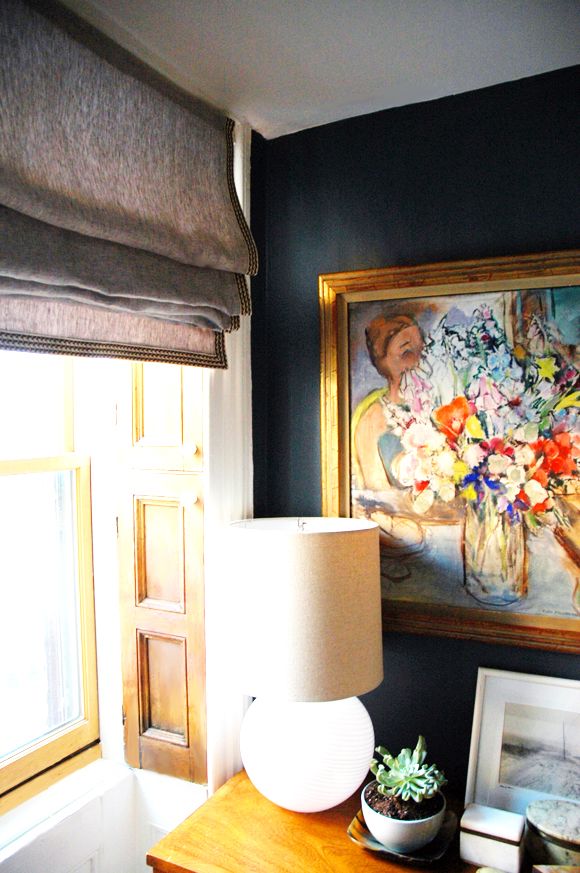

I love how soft and relaxed the linen looks and I think it works for my space, but if you're looking for perfectly straight folds with no slouching at all, you'll have to sew in wooden dowels along every fold. I've done it once before and it was about three times the amount of work and ten times the cost of these relaxed shades, but they are really lovely.
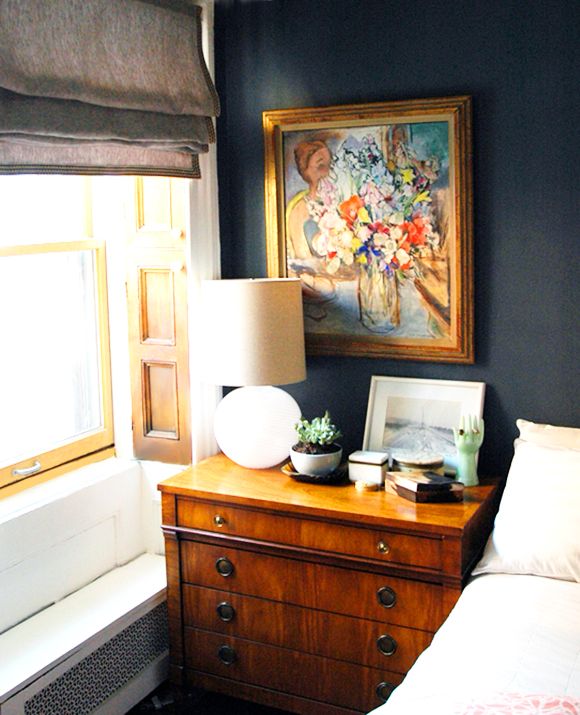

It is SO nice to have window treatments up so we don't have to keep the shutters closed all the time! And seriously, isn't this trim just perfect? So worth the wait to use it here!
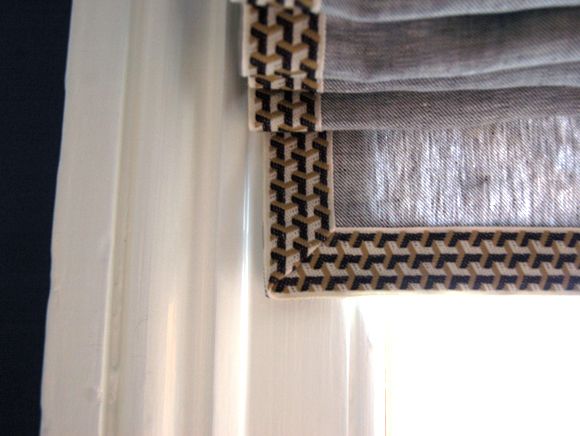

PS Don't forget to vote! Thanks again!! :)
Monday, January 14, 2013

Cheater Shades and Red Frames

We need roman shades for a few rooms in our house. I'm thinking about tackling the real-deal sewing project for the shades I want to put in our living room. But the others will hang in bedrooms, and I think I'd like to do something a little faster there. I still use and love my shades from mini-blinds project, but when I need something really sturdy, that can be used and abused, and I'm in a time pinch, I just glue fabric to store-bought fabric or bamboo shades.


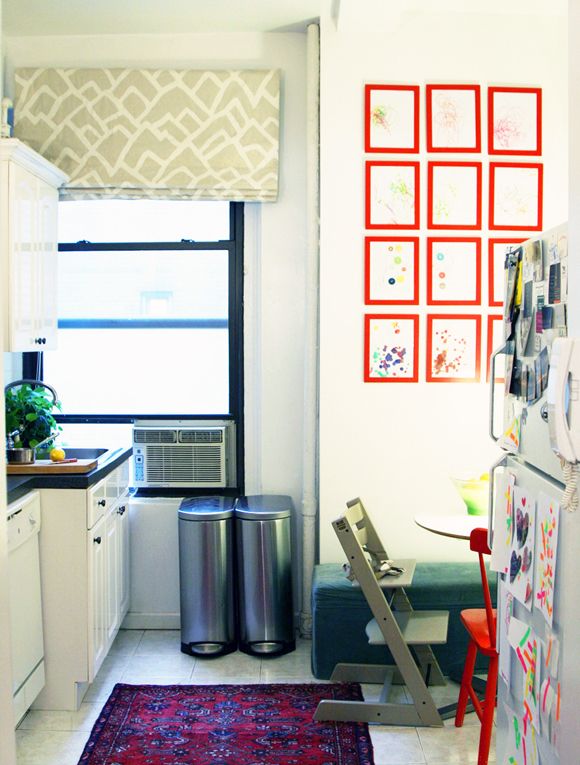
I glued this heavy linen (Schumacher's Zimba) to bamboo shades from Home Depot for Abbey's kitchen redo. I used spray glue to adhere the front and Fabritac to glue the wrapped around edges. I also glued a piece of black-out liner on the back for a cleaner look from the outside. If you're going to use bamboo shades as the base, make sure your fabric is thick or else you will see the texture of the bamboo peek through a little bit. Using a fabric shade as a base is an easy project too (as seen here).


PS How cute are the framed pictures in Abbey's kitchen? She picked up a ton of the $1 frames at IKEA and framed her toddler son's art. Such a big visual impact for not a lot of money. Reminds me of this Steven Gambrel room.

Bottom photo by Seth Smoot, styling by Kendra Smoot for this Cup of Jo house tour.

Monday, January 30, 2012

Custom Black Out Roman Shades

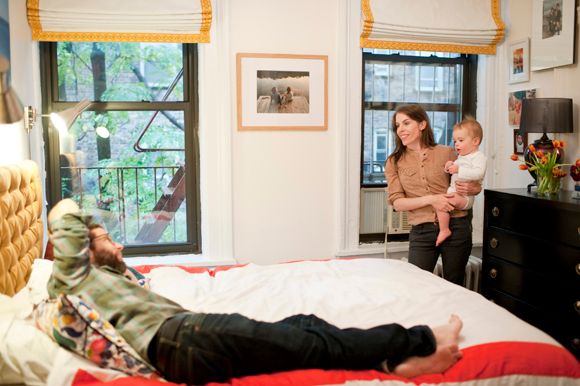
Every decorator has a favorite thing to see installed. I think mine is a toss up between new pillows (they really can transform a room!) and new window treatments. I was so happy with the way Joanna's roman shades just transformed her bedroom!


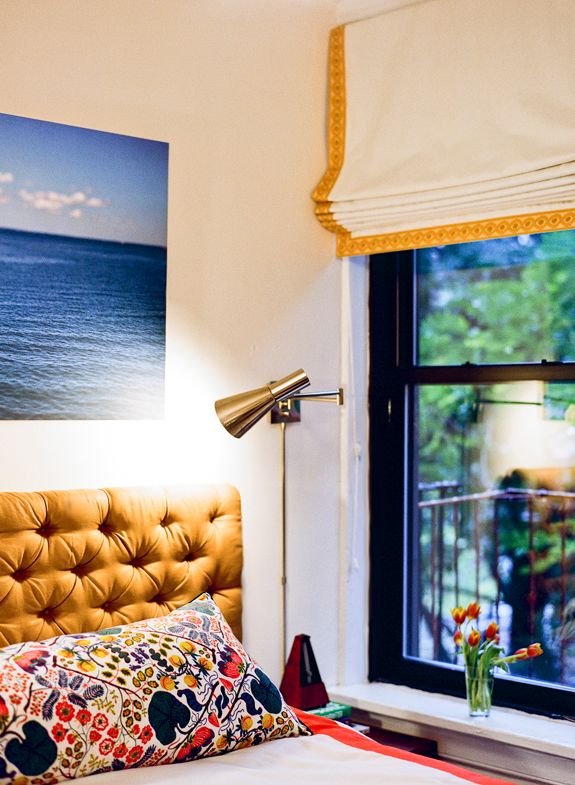
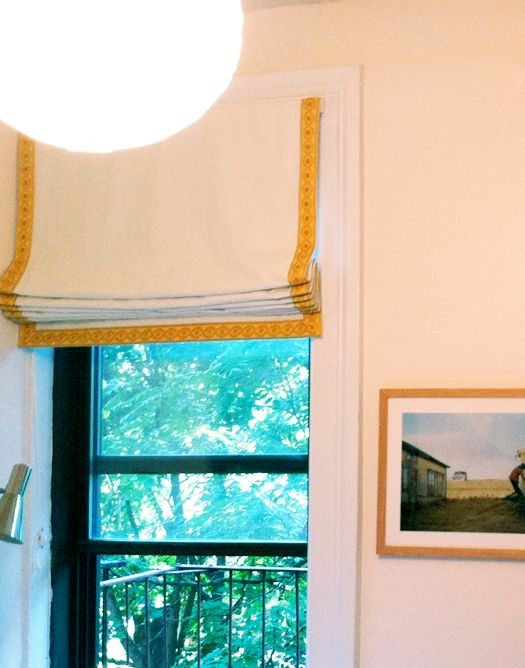
The white linen fabric with the cheery yellow trim has such a brightening effect on the room! The shades are also super functional. You know I am a big fan of making shades out of mini blinds and also glueing fabric on top of matchstick blinds. Both are great methods, but for this project I knew we needed something a little more permanent and hard-wearing, so I had my seamstress make the blinds. We had them blackout lined, which, beyond looking great and giving the linen a nice weight/drape, it's so nice for blocking out the city lights at night or the morning sun which always comes too early for us parents!


Custom shades are not inexpensive (that's why the DIY method can be great to keep around for some projects), but if you are using the shades every single day, I think the extra cost is justified. Joanna lives in a prewar apartment and her windows are extra, extra long so the cost was a little more than standard windows.


I had these exact shades priced out at the Shade Store for comparison to my work room, and they quoted me $650 per shade. Yikes! My seamstress did BOTH shades for several hundred less than that. So again, ask around. If you look on craigslist for a great seamstress, you can get custom work for a lot less than you might expect.


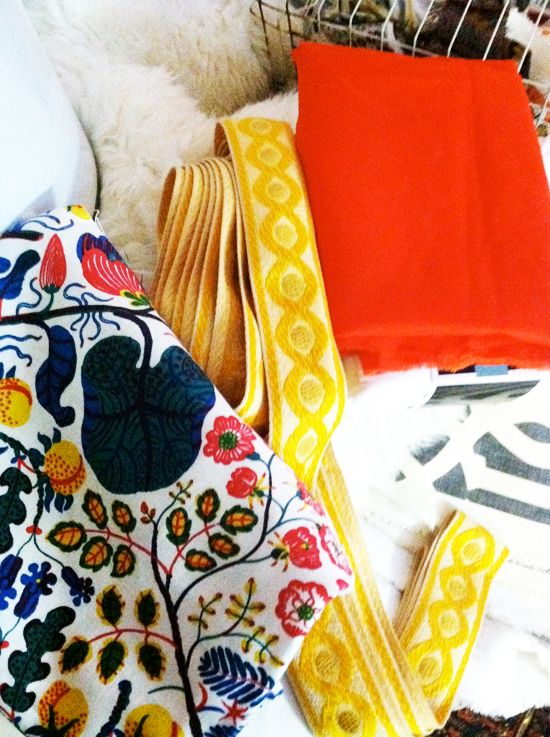
PS The mustard yellow vintage trim completely makes these shades for me. We bought the trim at JEM in Tribeca for just a few dollars a yard. They still have some left if you'd like to stop by and snag some for yourself!

Monday, October 3, 2011

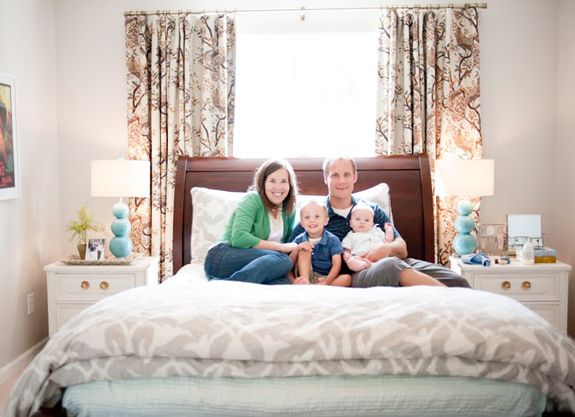
House Tour: Emily and Todd's Bedroom

The goal of my blog is to help readers feel like they can be their own decorator. This is probably a subject for another post, but I truly believe not everyone needs to hire a professional decorator to have a beautiful home they are proud of. This blog is great advertising for my interiors business, but I mostly do it because I'm an over-sharer. I like to talk about the ideas I've got brewing, what's worked for me (and what hasn't), and hopefully share some ideas that educate and instill confidence about tackling the decoration of your home. Emily, who is in the PR field and is a busy mother of two boys, is the perfect success story!


Emily lived in the dorm across the hall from me our freshman year of college. A few years later, she ended up marrying one of the really great guys in our group of friends, Todd. We only get together every couple years, but we definitely have one of those friendships that picks up right where we left it. I love hanging out with Emily!

She and Todd moved to North Carolina recently and it's been fun to hear about their projects in their new home. I pop in over the phone or email with ideas every now and then, but mostly this beautiful house, which I'm super excited to share with you this week, is a result of Emily's blog and magazine reading and her and Todd's hard work.

First up is the master bedroom! Come back in a couple hours today for Emily's home office. This is going to be such a fun week!

(and a huge thanks to NC-based photographer Jessica of JJ Horton Photography for the beautiful images!)

From Emily:

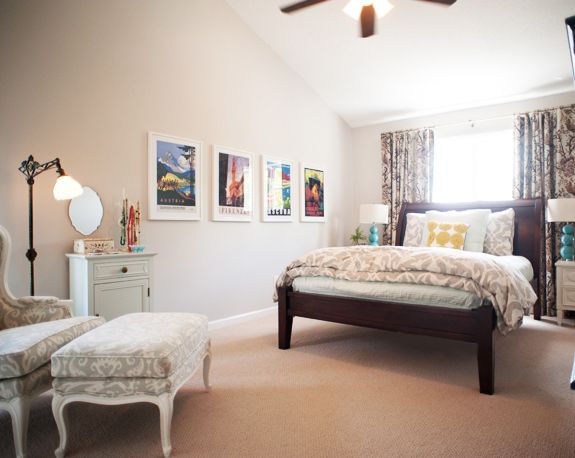
"The master bedroom was the hardest room in the house to decorate. We wanted a retreat that didn't have to bend to the rules of decorating with little kids like the rest of our house. I also had no idea what color scheme to go with.

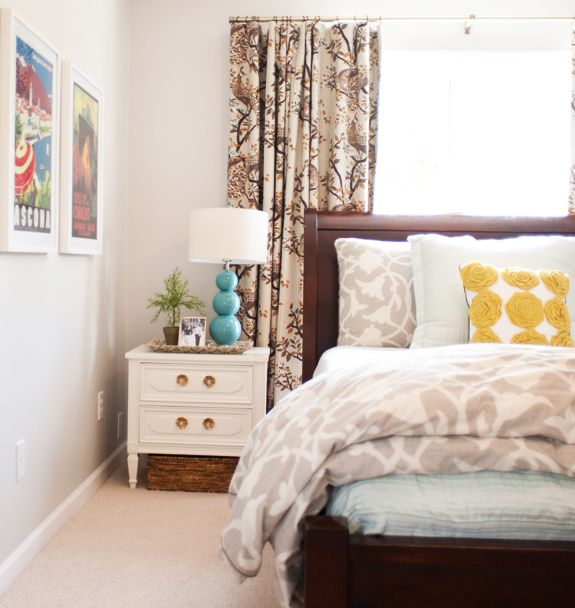
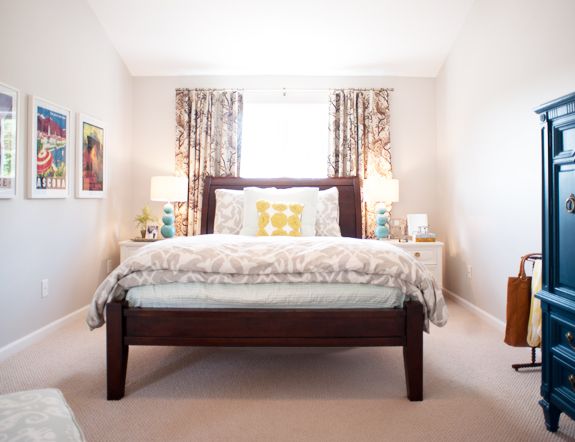
"Lucky for us, Jenny posted about this Barbara Barry bedding right after we moved in and that gave us a starting point. From there, we chose a pretty mint coverlet and sham from Restoration Hardware similar to what they show with the BB bedding collection. We bought it when RH was getting rid of all the old stuff to make way for the company's recent facelift so it was a huge discount (I think around $75 for both the sham and quilt), especially since the quilt they sell with the original bedding is $300.

"I liked the pop of color that the yellow flower pillow gives. This pillow is everywhere so if you're reading this and own this pillow, I highly recommend putting a new pillow form inside.
The one that comes with the pillow is way too small and doesn't have any oomph. Another trick I learned from a professional seamstress to make shams look like the professional pictures was to wrap the inserts with batting and then put additional pillow stuffing between the insert and the batting (the batting just keeps it looking smooth). I also sewed twill strips to the back of my shams and tied them together to keep the shams tight around the insert.


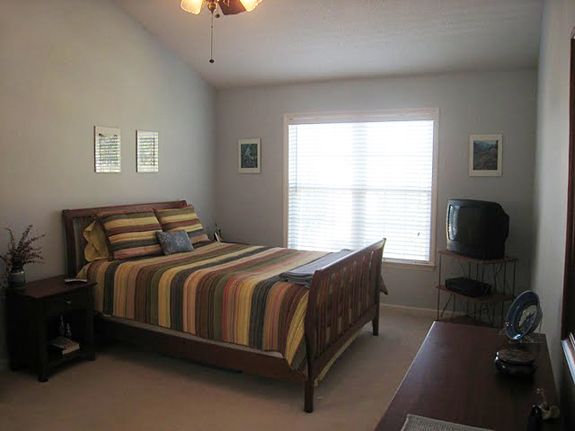
"The layout of our room is awkward with a vaulted ceiling and slanted walls. When the bed was against the wall like the owner did before us it threw everything off and made it impossible for any other furniture to look right. Nothing seemed to work.

(before, from the previous owners)


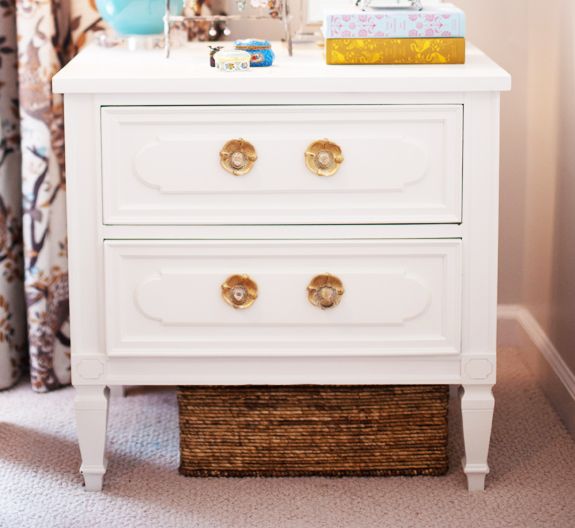
"When Jenny posted about what to do when you need to put a bed in front of a window, I knew that was the solution. Next, we needed nightstands. I really would have preferred to do a small desk on one side and a nightstand on the other but there isn't enough room. In order to keep us organized and clutter free I wanted nightstands with a lot of storage (we even added baskets underneath because we filled up the drawers!). After checking Craigslist religiously, finally on Christmas Eve a pair of vintage Baker nightstands came up for $140. If you've ever searched for a pair of matching nightstands you know how hard it is to find, especially on their own without an eight-piece bedroom set to go with them. We painted the nightstands Benjamin Moore White Dove and replaced the hardware (not original) with these wonderful knobs I found on ebay for $8 with shipping. They're unique and little on the tacky side but I love them.


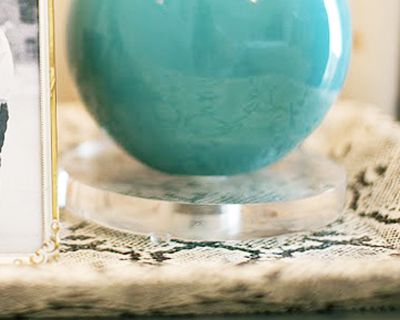
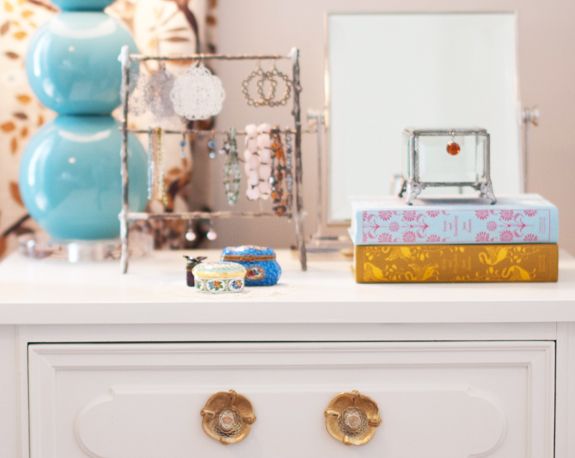
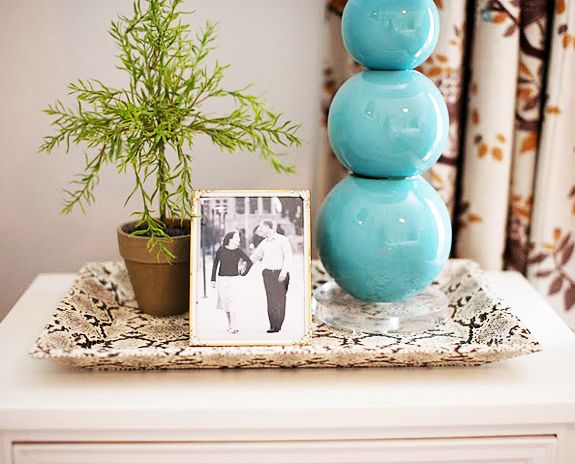
"To accessorize the nightstands (and the rest of our house) I went to Home Goods almost every Friday night after the kids were in bed. It became a ritual and if my husband could he will make sure that our next house it at least 60 miles from a Home Goods. The lamps are from Home Goods. The only problem was they came with a silver base which I thought clashed too much with the hardware on the nightstands. We ordered acrylic bases from here. However, if you ever try this just beware it is a lot harder than it looks. You basically have to unglue the balls and
then get them to fit back perfectly and glue them together again. Luckily I was about 8.5 months pregnant when my husband tackled this project so he couldn't get frustrated at me.


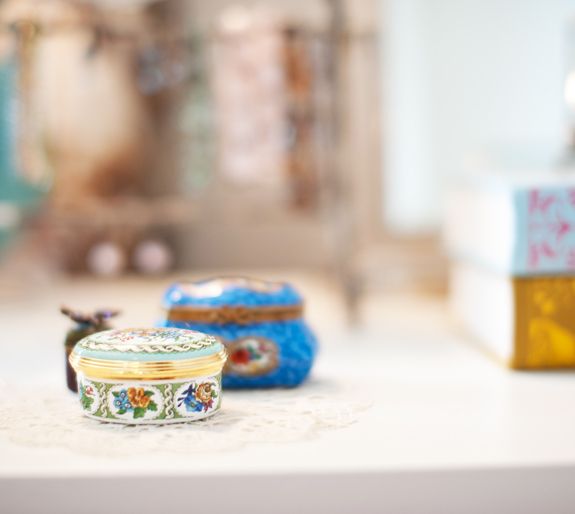
"I struggled with decorating these nightstands and I'm still not sure I love the arrangement. I really like having personal things out but I also like to keep it simple. My nightstand (the one on the right) has a mirror, a couple of favorite Jane Austin books, and a small set of French Limoges boxes that are part of a bigger collection (my mom started a collection for my sister and I almost 20 years ago when they took us to France) hidden away where my three-year old can't find them.


Parker loves these boxes. Every morning when he comes to wake me up he opens and closes these boxes. I'm always surprised what he can fit in them. For a while a fireman lego was in the glass box (he was hiding from the fire?).


"On my husbands' side is a python tray from the wonderful Furbish, a plant, and a picture of us when we were engaged.


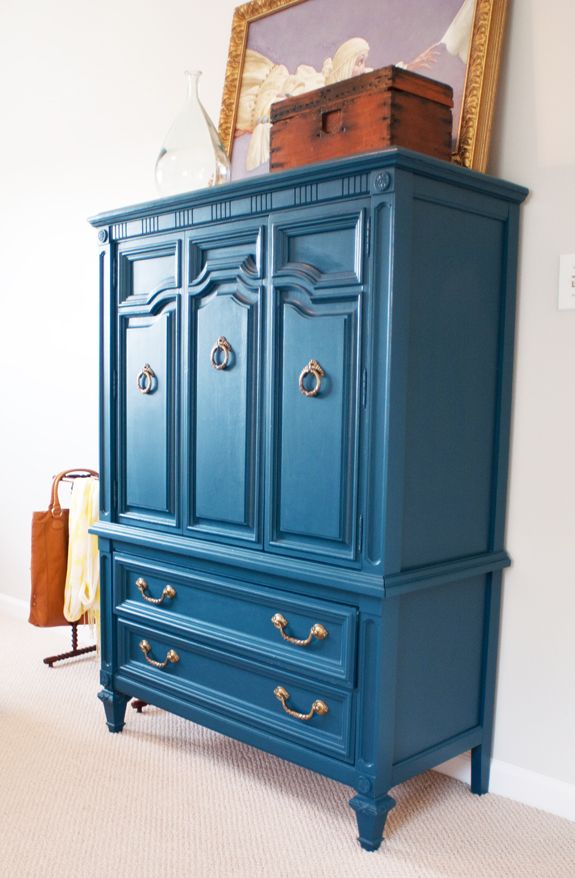
"Furbish opened around the time we were moving in and when I saw the picture of the blue armoire with all the pillows I knew I had to have it. I had always wanted an armoire and this one is perfect. On top is a canvas by James C. Christensen (my favorite artist) called Touching the Hem of God. In front, is a glass jar from Home Goods and a restored antique tool box from the flea market.


"Next to the armoire is an antique quilt rack I got for $8 from the flea market that I use to put my clothes on at the end of the day because who puts their clothes away every day?? I like to let them build up and when it's about to finally fall over I put them away.


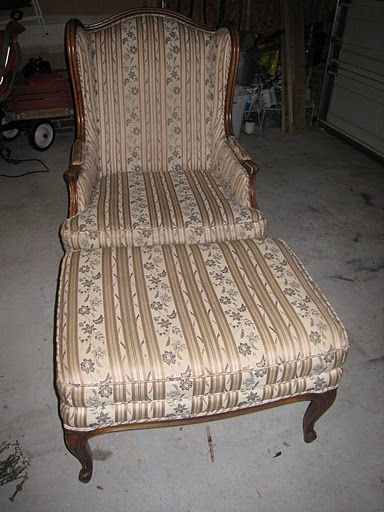
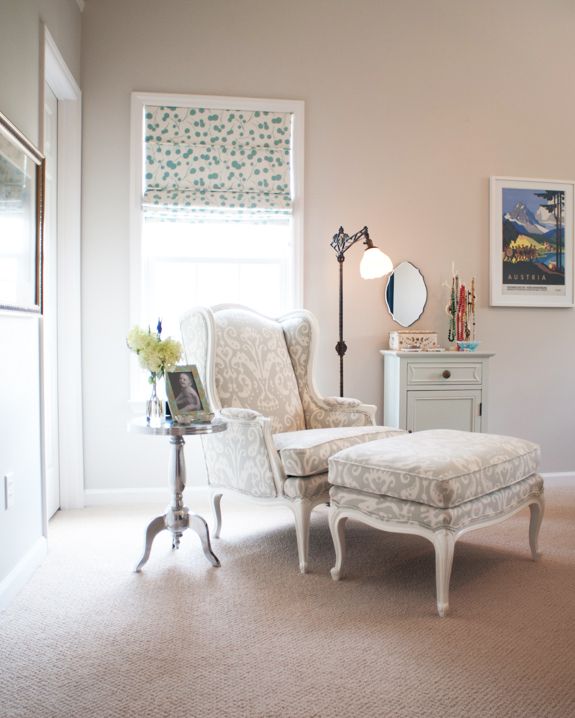
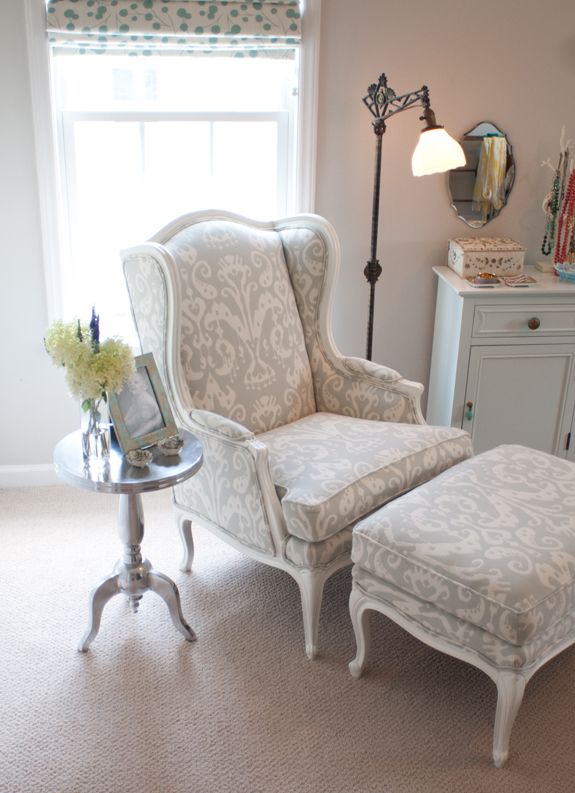
"The chair is a garage sale find that we painted the same color as the nightstands. The fabric is made by Lee Jofa (you can buy it at Ethan Allen for around $60/yard) but lucky for me I found it at a local fabric warehouse for $12/yard. I bought the fabric before I had a project in mind knowing it would work somewhere. So when I found the chair and ottoman it was the perfect fit. I had big plans to reupholster it all myself but after researching I realized this was one specialty I was not really up for.

(chair before)


So off they went to Agello's Interiors in Raleigh, NC. They were wonderful to work with. Nito's work is beautiful and the turnaround time is only two weeks! They do upholstery for Hunt & Gather and Antiques at Five Points.


The lamp is a flea market find for $10 that my husband rewired for about $2. A while back my husband had told me to find a storage piece that we could put against the wall between the doors to our bathroom and closet. The plan was to mount a small T.V. where the painting is and the piece would hold the cable box and other equipment.
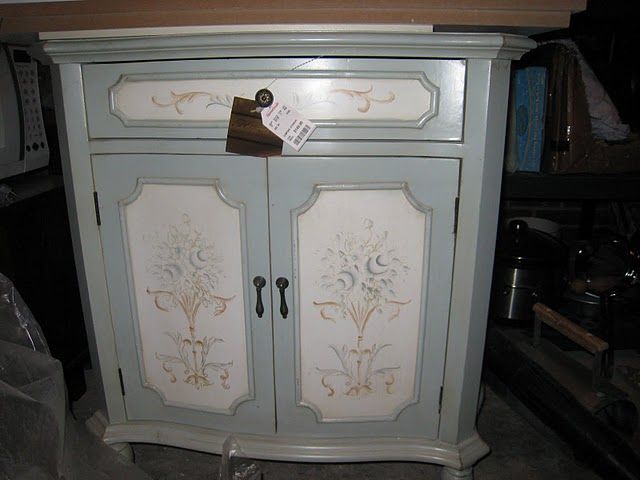
I found this little piece at Home Goods for about $60 but it was an awful color with painted flowers all over it.

(before)


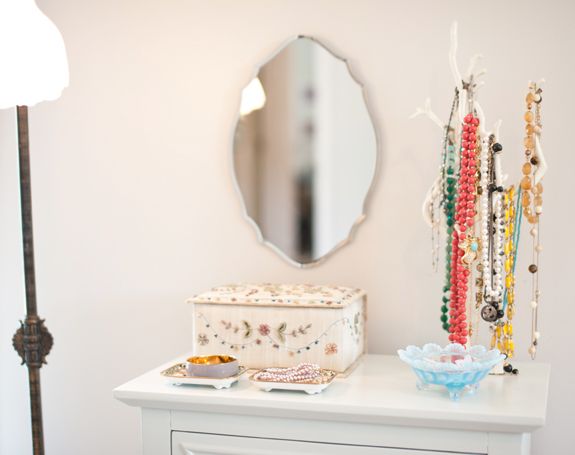
I painted it a pale mint to go with the bedding and replaced the hardware. But when we got the chair back this piece didn't look right on that wall anymore and it made it really hard to get to the closet. So it got moved to the other side of the chair and I decided to create a small vanity-style area for all my jewelry.


The little pedestal table from Z Gallerie used to be downstairs in the living room but got replaced with something else (you'll see in the living room
post) but it's so cute that I just had to make it work somewhere. We'll see though. I may need to retire it for a while. My eight month old is about to start crawling and he already tipped it over once.


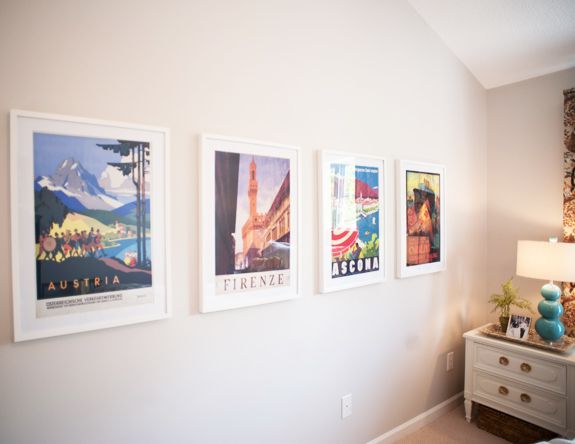
"The vintage travel posters are from ebay from this seller. I got them for $4 each (looks like his prices have gone up a little) and the frames are ikea.


At the local flea market is a discount framers that took the existing mattes and re-cut them for free! In researching this I found out that a lot of framers have the ability to open up mattes, it's a lot cheaper than buying a new custom matte, usually around $4-5 depending on the size. These are some of the
places we want to visit someday. We originally got the idea of this series from Jenny but her post was about putting them in the entryway. I would have loved to put them in our entry but our room needed some big art to fill the high walls and this was the best, cheapest, and most colorful way to do that.


"Finally, the windows. We decided to go with this fabric from Dwell for the panels and this one for the roman shade. The fabrics speak for themselves so I really don't have anything to say about them. When I told my husband we would be doing blackout lined panels and a roman shade I wasn't sure of the reaction I would get. His response was "you mean, it will be like a hotel in here all day?" He was on board. So I got to work on sewing the panels and learning how to make roman shades. By the way, this book is an awesome resource if you're interested in learning how to sew home décor. I have a good friend who is a seamstress and has been so kind to help me with questions. This book is my back up for when I don't want to bother her."


Sources
Bed: Pottery Barn, Valencia (husband bought it for me at a PB outlet for our first Christmas married)
Nightstands: Craigslist, vintage Baker
Knobs on nightstands: ebay, vintage
Armoire: Furbish
Jewellery cabinet: Home Goods
Hardware on cabinet: Anthropologie
Mirror above cabinet: Target
Bedding: Barbara Barry poetical
Coverlet and Sham: Restoration Hardware
Yellow flower pillow: Target
Pedestal table: Z Gallerie
Lamps: Home Goods
Mirror on nightstand: Gifted
Limoges and glass box: from childhood
Python tray: Furbish

Basket under nightstands: Home Goods
Jewelry tree: Urban Outfitters
Beaded Jewelry Box: Anthropologie, about 10 years old
Miscellaneous vintage trays and dishes: flea market
Glass jar on top of armoire: Home Goods
Wooden Tool Box: Flea Market
Wooden quilt rack: Flea Market
Touching the Hem of God painting by James C. Christensen, can be found at art galleries
The Lost Sheep by Minerva Teichert painting, can be found at art galleries.

Wednesday, February 23, 2011

Rolled Fabric Shades

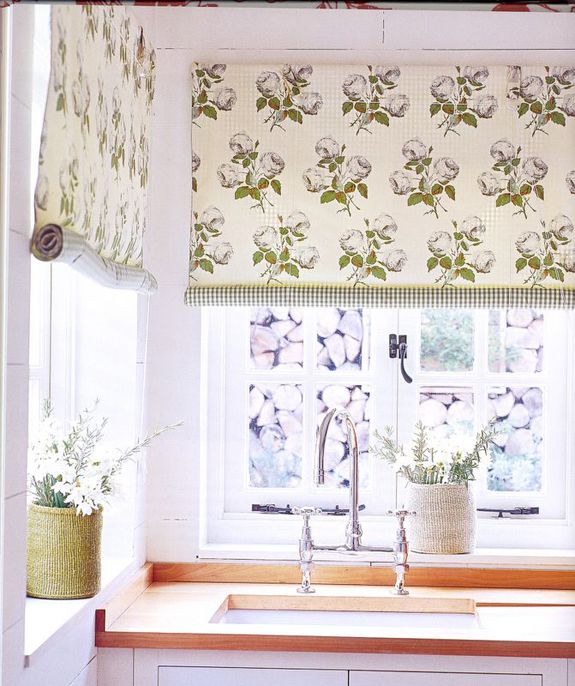
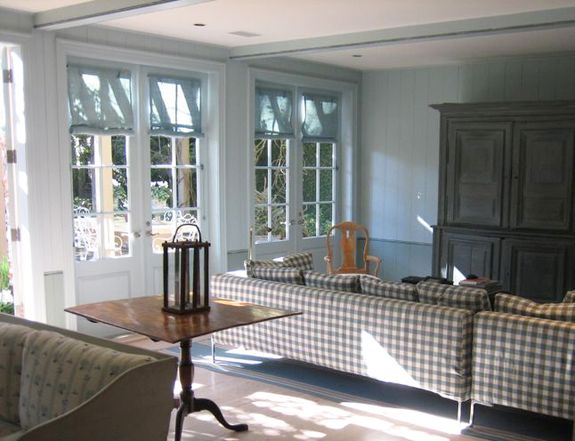
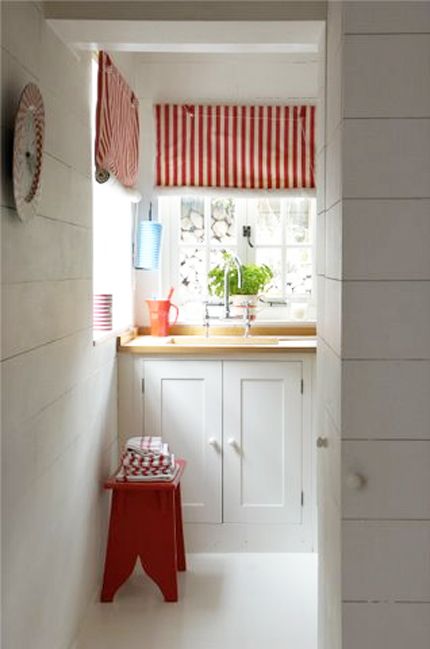
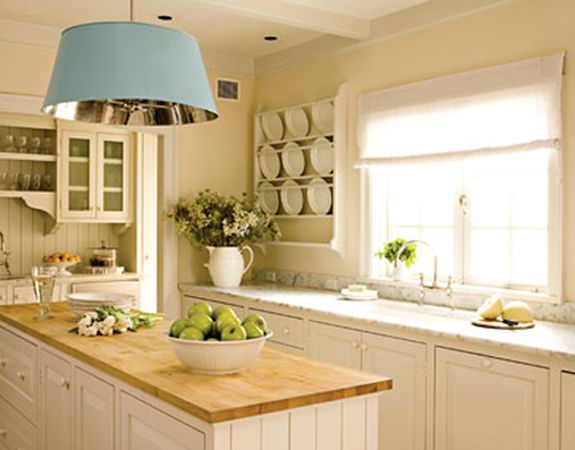
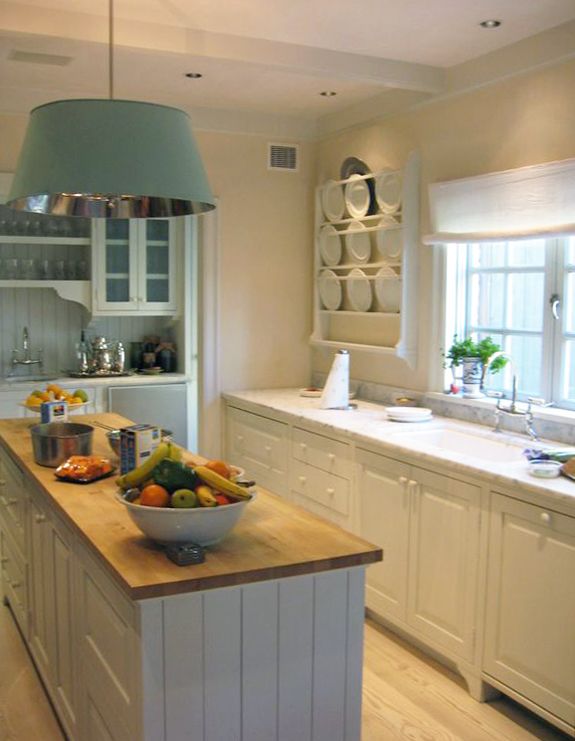
I stumbled across some of Katrin Cargill's work and I noticed that she uses these rolled shades a lot.


As an aside, I love seeing photos of a space we all know from a magazine, but unstyled and less perfect. This first image is from House Beautiful, the second is from Katrin's website.


This image is less pretty, but you can see a lot more details of the room when the photo isn't so blown out and bright. I would kill for that blue pendant.


Anyway, this rolled look is so fresh to me! I love it and am wondering how practical they actually are. Any readers with personal experience with these?

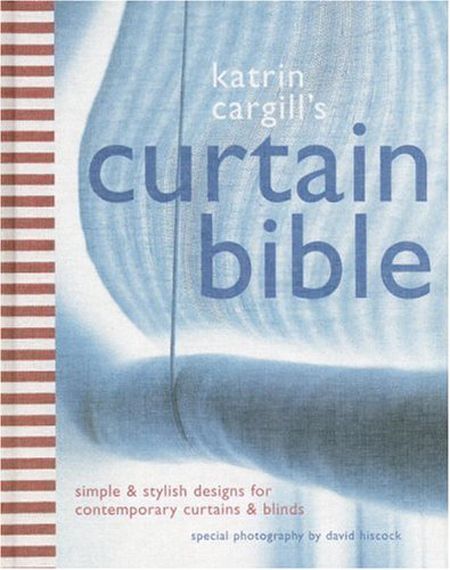
I ordered her book, Katrin Cargill's Curtain Bible, for about $7 on Amazon and I'm excited to see her suggestions for recreating the look. I'll be sure to report back.